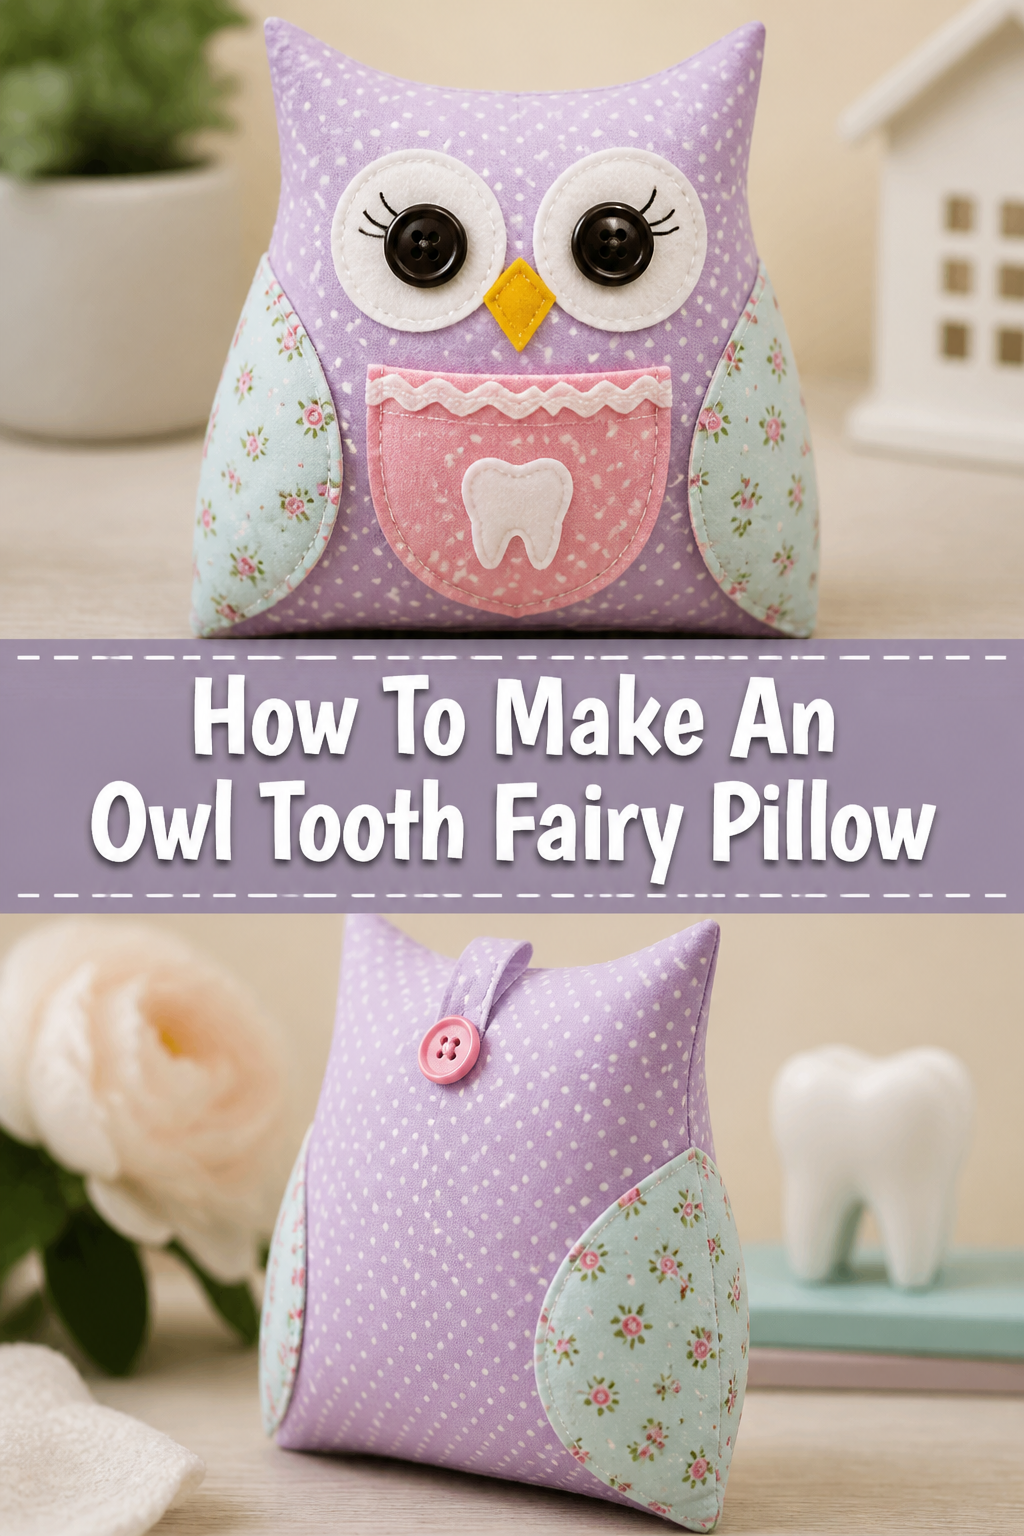
🦉 How To Make An Owl Tooth Fairy Pillow
Making a special tooth fairy pillow for your child is a heartwarming project.
I remember crafting one for my own little one; it became a cherished part of losing those first teeth.
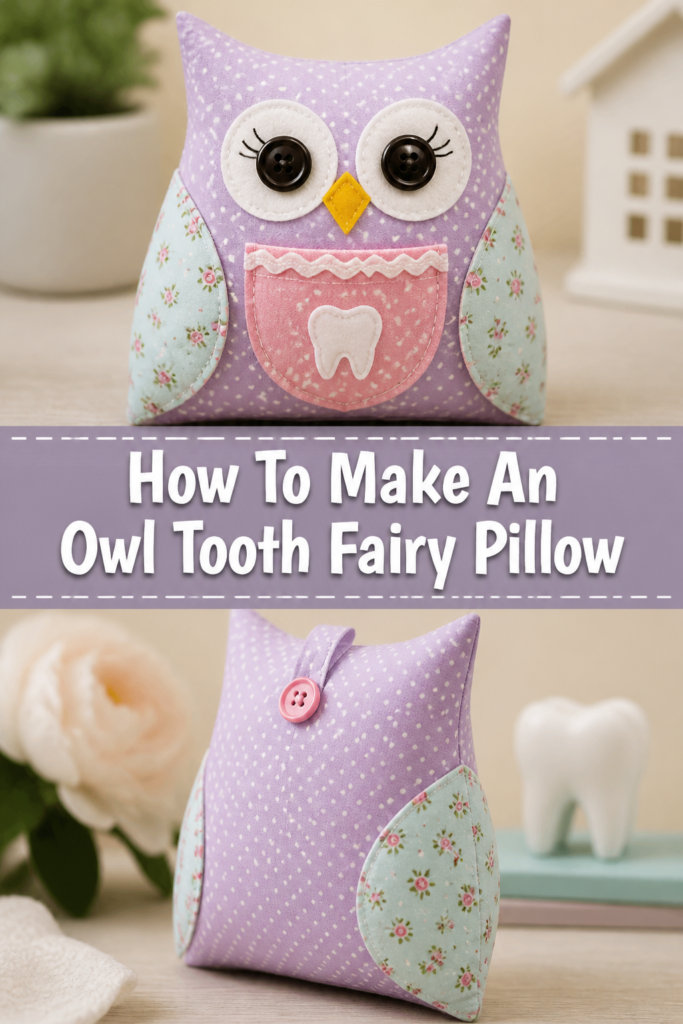
This guide will walk you through creating an adorable owl-themed pillow, ensuring a magical experience for your child.
Quick Overview
You’re about to embark on a delightful sewing adventure to create a charming owl tooth fairy pillow. This project results in a soft, pocketed pillow perfect for tiny teeth and fairy treasures.
- Time needed: 2-4 hours (depending on sewing experience)
- Difficulty: Beginner to Intermediate
- What you’ll need: Fabric scraps, felt, basic sewing supplies, fiberfill, and a button.
Step-by-Step Instructions
Step 1: Gather Your Materials and Plan Your Design
Before you begin sewing, collect all your fabric and notions. Lay everything out to ensure you have enough of each color and type.
Think about your owl’s colors and patterns. You’ll need main body fabric, wing fabric, belly fabric, and felt for facial features.
Cut out your pattern pieces. You can find free owl pillow patterns online or draw your own simple shapes for the body (two large ovals), wings (two smaller ovals), a belly patch, and small circles for eyes.
Pro Tip: Pre-wash and iron all your fabrics before cutting. This prevents shrinkage later and makes cutting more accurate.
Step 2: Prepare the Owl’s Body Pieces
Take your two main body fabric pieces. These will form the front and back of your owl pillow.
Place one body piece right side up. This will be the front of your pillow.
You will attach all the decorative elements to this front piece.
Step 3: Assemble the Face and Belly
Cut felt circles for the eyes. You’ll need two larger circles for the whites of the eyes and two smaller circles in a contrasting color for the pupils.
Position the larger felt circles onto the upper part of your front body piece. Pin them securely in place.
Layer the smaller pupil circles on top of the larger white circles. Pin these too.
Cut a small triangular beak from orange or yellow felt. Place it just below the eyes.
Cut a contrasting fabric or felt belly patch. This can be an oval or a heart shape. Pin it onto the lower-middle section of the front body piece.
Step 4: Create and Attach the Pocket
The tooth fairy pocket is a crucial element. It needs to be easily accessible yet secure.
Cut a small rectangular piece of fabric for the pocket. This should be about 3-4 inches wide and 2-3 inches tall.
Hem the top edge of the pocket piece. Fold the top edge down by about 1/4 inch, press, then fold again and stitch to create a clean finish.
Position the pocket onto the belly patch, or directly onto the main body piece if you skipped the belly. Make sure it’s centered and accessible for little hands.
Stitch the pocket in place along the bottom and two side edges, leaving the top hemmed edge open. Use a straight stitch close to the edge.
Pro Tip: Consider adding a small snap or a tiny loop and button closure to the pocket for extra security, ensuring no lost teeth or coins.
Step 5: Stitch the Decorative Elements
Now it’s time to permanently attach all those cute features.
Stitch around the edges of the felt eyes, pupils, and beak. You can use a straight stitch or a decorative zigzag stitch. Black thread works well for outlining.
Sew the belly patch onto the front body piece. Again, a straight or zigzag stitch around the edges will secure it.
Cut two wing shapes from your chosen fabric. Place them right sides together, stitch around the curved edge, leaving the straight edge open.
Trim the seam allowance and turn the wings right side out. Press them flat.
Step 6: Attach Wings and Assemble the Pillow
Once your decorative front is complete, it’s time to bring the owl to life.
Pin the finished wings onto the sides of your front owl body piece, with the raw edges aligned with the raw edges of the body. Make sure they point inwards slightly.
Place the second main body piece (the back) on top of the front piece, right sides together. The wings will be sandwiched in between the layers.
Pin all around the outer edge of the owl. Leave a 3-4 inch opening along the bottom for turning and stuffing.
Step 7: Sew and Finish the Pillow
You’re almost there! This is the final sewing step.
Stitch around the entire perimeter of the owl using a 1/2 inch seam allowance. Remember to backstitch at the beginning and end of your stitching, especially at the opening.
Trim the seam allowance around the curves to prevent bulk when turning. Clip notches into the curves if necessary.
Turn the owl right side out through the opening. Use a blunt object like a chopstick to gently push out all the curves and edges.
Press the entire owl pillow with an iron to smooth out the seams.
Step 8: Stuff and Close the Pillow
The pillow is ready for its filling.
Begin stuffing your owl with fiberfill. Start with the ears and corners, then gradually fill the rest of the body. Ensure it’s firm but still soft and cuddly.
Do not overstuff. An overly stuffed pillow can lose its shape and become too hard.
Fold in the raw edges of the opening and pin them neatly. Hand stitch the opening closed using a ladder stitch (also known as an invisible stitch) for a seamless finish.
Give your owl a final fluff and admire your work. It’s now ready for its important role as a tooth fairy assistant!
Common Mistakes to Avoid
Skipping Seam Finishing on the Pocket
Leaving the top edge of the tooth fairy pocket raw can lead to fraying. This makes the pocket look messy and can eventually unravel.
Always hem or finish the top edge of your pocket piece before attaching it to the pillow. This provides a clean, durable opening for tiny treasures.
Not Trimming Seam Allowances on Curves
When sewing curved edges, not trimming the seam allowance or clipping notches can result in a lumpy, puckered finish once the fabric is turned right side out.
After sewing, carefully trim your seam allowances to about 1/4 inch, and for inward curves, clip small V-shapes into the allowance. For outward curves, snip small notches. This allows the fabric to lay smoothly.
Overstuffing the Pillow
It’s tempting to pack in as much fiberfill as possible for a very firm pillow. However, overstuffing can distort the owl’s shape and make it feel hard rather than soft and cuddly.
Stuff the pillow gradually, feeling the shape as you go. Aim for a firm but yielding consistency that retains the owl’s silhouette without bulging excessively.
Rushing the Hand Stitching
The final hand-stitched opening can be a pain point for many. Rushing this step often results in visible stitches or an uneven closure, detracting from the pillow’s overall neatness.
Take your time with the ladder stitch. Use a matching thread and make small, even stitches that catch just enough fabric on each side. This creates an almost invisible seam.
Troubleshooting
Pocket Seems Too Small or Too Large
Sometimes, after completing the pocket, it might not look quite right in proportion to the owl. It could be too tiny to easily access or so large it dominates the design.
Before permanently stitching the pocket, pin it in place and step back to assess its size. If it looks off, unpin and adjust your cut fabric piece. Remember, you can always trim down a larger piece, but adding fabric to a small one is harder.
Owl Shape Looks Uneven or Lumpy After Turning
If your owl looks lopsided or has bumpy edges after turning it right side out, it’s usually due to uneven stitching or not properly trimming/clipping the seam allowances.
Carefully go back and examine your seams. If the stitching is very uneven, consider unpicking and re-sewing. Ensure you’ve trimmed your seam allowances appropriately, especially on curves, to allow the fabric to smooth out. Use a blunt tool to gently push out all seams and corners before stuffing.
Stuffing is Visible Through the Fabric
If you can see white fiberfill poking through your fabric, especially light-colored fabrics, it can make the pillow look less professional.
This often happens with loosely woven or very thin fabrics. For future projects, choose fabrics with a tighter weave. For the current project, ensure you’ve used a good quality, well-packed fiberfill that doesn’t easily shed. If the issue is severe, consider lining your main body fabric with a thin layer of batting or a second fabric before sewing.
Key Takeaways
- Preparation is paramount: Pre-wash fabrics and cut accurately for the best results.
- Layer and secure: Pin all decorative elements carefully before stitching them down.
- Pocket perfection: Hem the pocket’s top edge for durability and a neat finish.
- Seam management: Trim and clip curved seam allowances to achieve smooth, clean edges.
- Stuffing strategy: Fill your owl evenly, avoiding overstuffing, for a soft and shapely pillow.
- Invisible closure: Use a ladder stitch for a professional, seamless finish on the final opening.
Frequently Asked Questions
Can I hand sew this entire pillow?
Yes, you can certainly hand sew the entire owl tooth fairy pillow. It will take more time and require careful, even stitches, but it’s a perfectly viable option. Focus on using a strong backstitch for durability, especially for seams that will hold stuffing.
What’s the best fabric for an owl tooth fairy pillow?
Quilting cottons are ideal for the main body and wings because they are easy to work with, come in a vast array of prints, and are durable. For the facial features and belly, felt is excellent as it doesn’t fray and is easy to cut into small shapes. Avoid very stretchy or slippery fabrics unless you have advanced sewing experience.
How can I personalize the pillow even more?
There are many ways to personalize your owl. You could embroider your child’s initial or name onto the belly. Add small decorative buttons (make sure they are securely attached for safety) or beads for extra sparkle. You might even use glow-in-the-dark thread for the eyes, adding a magical touch for nighttime visits.
Is it safe for very young children?
When making this for very young children (under 3 years old), pay close attention to safety. Avoid small buttons, beads, or any embellishments that could be a choking hazard. Embroider details instead of attaching small pieces. Ensure all seams are very strong and securely stitched to prevent stuffing from escaping.
Our Top Recommended Finds
- Assorted Cotton Fabric Scraps: Great for adding variety to your owl’s wings, belly, and body. Having a stash means you can mix and match patterns.
- Premium Polyester Fiberfill: Essential for stuffing your pillow. Look for a brand that is washable and hypoallergenic for a durable and safe product.
- Felt Sheets in Various Colors: Perfect for eyes, beaks, and other small details. Felt is easy to cut and doesn’t fray, making it ideal for beginner sewers.
Craft a Cherished Keepsake Today
Creating this owl tooth fairy pillow is more than just a sewing project; it’s about crafting a tangible piece of childhood magic. Each stitch holds a sprinkle of love and anticipation for those special tooth fairy moments.
Imagine your child’s delight finding a coin in their owl’s pocket. This little pillow will become a beloved memory of their early years.
Why wait? Gather your supplies and start this rewarding project today. You might even find yourself inspired to make a whole family of owl friends!