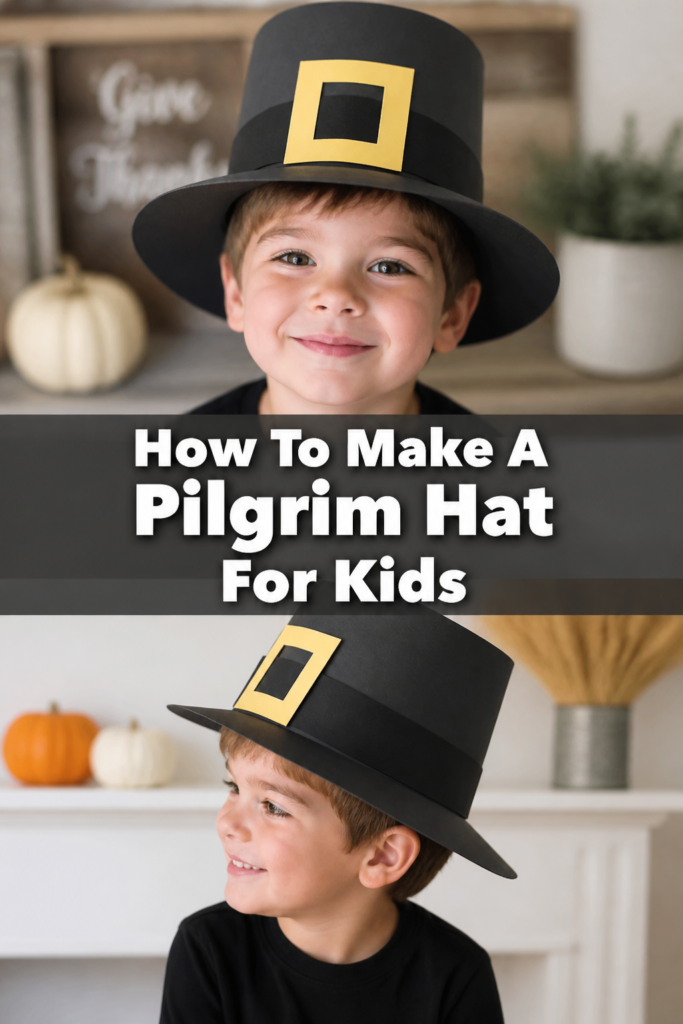
🎩 How To Make A Pilgrim Hat For Kids
Creating a pilgrim hat is a classic tradition that brings history to life for young learners.
I have spent years leading classroom craft projects and have seen exactly where little hands tend to get stuck.
This guide uses my tried-and-true methods to ensure your project is sturdy, stylish, and stress-free.
Quick Overview
This project transforms basic craft supplies into a wearable piece of history that kids will be proud to display.
- Time needed: 30 to 45 minutes
- Difficulty: Beginner
- What you’ll need: Black cardstock, gold or yellow paper, scissors, glue, and a ruler.
Step-by-Step Instructions
Step 1: Gather Your Crafting Supplies
Start by clearing a large, flat workspace where you can spread out your materials without clutter.
Collect two large sheets of heavy black cardstock to ensure the hat holds its shape during play.
Prepare a sheet of bright yellow or gold construction paper for the iconic buckle detail.
Grab a pair of safety scissors, a reliable glue stick, and some clear tape for extra reinforcement.
Find a white crayon or a piece of chalk to mark your lines on the dark black paper.
Pro Tip: Using cardstock instead of thin construction paper prevents the hat from flopping over when the child moves.
Step 2: Measure the Head Circumference
Fit is the most important part of making a wearable hat that won’t slide down over a child’s eyes.
Wrap a soft measuring tape around the widest part of the child’s head, just above the ears.
Add two extra inches to this measurement to allow for an overlap when you glue the ends together.
Mark this total length on your black cardstock using your white crayon or chalk.
Check the measurement twice before you make your first cut to avoid wasting paper.
Step 3: Cut the Hat Crown
The crown is the tall, cylindrical part of the hat that sits on top of the head.
Draw a large rectangle on your black cardstock that matches your head measurement in length.
Determine the height of the hat, which is usually between six and eight inches for most children.
Cut along the lines carefully, keeping the edges as straight as possible for a professional look.
Roll the paper into a cylinder to help the fibers “learn” the curved shape before you apply any glue.
Step 4: Create the Connecting Tabs
Tabs are the secret to a sturdy hat that stays attached to the brim throughout the whole Thanksgiving feast.
Draw a line one inch from the bottom edge across the entire length of your large rectangle.
Snip small vertical slits from the bottom edge up to that line, spacing them about an inch apart.
Fold these little flaps outward so they sit flat against the table when the cylinder is standing up.
Ensure each tab is creased sharply to create a strong foundation for the next stage of assembly.
Step 5: Form the Hat Cylinder
Now it is time to turn that flat rectangle into the iconic tall shape of a pilgrim hat.
Apply a generous amount of glue to one of the short ends of your rectangle.
Overlap the ends by the two inches you added earlier and press them firmly together.
Hold the seam for at least thirty seconds to let the glue bond with the heavy cardstock.
Place a few pieces of clear tape on the inside of the seam for maximum durability during active play.
Step 6: Design the Hat Brim
The brim gives the hat its classic silhouette and provides stability for the entire structure.
Trace a large circle on a second piece of black cardstock, using a large dinner plate as a guide.
Place your finished cylinder in the exact center of that large circle and trace around its base.
Cut out the large outer circle first to give yourself a manageable piece of paper to work with.
Poke a hole in the center of the inner circle and carefully cut it out to create a donut shape.
Pro Tip: If the inner circle is slightly too small, you can always trim a little more, but you cannot put paper back!
Step 7: Attach the Crown to the Brim
This is where the two main components come together to form the final hat shape.
Slide the brim over the top of the cylinder until it rests on the folded tabs at the bottom.
Apply glue to the top surface of every single one of those little tabs you cut earlier.
Press the brim down firmly onto the glue-covered tabs, ensuring they are hidden underneath the brim.
Flip the hat over and rub the tabs from the underside to make sure they are fully adhered.
Step 8: Craft the Buckle and Band
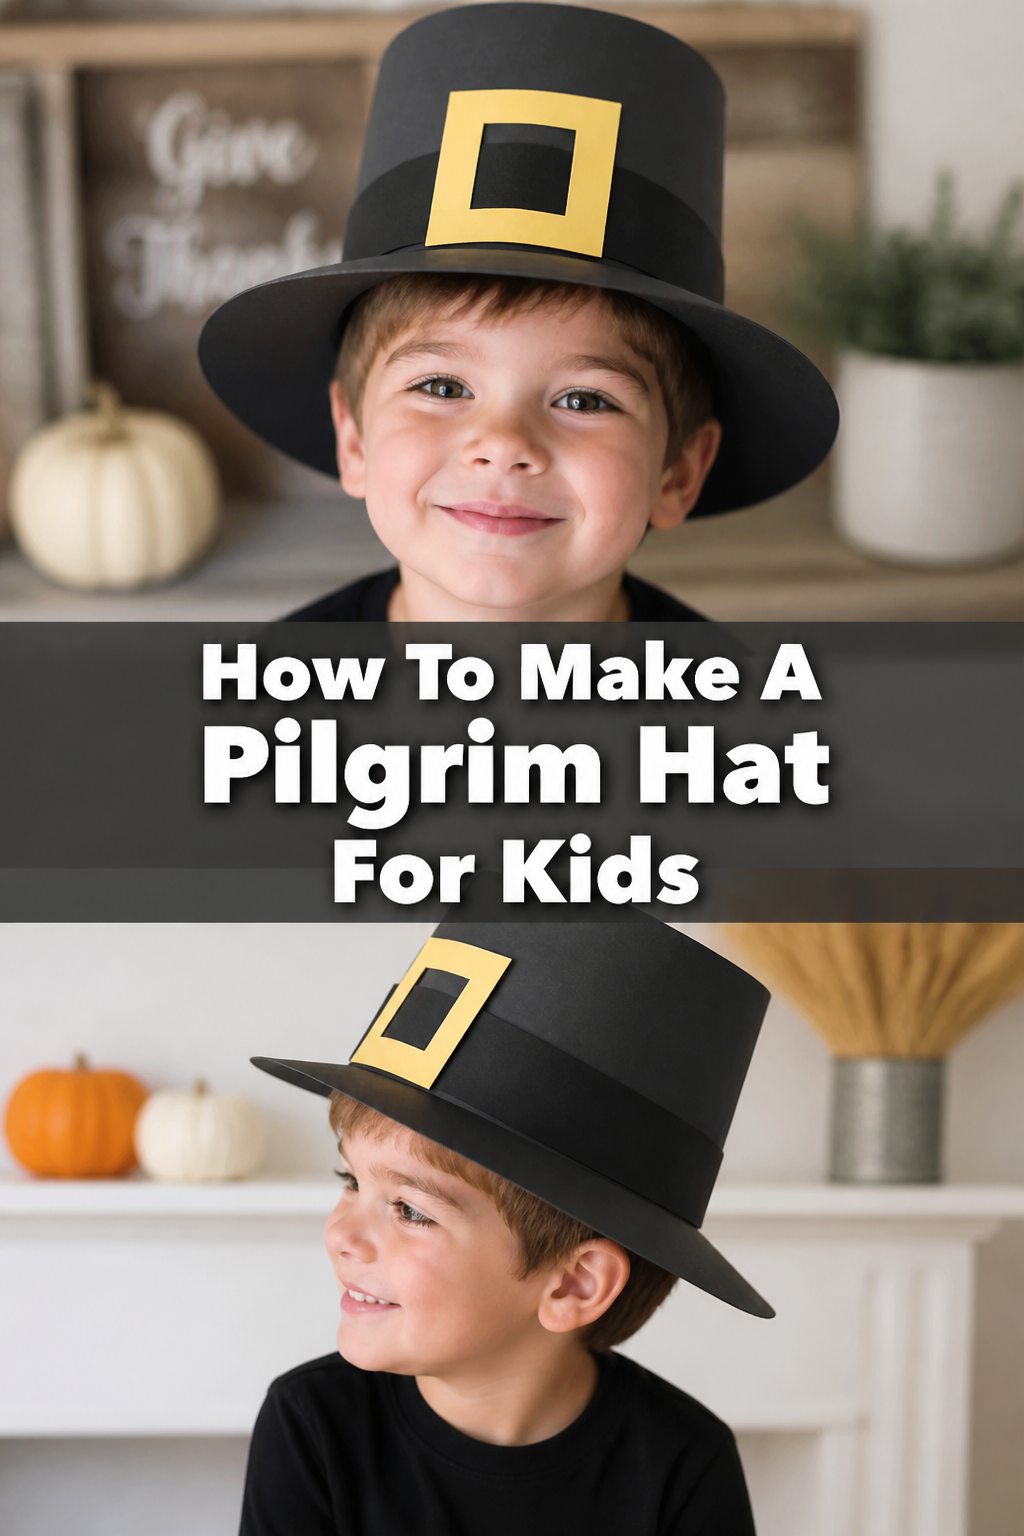
No pilgrim hat is complete without the decorative band and the signature square buckle.
Cut a strip of black or dark brown paper about two inches wide and long enough to wrap around the hat.
Cut a three-inch square out of your yellow or gold paper to serve as the buckle base.
Fold the gold square gently in half and cut a smaller square out of the middle to create a frame.
Thread the paper strip through the gold frame and glue the entire assembly to the base of the crown.
Step 9: Final Adjustments and Drying
Before the hat is ready for a busy afternoon of play, it needs a moment to set properly.
Inspect all the glued seams to make sure nothing is peeling away or lifting up.
Wipe away any excess glue that might have squeezed out from under the tabs or the buckle.
Let the hat sit undisturbed for at least fifteen minutes so the glue can dry completely.
Place the hat on the child’s head for a final fitting and admire the historical transformation.
Common Mistakes to Avoid
Using Paper That Is Too Thin
Many people try to use standard construction paper because it is easy to find and very inexpensive.
However, thin paper will buckle under its own weight once you add the brim and the decorative buckle.
The hat will likely flop to one side or collapse entirely before the craft session is even finished.
Always opt for a 65lb or 80lb cardstock to give the project the structural integrity it needs to stay upright.
Forgetting the Overlap Measurement
If you cut the paper to the exact circumference of the child’s head, the hat will end up being too small.
You must account for the area where the two ends of the paper meet and glue together.
Without this extra inch or two, you will be forced to butt the edges together, which creates a very weak seam.
This mistake usually results in the hat popping open the moment a child tries to put it on.
Applying Too Much Liquid Glue
While it is tempting to use a lot of glue to make things stay, liquid school glue can be very messy.
Too much moisture will cause the cardstock to warp, ripple, and lose its clean, flat appearance.
It also takes much longer to dry, which can be frustrating for children who want to wear their hat immediately.
Stick to high-quality glue sticks or double-sided tape for the cleanest and fastest results.
Troubleshooting
The Hat Keeps Sliding Down
If the hat is too large for the child’s head, it will constantly slip down and block their vision.
You can fix this easily by gluing a thin strip of foam weather stripping or felt inside the inner rim.
This adds a bit of grip and reduces the interior diameter without having to rebuild the entire hat.
Alternatively, you can punch two small holes in the sides and add a chin strap made of yarn or elastic.
The Brim Is Floppy or Drooping
Sometimes the brim can feel a bit weak, especially if the child is handling the hat frequently.
To fix a drooping brim, cut a second “donut” shape out of cardstock and glue it directly to the bottom of the first one.
Doubling the thickness of the brim will provide the extra support needed to keep it sticking straight out.
Make sure the glue is spread evenly between the two layers so they don’t peel apart later.
Key Takeaways
- Select heavy cardstock to ensure the hat remains upright and durable during use.
- Always measure the head and add two inches for the overlap to get the perfect fit.
- Use the tab method to create a secure bond between the crown and the brim.
- Reinforce seams with tape on the inside where it won’t be seen for extra strength.
- Allow proper drying time before letting kids run around and play in their new hats.
- Personalize the buckle with different colors or even glitter to make the project unique.
Frequently Asked Questions
Can I make a pilgrim bonnet using these same materials?
Yes, you can easily adapt this project by using white cardstock instead of black.
Instead of a cylinder, you would cut a large square and fold it to fit around the face, leaving the bottom open.
You would then attach white ribbons to the corners to tie under the chin for a traditional look.
What is the best way to cut the inner circle of the brim?
The easiest way is to gently fold the brim circle in half and make a small snip in the center.
Insert your scissors into that snip and then cut outward toward the line you traced for the inner circle.
This prevents you from having to “stab” the paper, which can lead to accidental tears or jagged edges.
How can I make the hat look more realistic?
To add a touch of realism, you can use a textured cardstock that mimics the look of felt or heavy wool.
You can also use a real metallic buckle from an old belt if you have one lying around the house.
Adding a small feather or a bit of dried grass tucked into the band can also give it an authentic colonial feel.
Our Top Recommended Finds
- Heavyweight Black Cardstock: Look for 80lb cover weight paper to get the best structural results for your hat.
- Precision Craft Scissors: A good pair of sharp, small scissors helps when cutting out the inner circle of the brim.
- Extra-Strength Glue Sticks: These provide a fast bond without the warping issues associated with liquid white glue.
Bring History To Life Today
Making a pilgrim hat is more than just a simple paper craft; it is a way to connect with the past.
Now that you have mastered the basic structure, you can experiment with different sizes and styles for the whole family.
Consider making a matching set of bonnets or even a miniature version for a favorite stuffed animal.
Gather your supplies and start building your colonial wardrobe this afternoon!