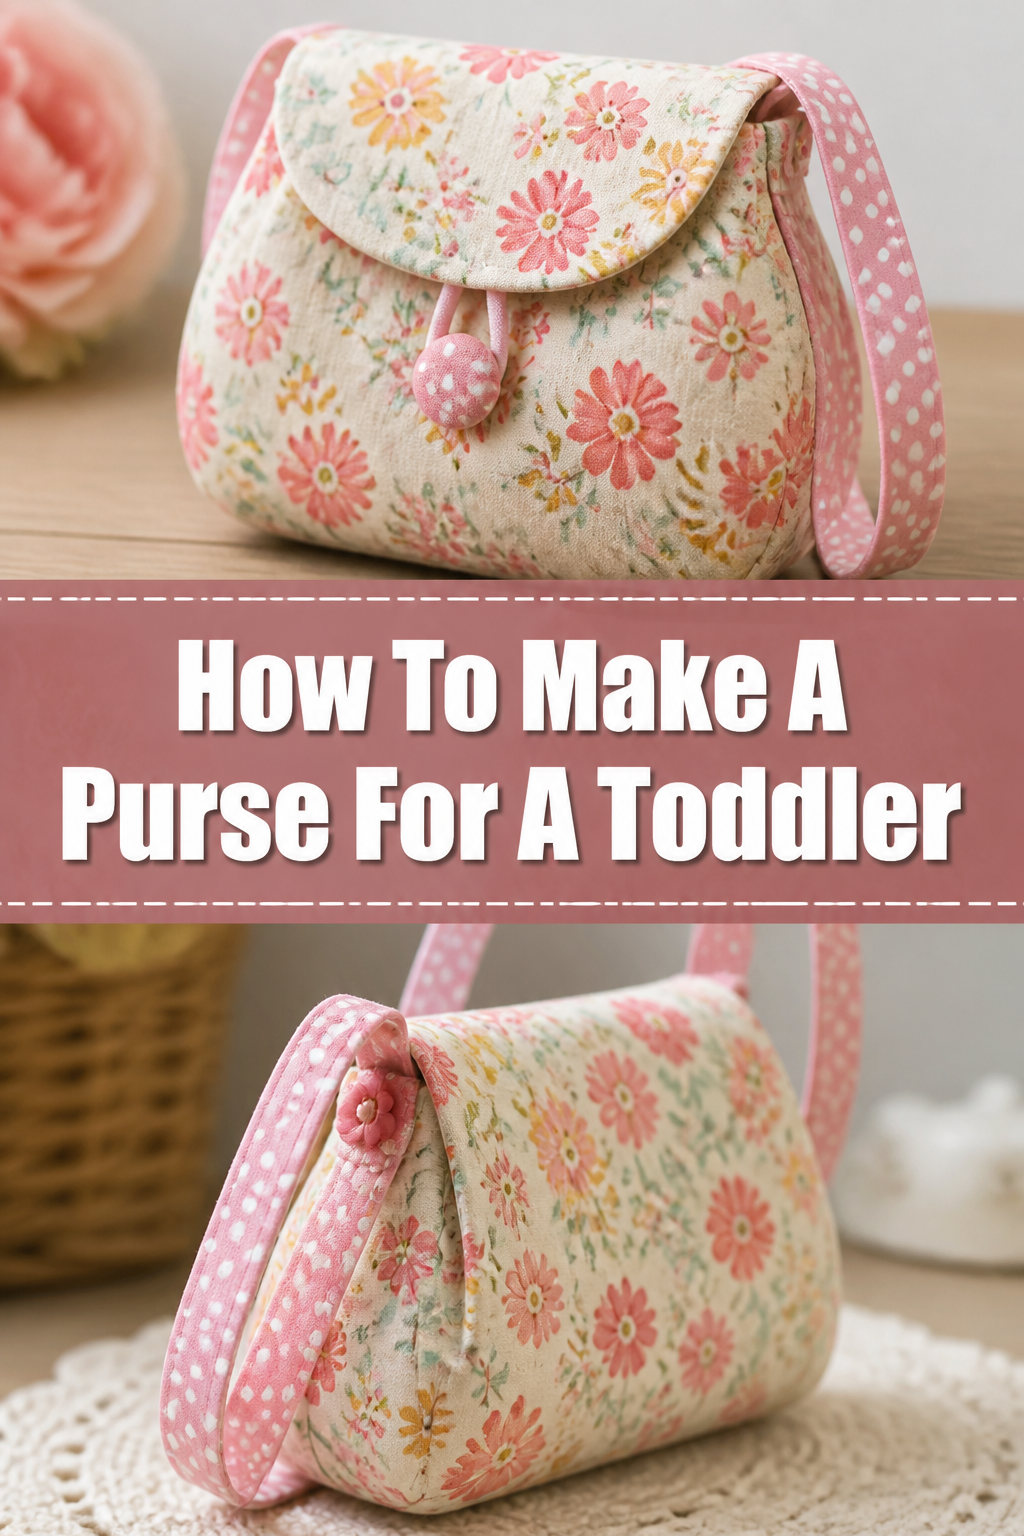
👛 How To Make A Purse For A Toddler
There’s something truly special about watching a toddler carry their own tiny purse.
It’s a moment of adorable independence, perfect for stashing their most treasured “finds” – a tiny rock, a leaf, or maybe a single crayon.
Having crafted several of these delightful accessories for my own children and their playmates, I’ve learned the secrets to making them safe, durable, and utterly charming.
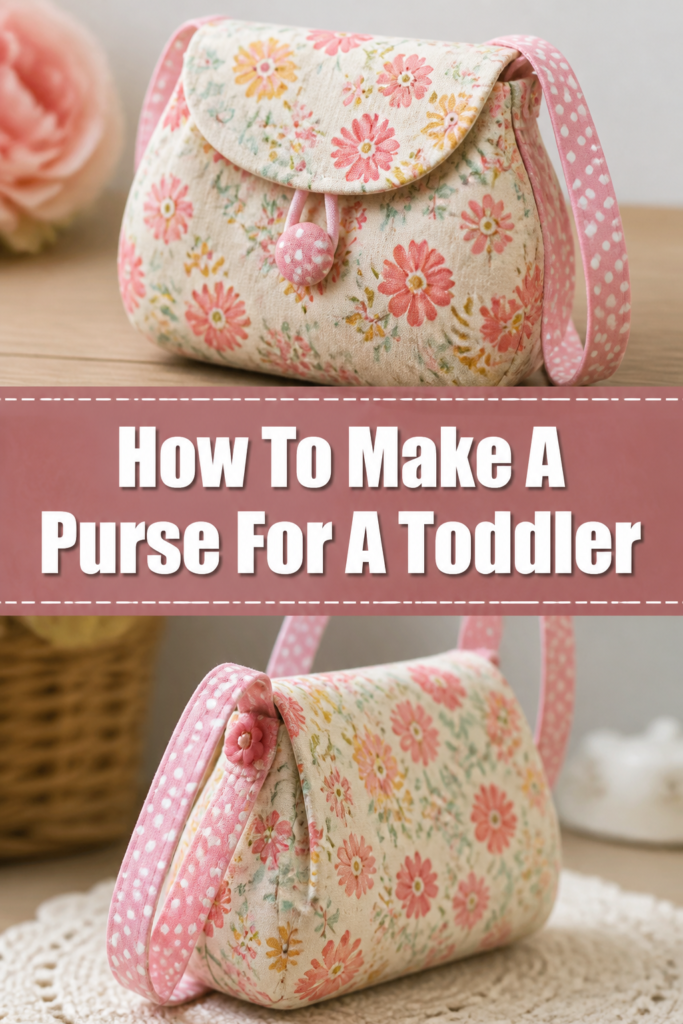
Quick Overview
This guide will walk you through creating a sturdy and sweet little purse, perfectly sized for a toddler’s adventures. You’ll finish with a handmade treasure that can withstand enthusiastic play and countless “important” items.
- Time needed: 2-4 hours
- Difficulty: Beginner
- What you’ll need: Fabric, sewing machine (or needle), thread, scissors, Velcro or snap, strap material, basic sewing notions.
Step-by-Step Instructions
Step 1: Gather Your Materials
Before you begin, ensure you have all the necessary supplies within reach. A well-prepared workspace makes the crafting process much smoother and more enjoyable.
- Choose: Select two coordinating cotton fabrics – one for the exterior and one for the lining. Quilting cottons are excellent for their durability and wide range of child-friendly prints.
- Acquire: Get a sturdy fabric for the strap, like cotton webbing, or extra exterior fabric to make your own. You’ll also need matching all-purpose thread.
- Prepare: Gather your sewing machine (or hand-sewing needle), fabric scissors, pins, an iron, and a ruler or measuring tape.
- Decide: Pick a child-safe closure, such as sew-on Velcro, a magnetic snap, or a large, flat button (if appropriate for the child’s age and safety).
Pro Tip: Pre-wash and iron your fabrics before cutting. This prevents shrinkage later and ensures your finished purse maintains its shape after washing.
Step 2: Plan Your Design and Cut Fabric
Careful measuring and cutting are the foundation of a well-made purse. Take your time with this step to ensure all pieces fit together perfectly.
- Determine: Decide on the finished size of your toddler purse. A good starting point is a rectangle approximately 6 inches wide by 5 inches tall. This size is ideal for small hands.
- Cut: For the main purse body, cut two rectangles from your exterior fabric and two identical rectangles from your lining fabric. Add a 1/2-inch seam allowance to all sides. So, for a 6×5 inch purse, cut 7×6 inch rectangles.
- Measure: For the flap, cut one rectangle from exterior fabric and one from lining fabric. This piece should be the same width as your purse body (6 inches finished, so 7 inches with seam allowance) and about 3-4 inches tall (4-5 inches with seam allowance).
- Shape: Gently round the bottom corners of your flap pieces if you desire a softer look. You can use a small plate or a spool of thread as a guide.
Step 3: Prepare the Strap
A comfortable and secure strap is crucial for a toddler’s purse. It needs to be durable enough for active play.
- Choose: Decide if you’re using pre-made webbing or making a fabric strap. If using webbing, cut it to your desired length (around 30-36 inches for a cross-body toddler purse, but measure on the child if possible).
- Create: If making a fabric strap, cut a strip of exterior fabric that is 2 inches wide and about 32-38 inches long.
- Fold: Fold this fabric strip in half lengthwise, pressing firmly. Open it up, then fold each raw edge in towards the center crease and press again.
- Stitch: Fold the entire strip in half once more, encasing the raw edges. Topstitch along both long edges of the strap, close to the fold, to create a neat and strong strap.
Step 4: Construct the Main Purse Body
Now, let’s start bringing the purse shape to life. This involves sewing the exterior and lining pieces separately.
- Place: Take your two exterior fabric rectangles. Place them right sides together, aligning all edges.
- Pin: Pin along the two side edges and the bottom edge, leaving the top edge open.
- Sew: Stitch these three pinned edges using a 1/2-inch seam allowance. Backstitch at the beginning and end of your seams for extra strength.
- Repeat: Do the exact same process for your two lining fabric rectangles, sewing them right sides together along the sides and bottom.
- Trim: Trim the seam allowances to 1/4 inch and clip the bottom corners of both the exterior and lining bags to reduce bulk when you turn them right side out.
Pro Tip: For extra durability, especially for a toddler’s item, consider sewing a second line of stitching just inside your first seam on the exterior bag. This reinforces the main seams.
Step 5: Assemble the Flap and Attach the Closure
The flap gives the purse its distinct look and provides the foundation for your chosen closure.
- Prepare: Take your two flap pieces (one exterior, one lining). Place them right sides together.
- Sew: Stitch around the curved or bottom edges of the flap, leaving the straight top edge open. Use a 1/2-inch seam allowance.
- Trim: Trim the seam allowances to 1/4 inch, and clip any curves to help them lie flat.
- Turn: Turn the flap right side out and press it well. Topstitch along the sewn edges for a crisp finish.
- Install: Now, attach one half of your chosen closure (e.g., the loop side of Velcro, or one half of a magnetic snap) to the underside of the flap, centered and about 1 inch from the finished edge.
Step 6: Integrate the Flap and Strap
This step brings the flap and strap together with the exterior purse body, preparing for the final assembly.
- Position: Take your exterior purse body (still wrong side out). Lay it flat.
- Align: Place the raw, unsewn edge of your finished flap (right side up) onto the back top edge of the exterior purse, centered. The flap will be facing downwards towards the bottom of the purse. Pin it securely.
- Attach: Take your strap. Pin each end of the strap to the top side edges of the exterior purse body, about 1/2 inch in from the side seams. Ensure the strap is not twisted. The strap should also be facing inwards, towards the bottom of the purse.
- Baste: Baste the flap and strap ends in place with a long stitch, within your 1/2-inch seam allowance. This temporarily holds them while you attach the lining.
Step 7: Attach the Lining and Finish the Purse
This is where the magic happens, and your purse starts to take its final form. It’s a bit like a sewing sandwich!
- Insert: Place the exterior purse body (with the flap and strap basted in place) inside the lining bag. The exterior bag should be right side out, and the lining bag should be wrong side out. This means the right sides of the exterior and lining bags are now facing each other.
- Align: Match up the top raw edges of the exterior bag and the lining bag. Pin all the way around, carefully aligning the side seams.
- Sew: Stitch around the top opening, using a 1/2-inch seam allowance. Crucially, leave a 2-3 inch opening along the back top edge for turning.
- Turn: Carefully pull the entire purse right side out through the opening you left in the lining. Gently push out all corners and edges.
- Press: Press the top seam of the purse flat, making sure the opening edges are neatly folded under.
Step 8: Final Touches and Embellishments
Almost there! These last steps ensure your purse is secure, functional, and adorable.
- Close: Hand stitch the opening in the lining closed using a ladder stitch for an invisible finish, or machine stitch very close to the edge.
- Topstitch: Topstitch all around the top edge of the purse, about 1/8 inch from the edge. This gives a professional finish and helps the top edge lie flat.
- Install: Attach the other half of your closure (e.g., the hook side of Velcro, or the second half of a magnetic snap) to the front of the exterior purse body, ensuring it aligns perfectly with the flap.
- Decorate: Consider adding child-safe embellishments like fabric appliques, embroidery, or fabric paint. Always ensure any additions are securely attached and do not pose a choking hazard.
Pro Tip: For maximum durability, especially at the strap attachment points, stitch a small “X” or a box stitch over the seam where the strap is attached. This significantly strengthens these high-stress areas.
Common Mistakes to Avoid
Using Unsafe Embellishments
It’s tempting to add cute little buttons, beads, or sequins to a toddler’s purse. However, these small items can easily detach and become choking hazards for young children. Always prioritize safety over intricate decoration.
Instead, opt for fabric appliques, embroidery using thick thread, or fabric paints that are permanently affixed and too large to be swallowed. Ensure all embellishments are securely sewn or fused.
Skipping Reinforcement at Stress Points
Toddlers are notoriously tough on their belongings. The strap attachment points are particularly vulnerable to tearing or coming loose. Neglecting to reinforce these areas can lead to a quickly broken purse.
Always backstitch several times at the beginning and end of seams, especially where the strap attaches. For added strength, sew a small box or “X” pattern over the strap attachment points on the exterior of the purse, securing it firmly.
Incorrect Seam Allowances
Inconsistent or incorrect seam allowances can result in a misshapen purse, or one that is much smaller or larger than intended. Precision in this area is key to a professional-looking finish.
Always use a consistent seam allowance, typically 1/2 inch for this project. Use the markings on your sewing machine plate as a guide, or draw a light line with tailor’s chalk before sewing to maintain accuracy.
Choosing Flimsy Fabric
While delicate fabrics might look pretty, they won’t stand up to the rigors of toddler play. A flimsy fabric will quickly tear, fray, or lose its shape, leading to disappointment.
Opt for durable, tightly woven fabrics like quilting cotton, canvas, or even denim for the exterior. For the lining, quilting cotton is usually sufficient. These fabrics will ensure the purse lasts through many adventures.
Troubleshooting
Strap Comes Loose
If the strap begins to pull away from the purse body, it usually indicates insufficient reinforcement at the attachment points. This is a common issue with items that get a lot of tugging.
Carefully unpick the seam where the strap is detaching. Reattach the strap, ensuring you backstitch multiple times at the beginning and end of the seam. For extra security, hand-stitch a few reinforcing stitches through all layers, or machine-stitch a small box with an “X” through it at each strap attachment point.
Purse Looks Crooked or Uneven
A crooked purse often results from inconsistent seam allowances or inaccurate cutting. It can be frustrating to see your hard work look a little off-kilter.
Go back and check your original fabric cuts against your pattern. When sewing, use a ruler or the markings on your sewing machine to maintain a precise seam allowance. Pressing seams thoroughly as you go can also help square up the fabric and reveal any minor inconsistencies before they become major problems.
Closure Doesn’t Hold
If your Velcro isn’t sticking well, or a snap keeps popping open, the closure might be incorrectly positioned or not strong enough for active little hands.
Ensure both halves of the closure are perfectly aligned. If using Velcro, make sure you’re using a strong, sew-on variety and that it’s sewn securely around all edges. For snaps, check that they are firmly crimped and that the fabric layers aren’t too thick for the snap’s prongs to engage properly. You might need to replace a weak closure with a stronger option.
Key Takeaways
- Always prioritize safety by avoiding small, detachable embellishments that could be choking hazards for toddlers.
- Use durable fabrics like quilting cotton or canvas to ensure the purse withstands active play and frequent washing.
- Reinforce all stress points, especially where the strap attaches, with extra backstitching or box stitches for longevity.
- Precise cutting and consistent seam allowances are essential for creating a well-shaped and professional-looking purse.
- Pre-washing fabrics prevents shrinkage, and pressing seams as you go helps achieve a crisp, neat finish.
- Consider adding a lining for a clean interior finish and added durability to the purse.
Frequently Asked Questions
What’s the best fabric for a toddler purse?
Quilting cotton is an excellent choice due to its durability, washability, and vast array of child-friendly patterns. Canvas or denim are also great options for a sturdier exterior, offering even more resilience to wear and tear.
How big should a toddler purse be?
A toddler purse should be small and lightweight, easy for little hands to carry without being cumbersome. A finished size of approximately 6 inches wide by 5 inches tall is generally ideal, offering enough space for a few small treasures.
Can I hand sew this purse?
Absolutely! While a sewing machine speeds up the process, you can hand sew this purse using a strong running stitch or backstitch. Just be sure to make your stitches small and consistent, and reinforce all seams, especially the strap attachments, for durability.
How do I make it machine washable?
To ensure your toddler purse is machine washable, always pre-wash all your fabrics before cutting and sewing. Use durable cotton threads and avoid any embellishments that are not machine-safe. Once complete, wash on a gentle cycle with cold water and air dry or tumble dry on low.
Our Top Recommended Finds
- Good Quality Fabric Scissors: Sharp scissors make cutting fabric much easier and more precise, preventing frayed edges and uneven cuts.
- Fabric Marking Pen/Chalk: Essential for marking seam allowances, cutting lines, and placement for closures without leaving permanent marks on your fabric.
- Sew-on Velcro (Heavy Duty): A safe and secure closure option for toddlers, easy for little fingers to open and close, and highly durable.
Crafting Joy: Your Little One’s New Favorite Accessory Awaits!
You’ve just created a wonderful, personalized gift that your toddler will adore. This isn’t just a purse; it’s a vessel for imagination, a carrier of tiny dreams, and a testament to your loving effort.
Feel proud of your accomplishment and the joy it will bring. Why stop here? Consider making a matching purse for a favorite doll or even a slightly larger one for a preschooler.
Gather your materials and start your next creative project today. The smiles are absolutely worth it!