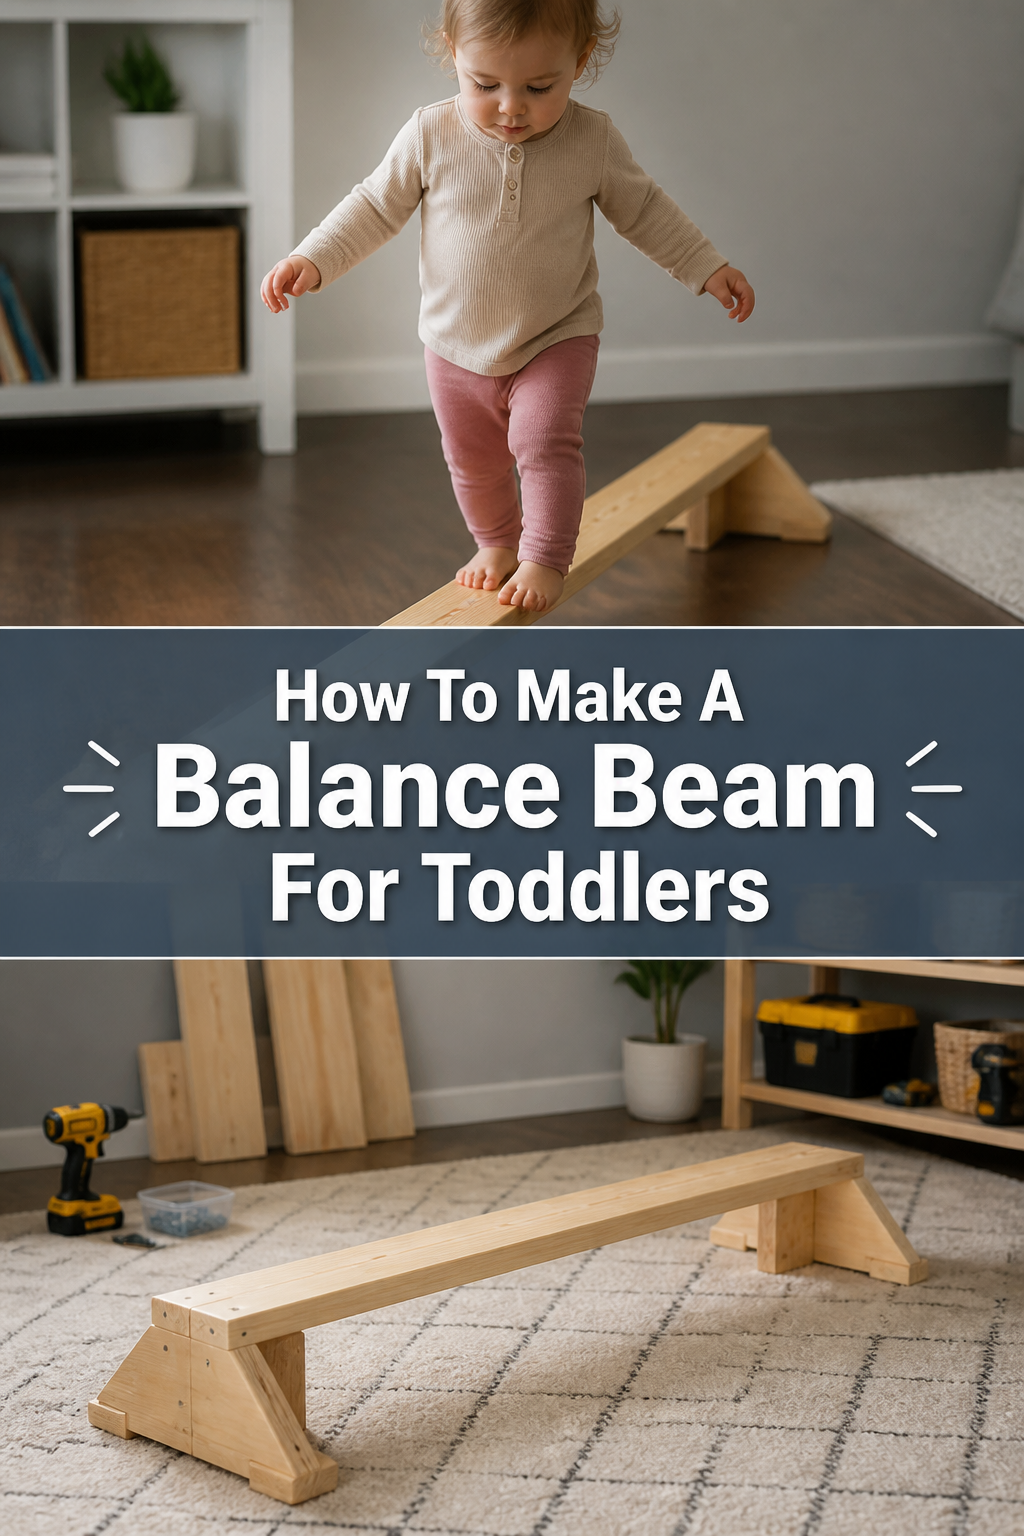
🤸 How To Make A Balance Beam For Toddlers
Watching my own little one navigate the world fills me with immense joy and curiosity. I’ve personally seen how a simple balance beam can transform their coordination and confidence. Crafting one at home is a surprisingly rewarding project, and I’m excited to share exactly how I built a safe, sturdy beam for my toddler.
This guide comes from hands-on experience, focusing on practical steps and real-world safety. You can absolutely create a fun and developmental play item with basic tools and materials. Let’s get started on building a fantastic balance beam for your little adventurer.
Quick Overview
This guide will walk you through creating a simple, safe, and sturdy balance beam perfect for toddlers. You’ll assemble a low-profile beam that encourages gross motor skill development and imaginative play. It’s a fantastic DIY project that yields big developmental benefits.
- Time needed: 2-4 hours (includes potential drying time for finishes)
- Difficulty: Beginner
- What you’ll need: Lumber (2x4s or 2x6s), wood screws, saw, drill, sandpaper, tape measure, safety glasses, wood glue (optional).
Step-by-Step Instructions
Step 1: Gather Your Materials and Tools
Before starting any project, ensure you have everything within reach. This saves time and keeps your workflow smooth. Double-check your measurements and make sure all tools are in good working order.
You will need two pieces of lumber for the beam itself and two shorter pieces for the support bases. Standard 2x4s or 2x6s work wonderfully. Make sure your wood is free of major knots or cracks.
- Acquire a long piece of lumber for the beam (e.g., one 6-foot long 2×4 or 2×6).
- Get two shorter pieces for the supports (e.g., two 12-inch long 2x4s or 2x6s).
- Collect wood screws (2.5-3 inches long), a drill with appropriate bits, a saw (hand saw or miter saw), sandpaper (medium and fine grit), a tape measure, and safety glasses.
Step 2: Measure and Cut the Wood
Accuracy in measuring and cutting is crucial for a stable and aesthetically pleasing balance beam. Take your time with these steps to ensure everything fits together perfectly. Even slight inaccuracies can lead to a wobbly beam.
Mark your cuts clearly with a pencil before sawing. Always wear safety glasses when operating a saw. If you’re unsure about making cuts, many hardware stores offer cutting services.
- Measure your main beam piece to your desired length (e.g., 6 feet). Mark the cut line clearly.
- Cut the main beam piece to the marked length using your saw. Ensure the ends are straight.
- Measure your two support pieces to your desired width (e.g., 12 inches each). Mark these lines.
- Cut the two support pieces. These will form the stable feet for your beam.
Pro Tip: For a clean cut, use a miter saw if available. If using a hand saw, clamp the wood securely to prevent movement and ensure a straight line.
Step 3: Sand All Wood Surfaces Smooth
This step is incredibly important for toddler safety. Splinters are a common hazard with untreated wood, and rough edges can cause scrapes. A smooth finish also feels better and looks more professional.
Sanding removes any rough spots, sharp edges, and potential splinters. Begin with a medium-grit sandpaper to tackle imperfections, then switch to a fine-grit for a silky-smooth finish. Don’t forget the edges and corners.
- Start with medium-grit sandpaper (e.g., 100-120 grit) and thoroughly sand all sides of the beam and support pieces.
- Focus on smoothing out any rough patches, saw marks, and especially the edges and corners. Round them slightly.
- Finish by sanding all surfaces with fine-grit sandpaper (e.g., 180-220 grit) for a silky-smooth feel.
- Wipe down all pieces with a damp cloth to remove sawdust.
Step 4: Assemble the Base Supports
The support bases are what give your balance beam stability. They need to be wide enough to prevent tipping and securely attached to the main beam. Creating a sturdy base is fundamental to the beam’s overall safety.
The easiest method is to stand the support pieces on their narrow edge and attach the main beam on top. This creates a low, stable platform. Ensure your supports are spaced evenly from the ends of the beam.
- Position one support piece on its narrow edge, flat on your work surface.
- Place one end of the main beam piece directly on top of the support, centered.
- Pre-drill two pilot holes through the top of the beam and into the support. This prevents wood splitting.
- Secure with two wood screws, driving them until they are flush with the beam’s surface.
- Repeat this process for the other support piece at the opposite end of the beam.
Pro Tip: For extra strength, apply a thin layer of wood glue between the beam and the supports before screwing them together. Wipe away any excess glue immediately.
Step 5: Check for Stability and Safety
Before allowing any toddler near the beam, a thorough safety check is essential. You need to be absolutely certain it can withstand gentle play without wobbling or presenting hazards. This step ensures peace of mind.
Test the beam by applying pressure and checking for any movement. Look for overlooked rough spots or protruding screw heads. Your vigilance here directly contributes to your child’s safety.
- Gently push down and side-to-side on the assembled beam. It should feel solid with no noticeable wobble.
- Inspect all surfaces again for any missed splinters or rough edges that might have become apparent during assembly.
- Ensure all screw heads are flush or slightly recessed into the wood. No part should stick out.
- Verify that the supports are firmly planted and the beam doesn’t tip easily when pressure is applied to the ends.
Step 6: Add Finishing Touches (Optional)
While purely functional, adding a finish can protect the wood and make the beam more appealing to your toddler. This is where you can personalize the beam to match your play space or your child’s preferences.
Consider using child-safe paints or sealants. A clear sealant protects the wood from moisture and wear, especially if the beam might be used outdoors. Non-slip strips can also enhance safety.
- Apply a coat of child-safe, non-toxic paint or stain to the beam for a fun look. Allow it to dry completely.
- Consider a clear, non-toxic sealant if the beam will be used outdoors or in high-traffic areas. This protects the wood.
- Attach non-slip grip tape to the top surface of the beam. This provides extra traction for little feet.
- Allow all finishes to cure fully according to manufacturer instructions before use.
Step 7: Position and Supervise Play
Once your balance beam is complete and any finishes have dried, it’s time to introduce it to your toddler. Proper placement and constant supervision are key to safe and enjoyable play. Never leave a child unattended.
Place the beam on a soft, level surface, such as a rug, carpet, or grass. Demonstrate how to use it safely, and always be nearby to offer a helping hand. This ensures a positive and secure play experience.
- Place the balance beam on a soft, level surface. Avoid hard floors or uneven ground.
- Always supervise your toddler when they are using the balance beam.
- Encourage them to walk slowly, hold your hand if needed, and practice different movements.
- Store the beam in a dry place when not in use, especially if it’s not sealed for outdoor weather.
Common Mistakes to Avoid
Using Untreated Wood Outdoors
Many DIY projects use standard lumber, which is fine for indoor use. However, if you plan for your balance beam to live outside, untreated wood will quickly warp, rot, and become unsafe due to moisture and insects. This compromises the beam’s structural integrity over time.
Instead, opt for pressure-treated lumber designed for outdoor conditions. Alternatively, thoroughly seal and regularly re-seal any untreated wood with a weather-resistant, non-toxic outdoor sealant. This protective layer is crucial for longevity and safety.
Skipping the Sanding Process
It might seem like a minor step, but neglecting to properly sand the wood is a serious oversight. Rough patches and splinters are not just uncomfortable; they pose a significant injury risk to toddlers with sensitive skin. A quickly assembled, unsanded beam can lead to painful accidents.
Dedicate ample time to sanding all surfaces, edges, and corners. Start with a medium-grit paper to remove imperfections, then finish with a fine-grit for a smooth, splinter-free finish. Your toddler’s safety depends on this crucial step.
Inadequate Support Base
A balance beam is only as stable as its base. If the support pieces are too narrow, too short, or not securely attached, the beam will be wobbly and prone to tipping. This creates a fall hazard, especially for young children just developing their balance.
Ensure your support pieces are wide enough (e.g., 12 inches for a 2×4 beam) and securely fastened with multiple screws. The wider the base, the more stable the beam. A sturdy foundation is paramount for safe play.
Leaving Gaps or Sharp Edges
During assembly, it’s possible for wood pieces not to align perfectly, leaving small gaps or sharp edges. These imperfections can pinch little fingers or scrape skin. Any exposed sharp edges or corners also pose a bumping hazard.
Carefully align all wood pieces before fastening them together. Fill any unavoidable small gaps with wood filler and sand smooth. Take extra care to round all corners and edges during the sanding process.
Troubleshooting
Beam Feels Wobbly After Assembly
A wobbly balance beam is a primary safety concern. This usually indicates that the connections between the main beam and its supports are not secure enough, or the supports themselves are uneven. It needs immediate attention before use.
First, check all screws to ensure they are fully tightened and recessed. If wobbling persists, consider adding more screws to each support or applying wood glue before re-tightening. If the ground is uneven, place shims under the support bases to level the beam.
Toddler Slips Easily on the Surface
If your toddler is having trouble maintaining grip on the beam, the surface might be too smooth. This is common with sanded wood, especially if socks are worn. A slippery surface increases the risk of falls.
Consider applying non-slip grip tape specifically designed for surfaces like stairs or play equipment. Alternatively, you can paint the top surface with a non-toxic, textured paint or a paint mixed with fine sand for added friction. Always ensure any additions are securely attached.
Wood Splits During Assembly
Wood splitting often occurs when screws are driven too close to an edge or without pre-drilling pilot holes. This weakens the wood and can compromise the beam’s integrity. It’s a frustrating but solvable issue.
Always pre-drill pilot holes slightly smaller than your screw diameter, especially when working close to edges or with harder woods. If a split occurs, remove the screw, apply wood glue to the split, clamp it tightly until dry, then pre-drill and re-insert the screw slightly away from the original split.
Key Takeaways
- Prioritize Safety: Thorough sanding and stable construction are non-negotiable for toddler equipment.
- Choose Quality Materials: Sturdy lumber and appropriate screws ensure durability and longevity.
- Accurate Measurements Matter: Precise cuts and alignment prevent wobbles and gaps.
- Secure All Connections: Use enough screws and consider wood glue for maximum stability.
- Supervise Play Actively: Always be present when your toddler uses the balance beam to ensure their safety.
Frequently Asked Questions
What’s the ideal height for a toddler balance beam?
For toddlers, a balance beam should be very low to the ground to minimize fall risk. An ideal height is typically 4 to 6 inches off the ground. Using 2×4 or 2×6 lumber for the beam and standing it on its narrow edge for the supports naturally creates this safe, low profile.
Can I use plywood instead of solid wood for the beam?
While plywood can be used for the support bases due to its stability, it’s generally not recommended for the main beam itself. Plywood can delaminate over time, especially if exposed to moisture, and its edges can splinter more easily than solid lumber. Solid wood offers superior durability and a smoother finish for the walking surface.
How can I make the balance beam portable for storage?
To make the beam portable, you can design the supports to be detachable. Instead of permanently screwing the beam to the supports, use carriage bolts with wing nuts. This allows you to easily unbolt the supports for flat storage and quickly reassemble the beam when it’s time to play.
Is outdoor use safe for this DIY balance beam?
Yes, outdoor use is safe if you prepare the wood correctly. Use pressure-treated lumber or apply several coats of a high-quality, non-toxic outdoor sealant to all surfaces of untreated wood. Regular maintenance and re-sealing will protect the beam from weather damage and ensure its safety for years to come.
Our Top Recommended Finds
- Cordless Drill/Driver: An essential tool for quickly and securely driving screws, making assembly much easier than with hand tools.
- Orbital Sander: Speeds up the sanding process significantly and achieves a smoother, more consistent finish, crucial for splinter-free surfaces.
- Non-Slip Grip Tape: Provides excellent traction on the beam’s surface, enhancing safety and confidence for little feet.
Igniting Imagination, One Step at a Time
Building a balance beam for your toddler is more than just a woodworking project; it’s an investment in their development and joy. You’re creating a tool that fosters balance, coordination, and imaginative play right in your home. The pride you’ll feel watching them master new skills on something you crafted is truly special.
Don’t let the idea of DIY intimidate you. With these clear steps and practical tips, you have everything you need to succeed. Gather your materials, dedicate a few hours, and prepare to inspire your little explorer. Start building today and watch their confidence soar.