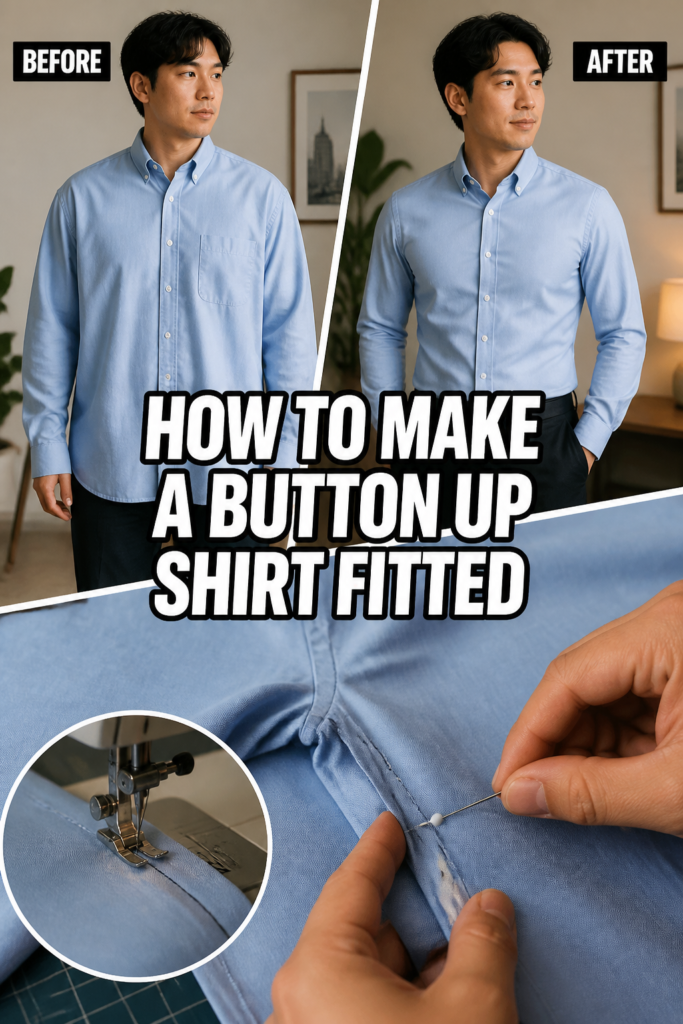
👕 How To Make A Button Up Shirt Fitted
Many years ago, I pulled on a brand-new button-up, only to find it swimming on me. The shoulders drooped, the waist billowed, and it just looked sloppy. That frustration sparked my journey into learning how to tailor my own clothes.
This guide shares the practical lessons I’ve learned, helping you transform an ill-fitting shirt into a perfectly tailored piece. You don’t need to be a professional seamstress; just a willingness to learn and some basic tools.
Quick Overview
This guide will walk you through the process of altering a standard button-up shirt to achieve a custom, more flattering fit. You’ll learn to mark, pin, stitch, and finish your garment with confidence.
- Time needed: 2-4 hours (for beginners, including fitting time)
- Difficulty: Intermediate
- What you’ll need: Sewing machine, fabric scissors, sharp pins, matching thread, seam ripper, tailor’s chalk, measuring tape, iron, ironing board, a well-fitting shirt (for reference).
Step-by-Step Instructions
Step 1: Gather Your Tools and Prepare Your Space
Before you begin, ensure you have all necessary items laid out and ready. A clear, well-lit workspace is crucial for precision and comfort. Double-check that your sewing machine is threaded and in good working order.
Having everything at hand prevents interruptions and helps you maintain focus throughout the project. This preparation saves time and reduces potential frustration later on.
Step 2: Assess the Current Fit and Plan Your Adjustments
Put on the shirt you intend to alter. Wear an undershirt and the trousers you typically pair with it for the most accurate assessment. Stand naturally in front of a full-length mirror.
Identify where the shirt is too loose. Common areas include the side seams, the back (especially around the shoulder blades), and sometimes the sleeves. A well-fitting reference shirt can be incredibly helpful here.
Pro Tip: Pay close attention to the shoulders. These are the hardest to alter. If the shoulder seams fall more than an inch past your natural shoulder point, consider finding a different shirt size. This guide focuses on fitting the body and sleeves.
Step 3: Mark Your New Seams
With the shirt on, use tailor’s chalk to mark your desired new fit. Start by marking the side seams. Pinch the excess fabric at the side, from the armpit down to the hem, until the shirt feels snug but not tight.
Draw a line with the chalk where your fingers are pinching, indicating the new seam line. Repeat this process on the other side. Aim for symmetry, but prioritize how the shirt feels on your body.
Next, consider the back. If there’s excess fabric, you might add two darts. Pinch the fabric vertically, usually starting around the mid-back and tapering down towards the hem. Mark these dart lines symmetrically.
Step 4: Pin the Adjustments Securely
Carefully remove the shirt, keeping the chalk marks visible. Lay the shirt flat, inside out, on a large surface. Using sharp pins, secure the fabric along your chalk lines.
For side seams, pin directly on the chalk line, placing pins perpendicular to the seam every inch or so. Ensure both front and back fabric layers are evenly pinned together. This prevents shifting during the next step.
If you’re adding back darts, fold the fabric along the center of your chalked dart line. Pin through all layers, creating a neat fold. Accuracy in pinning is essential for a smooth, even fit.
Step 5: Test the Fit (Baste the Seams)
Before permanently stitching, it’s wise to baste your new seams. Basting means sewing with long, loose stitches that are easy to remove. This allows for a final fitting and any necessary adjustments.
Using a contrasting thread color, machine baste along your chalk lines. If you’re new to sewing, you can hand-baste for more control. Once basted, try the shirt on again.
Check the fit from all angles. Sit down, raise your arms, and move around to ensure comfort and ease of movement. Make any minor adjustments to the basted lines with chalk and re-baste if needed.
Pro Tip: When testing the fit, pay attention to how the fabric drapes. There should be no pulling or excessive wrinkles. The shirt should follow the natural contours of your body without feeling restrictive.
Step 6: Stitch the New Seams Permanently
Once you are completely satisfied with the basted fit, it’s time to sew the permanent seams. Use a good quality, matching thread. Set your sewing machine to a standard stitch length (around 2.5mm).
Sew slowly and steadily along your chalked and basted lines. Start and end each seam with a backstitch to secure the threads. For side seams, start from the armpit and sew down to the hem.
For back darts, start from the wider part (usually around mid-back) and gradually taper to nothing at the hem. Remove the basting stitches after you’ve sewn your permanent seams.
Step 7: Trim Excess Fabric and Finish Seams
After stitching, turn the shirt inside out. You will see the original seam allowance and the new, smaller one. Carefully trim the excess fabric, leaving a consistent seam allowance of about 1/2 inch (1.25 cm) from your new stitch line.
Trimming reduces bulk and creates a cleaner finish. Next, you need to finish the raw edges of your new seams to prevent fraying. If you have a serger, this is the ideal tool for a professional finish.
Alternatively, use your sewing machine’s zigzag stitch or an overlock stitch setting. Stitch along the raw edge of the seam allowance. This encases the raw edges, making the shirt more durable and neat.
Step 8: Press Your Work
Pressing is a crucial step that often gets overlooked. A well-pressed garment looks professional and polished. Turn the shirt right side out.
Using an iron set to the appropriate temperature for your shirt’s fabric, press your new seams flat. Press the seam allowances towards the back of the shirt or open them flat, depending on the shirt’s original construction.
A good press helps the fabric lie smoothly and sets your stitches. It makes all the difference in the final appearance of your fitted shirt.
Common Mistakes to Avoid
Cutting Too Soon
Many eager beginners cut away excess fabric immediately after marking or pinning. This is a critical mistake. Once fabric is cut, it cannot be added back. Always baste and test the fit before making any permanent cuts.
Cutting before a final fitting can lead to a shirt that’s too tight or uneven. It’s much easier to adjust a basted seam than to repair a permanently cut one.
Not Testing the Fit Thoroughly
A quick glance in the mirror isn’t enough. You need to move, sit, and raise your arms while wearing the basted shirt. Overlooking this step can result in a shirt that looks good standing still but is uncomfortable or restrictive in motion.
Ensure the shirt allows for a full range of movement without pulling or straining. Adjustments made at the basting stage are quick and simple, saving you from having to unpick permanent stitches.
Ignoring Seam Allowance
When marking new seams, remember that your sewing machine will stitch a certain distance from the edge of the fabric. Your marks should represent the final stitch line, not where you plan to cut the fabric.
Always leave enough seam allowance (typically 1/2 to 5/8 inch) beyond your stitch line for trimming and finishing. Insufficient seam allowance makes it difficult to finish seams properly and makes the garment prone to tearing.
Uneven Stitching
Sewing too fast or not guiding the fabric properly can lead to wavy or crooked seams. These imperfections are very noticeable on a fitted garment and detract from the tailored look.
Take your time, guiding the fabric steadily with both hands. Practice on scrap fabric if you’re unsure. Slow, consistent stitching produces neat, straight seams that enhance the shirt’s appearance.
Troubleshooting
Shirt Feels Too Tight After Stitching
If your shirt feels too restrictive, it means you took in too much fabric. Don’t worry; this is often fixable. Carefully use your seam ripper to remove the permanent stitches along the tight areas.
Once unpicked, re-pin the seams, giving yourself a little more ease. Baste again, try on the shirt, and then re-stitch once you’re comfortable with the new fit. It’s better to be slightly loose than too tight.
Fabric Bunching or Puckering Along Seams
Bunching often occurs if your machine’s tension is off or if you’re pulling the fabric while sewing. First, check your machine’s tension settings and adjust if necessary.
Ensure you’re letting the feed dogs do the work, guiding the fabric gently but not pulling or pushing it through the machine. Using a walking foot can also help with tricky fabrics prone to puckering.
Seams Look Wavy or Crooked
Wavy seams are usually a sign of inconsistent sewing speed or poor fabric guidance. This can also happen if your pins aren’t holding the fabric securely enough.
Unpick the wavy section and re-sew it slowly and steadily. Make sure your pins are perpendicular to the seam line and placed frequently. Practice sewing straight lines on scrap fabric to build confidence and muscle memory.
Key Takeaways
- Always measure and mark carefully for precise adjustments.
- Baste your seams and test the fit thoroughly before permanent stitching.
- Leave adequate seam allowance when trimming to allow for proper finishing.
- Press your seams after stitching for a professional, crisp finish.
- Patience and attention to detail are key to a successful project.
- Don’t be afraid to unpick stitches and try again if the fit isn’t right.
Frequently Asked Questions
Can I do this without a sewing machine?
While possible, hand-sewing a fitted shirt is very time-consuming and requires significant skill to achieve durable, straight seams. A sewing machine is highly recommended for best results and efficiency.
If you’re hand-sewing, use a strong backstitch for durability and ensure your stitches are small and even. This will provide a more tailored appearance.
What if my shirt is too big in the shoulders?
Altering shoulder width is a much more advanced tailoring task, often requiring deconstructing the sleeve and collar. This guide focuses on fitting the body and sleeves from the armpit down.
For shirts that are too big in the shoulders, it’s generally best to find a different size. If you’re determined, seek out a professional tailor or a more advanced sewing tutorial.
How much can I take in a shirt?
You can take in a significant amount of fabric, especially from the side seams and back darts, as long as the shoulders fit well. However, avoid making it so tight that it restricts movement or pulls excessively across the chest.
The goal is a comfortably fitted look, not a skin-tight one. Always test the fit thoroughly after basting to ensure you haven’t over-adjusted.
Is it hard to fit a patterned shirt?
Fitting a patterned shirt follows the same steps as a solid one. The main challenge can be matching patterns if you’re altering areas where patterns meet, like side seams.
While not strictly necessary for a fitted shirt, experienced sewers might try to align patterns at the new seam lines for a very polished look. For beginners, focus on the fit first.
Our Top Recommended Finds
- Brother CS6000i Sewing Machine: A versatile and user-friendly machine perfect for beginners and intermediate sewers, offering a good range of stitches.
- Dritz Tailor’s Chalk Set: Essential for clear, temporary markings on various fabrics, easily brushed away after use.
- Fiskars Amplify Fabric Shears: High-quality, sharp scissors designed for cutting fabric cleanly and precisely, reducing fraying.
Mastering Your Wardrobe, One Stitch at a Time
Transforming an ill-fitting shirt into a perfectly tailored garment is incredibly rewarding. It’s a skill that empowers you to take control of your wardrobe, ensuring every button-up looks like it was custom-made just for you. This practical guide provides the foundation for that transformation.
Don’t let a loose fit diminish your style. Grab your tools, follow these steps, and experience the satisfaction of wearing a shirt that truly fits. Your confidence will thank you.