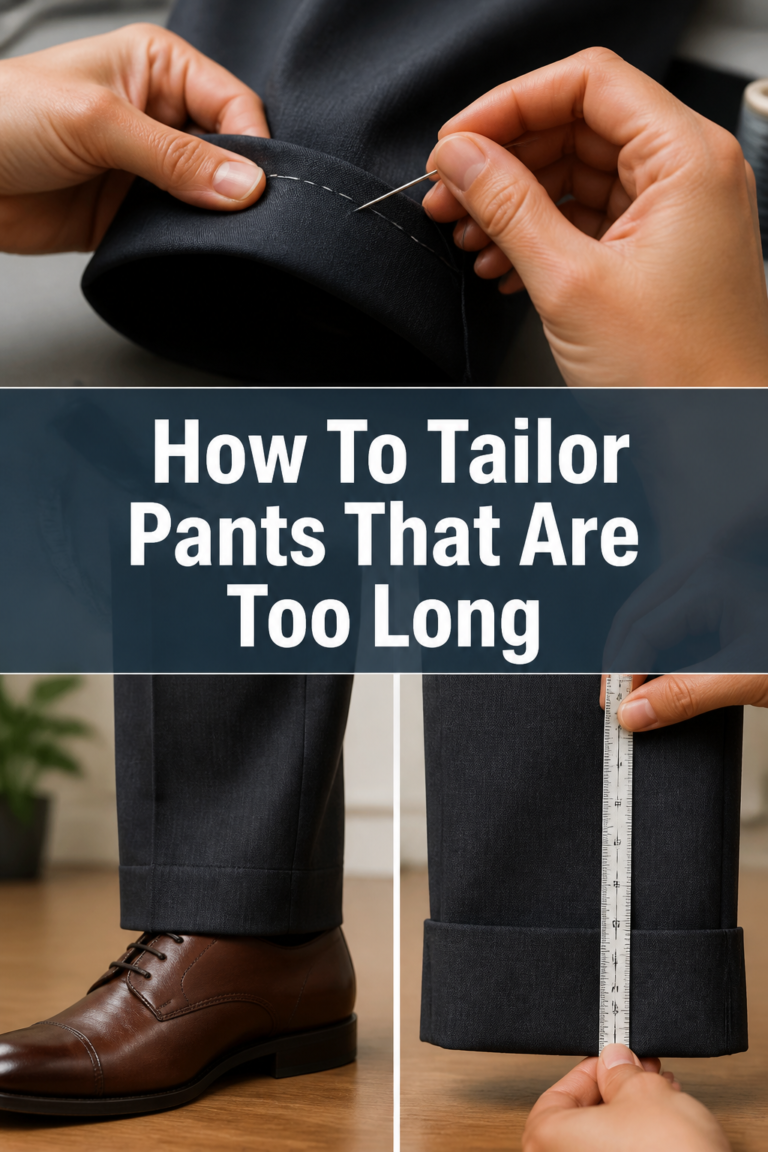
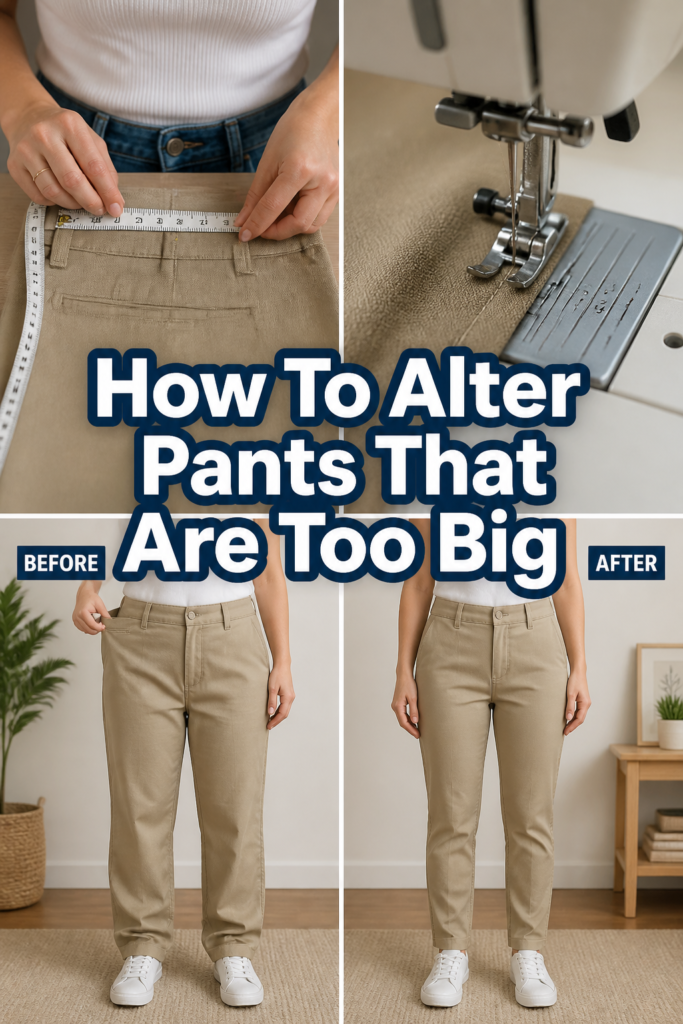
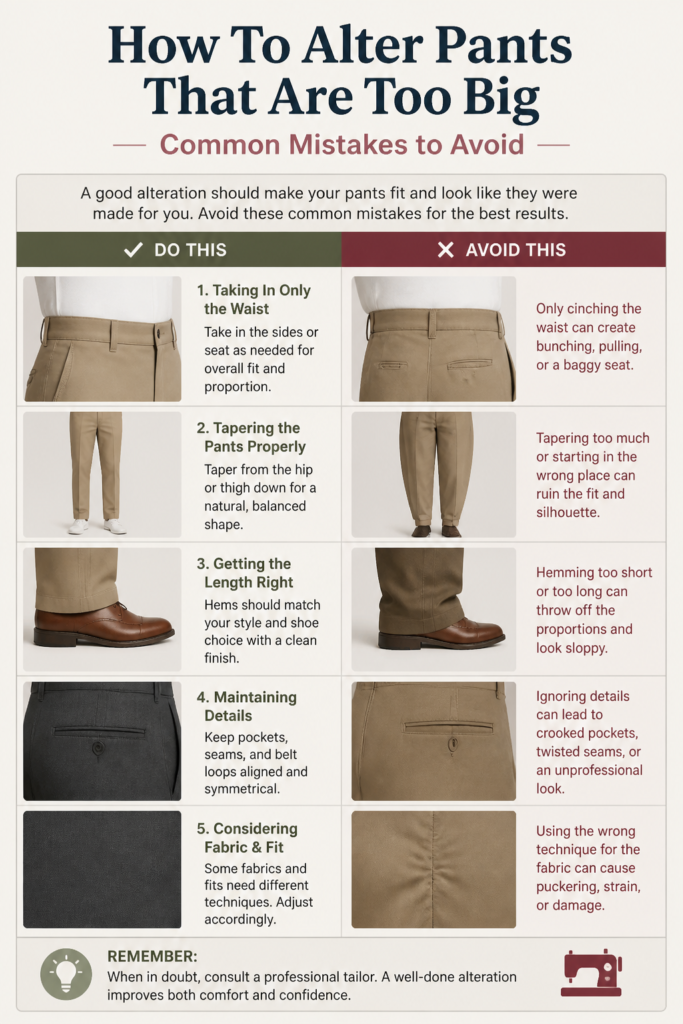
👖 How To Alter Pants That Are Too Big
Have you ever found a great pair of pants, only to realize they’re a size too generous? It’s a common dilemma, and one I’ve faced many times myself. Learning to tailor your own clothes can save you money and ensure a perfect fit every time. This guide will walk you through making those oversized pants fit just right.
Quick Overview
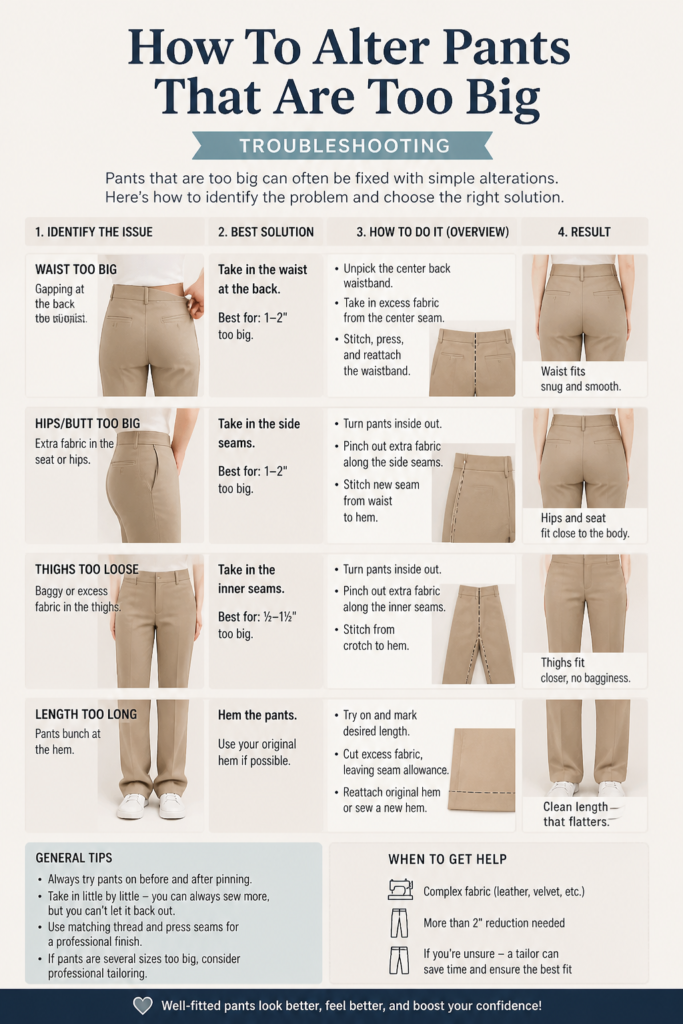
This guide empowers you to resize pants that are too big, primarily focusing on the waist, seat, and optionally the legs. You will learn to measure, mark, sew, and finish your alterations for a professional look.
- Time needed: 2-4 hours (depending on experience and complexity)
- Difficulty: Intermediate
- What you’ll need: Sewing machine, thread, scissors, pins, seam ripper, measuring tape, tailor’s chalk, iron, ruler.
Step-by-Step Instructions
Step 1: Gather Your Tools and Prepare Your Workspace
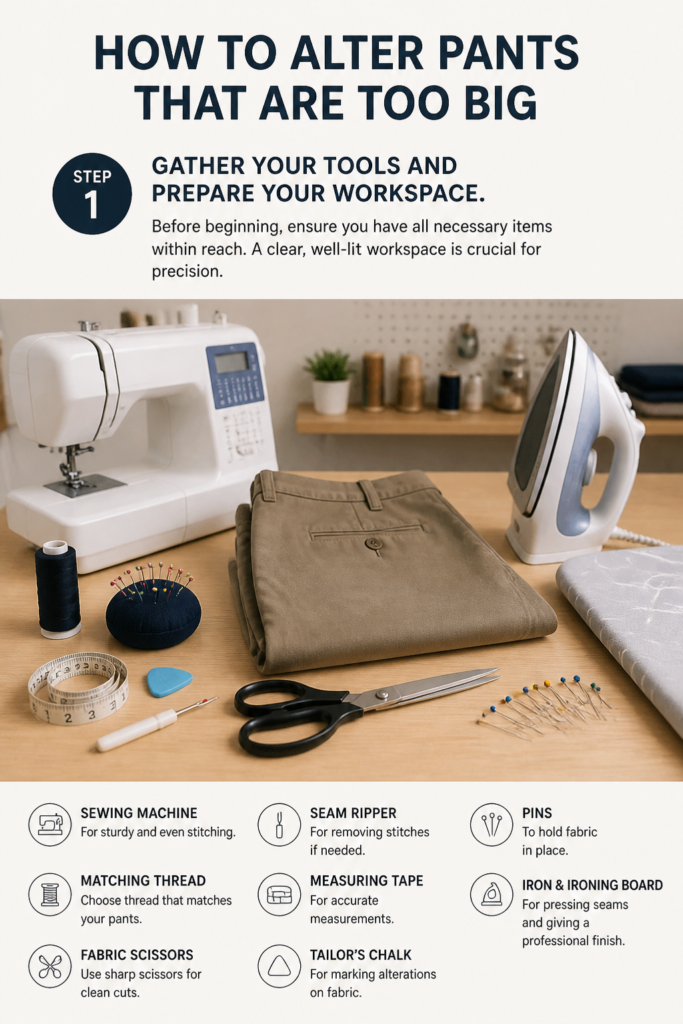
Before beginning, ensure you have all necessary items within reach. A clear, well-lit workspace is crucial for precision. This includes your sewing machine, thread that matches your pants, sharp fabric scissors, and a seam ripper.
You will also need a measuring tape, tailor’s chalk for marking, and plenty of pins. An iron and ironing board are essential for pressing seams.
Step 2: Try On and Pin for the Perfect Fit
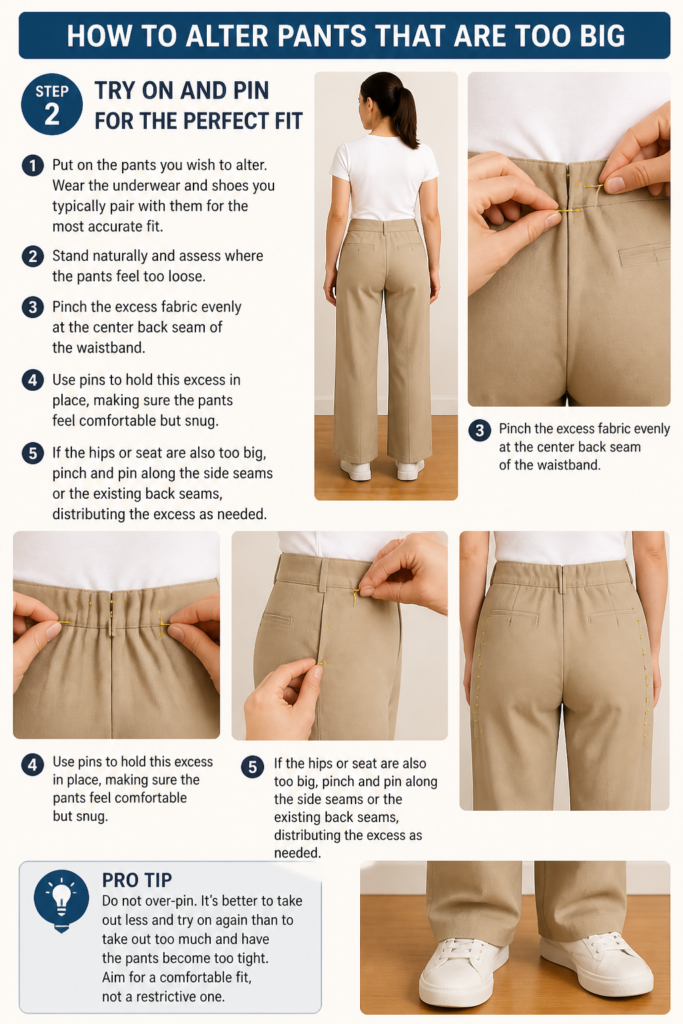
Put on the pants you wish to alter. Wear the underwear and shoes you typically pair with them for the most accurate fit. Stand naturally and assess where the pants feel too loose.
Pinch the excess fabric evenly at the center back seam of the waistband. Use pins to hold this excess in place, making sure the pants feel comfortable but snug. If the hips or seat are also too big, pinch and pin along the side seams or the existing back seams, distributing the excess as needed.
Pro Tip: Do not over-pin. It’s better to take out less and try on again than to take out too much and have the pants become too tight. Aim for a comfortable fit, not a restrictive one.
Step 3: Mark Your Alteration Lines
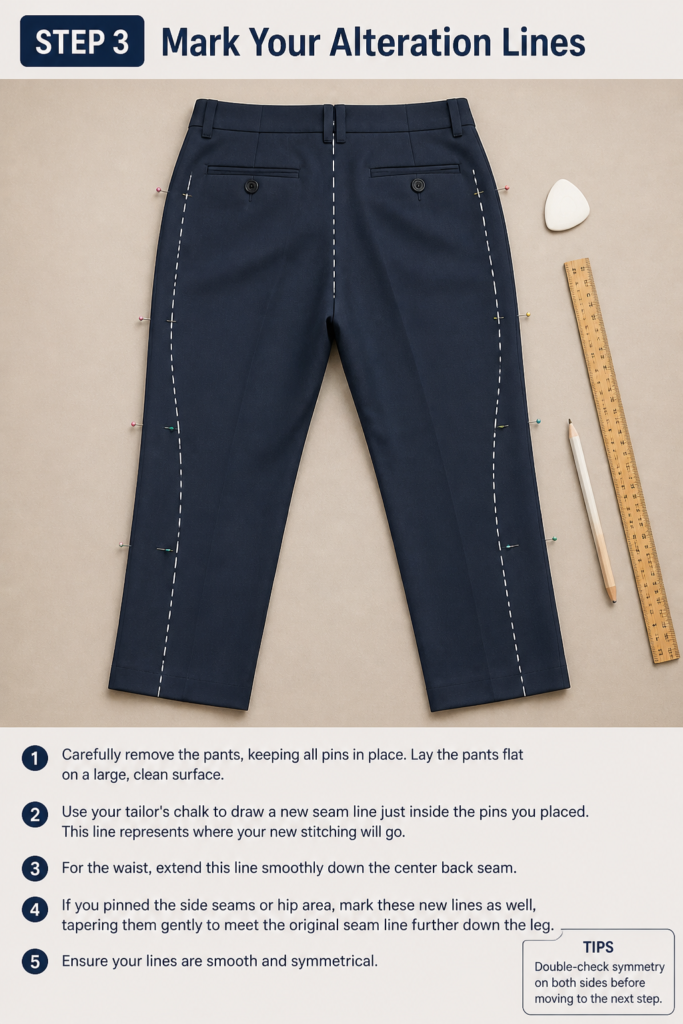
Carefully remove the pants, keeping all pins in place. Lay the pants flat on a large, clean surface. Use your tailor’s chalk to draw a new seam line just inside the pins you placed. This line represents where your new stitching will go.
For the waist, extend this line smoothly down the center back seam. If you pinned the side seams or hip area, mark these new lines as well, tapering them gently to meet the original seam line further down the leg. Ensure your lines are smooth and symmetrical.
Step 4: Deconstruct the Waistband (If Necessary)
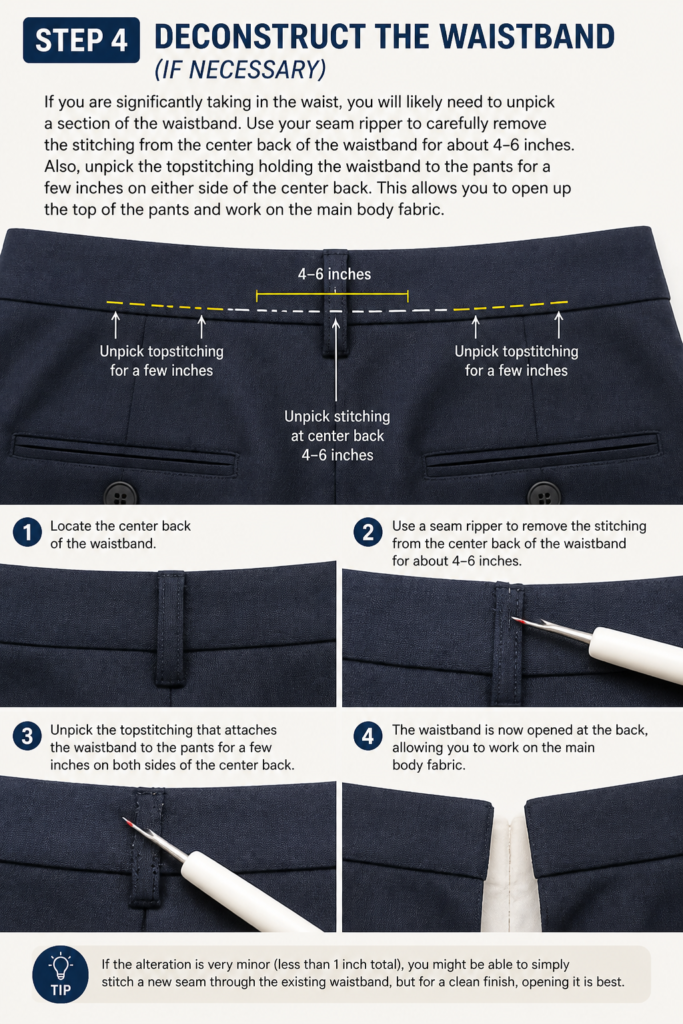
If you are significantly taking in the waist, you will likely need to unpick a section of the waistband. Use your seam ripper to carefully remove the stitching from the center back of the waistband for about 4-6 inches. Also, unpick the topstitching holding the waistband to the pants for a few inches on either side of the center back.
This allows you to open up the top of the pants and work on the main body fabric. If the alteration is very minor (less than 1 inch total), you might be able to simply stitch a new seam through the existing waistband, but for a clean finish, opening it is best.
Step 5: Stitch Your New Seams
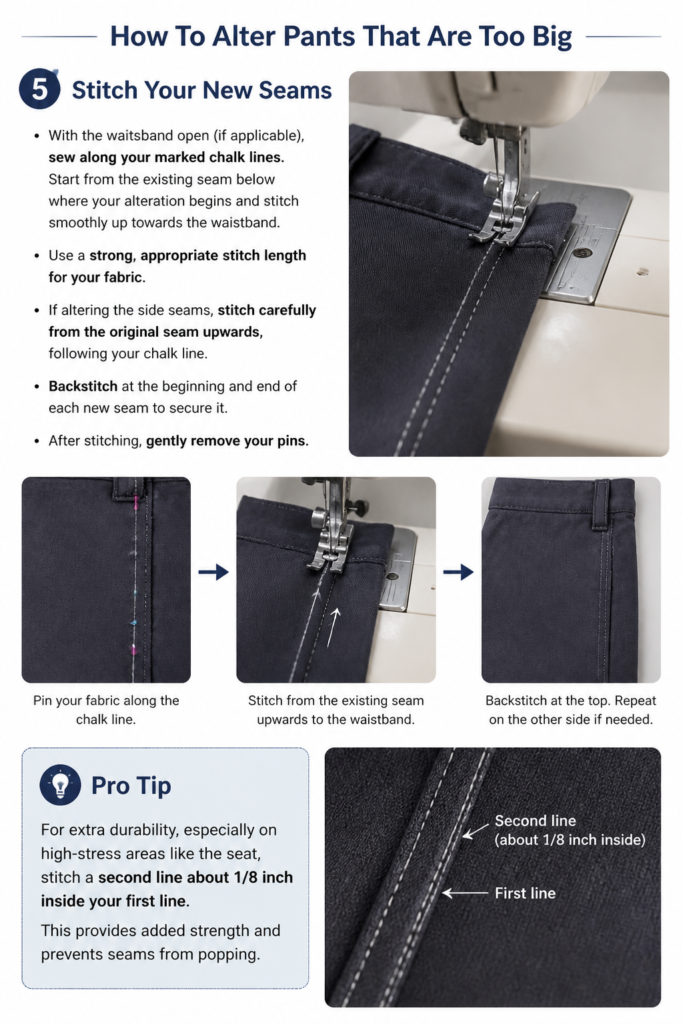
With the waistband open (if applicable), sew along your marked chalk lines. Start from the existing seam below where your alteration begins and stitch smoothly up towards the waistband. Use a strong, appropriate stitch length for your fabric.
If altering the side seams, stitch carefully from the original seam upwards, following your chalk line. Backstitch at the beginning and end of each new seam to secure it. After stitching, gently remove your pins.
Pro Tip: For extra durability, especially on high-stress areas like the seat, stitch a second line about 1/8 inch inside your first line. This provides added strength and prevents seams from popping.
Step 6: Trim and Finish Seams
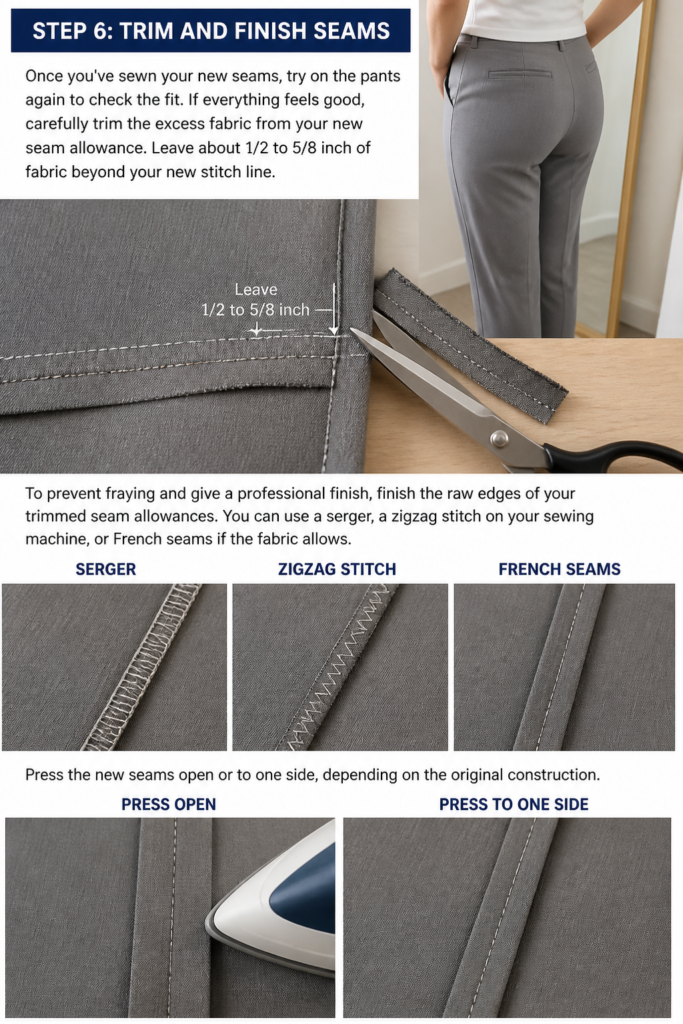
Once you’ve sewn your new seams, try on the pants again to check the fit. If everything feels good, carefully trim the excess fabric from your new seam allowance. Leave about 1/2 to 5/8 inch of fabric beyond your new stitch line.
To prevent fraying and give a professional finish, finish the raw edges of your trimmed seam allowances. You can use a serger, a zigzag stitch on your sewing machine, or French seams if the fabric allows. Press the new seams open or to one side, depending on the original construction.
Step 7: Reattach the Waistband
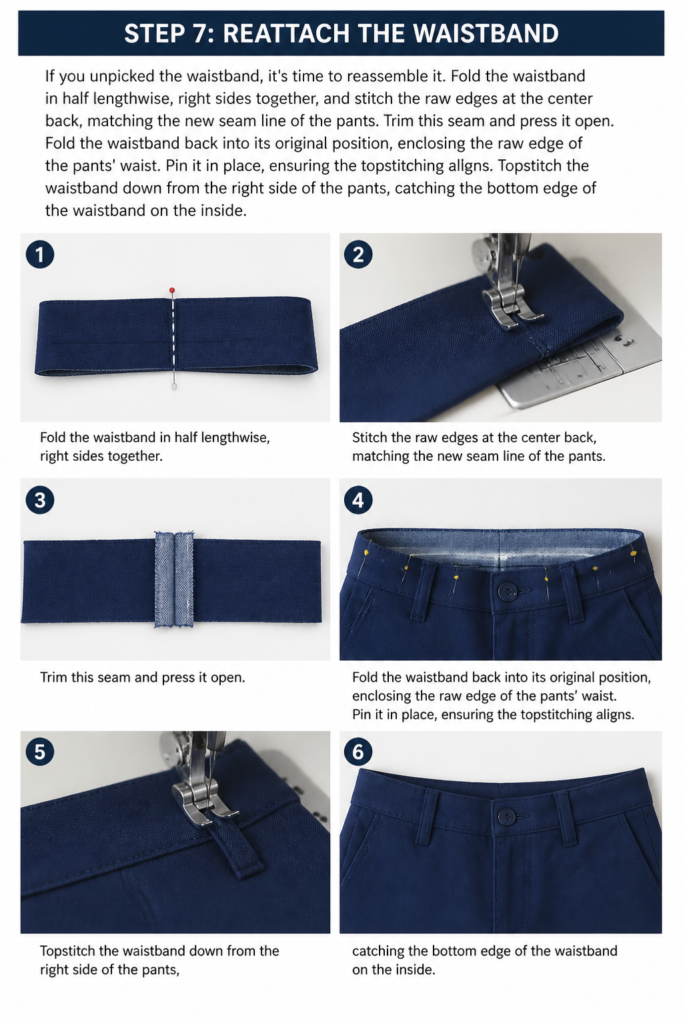
If you unpicked the waistband, it’s time to reassemble it. Fold the waistband in half lengthwise, right sides together, and stitch the raw edges at the center back, matching the new seam line of the pants. Trim this seam and press it open.
Fold the waistband back into its original position, enclosing the raw edge of the pants’ waist. Pin it in place, ensuring the topstitching aligns. Topstitch the waistband down from the right side of the pants, catching the bottom edge of the waistband on the inside.
Step 8: Press Your Work Thoroughly
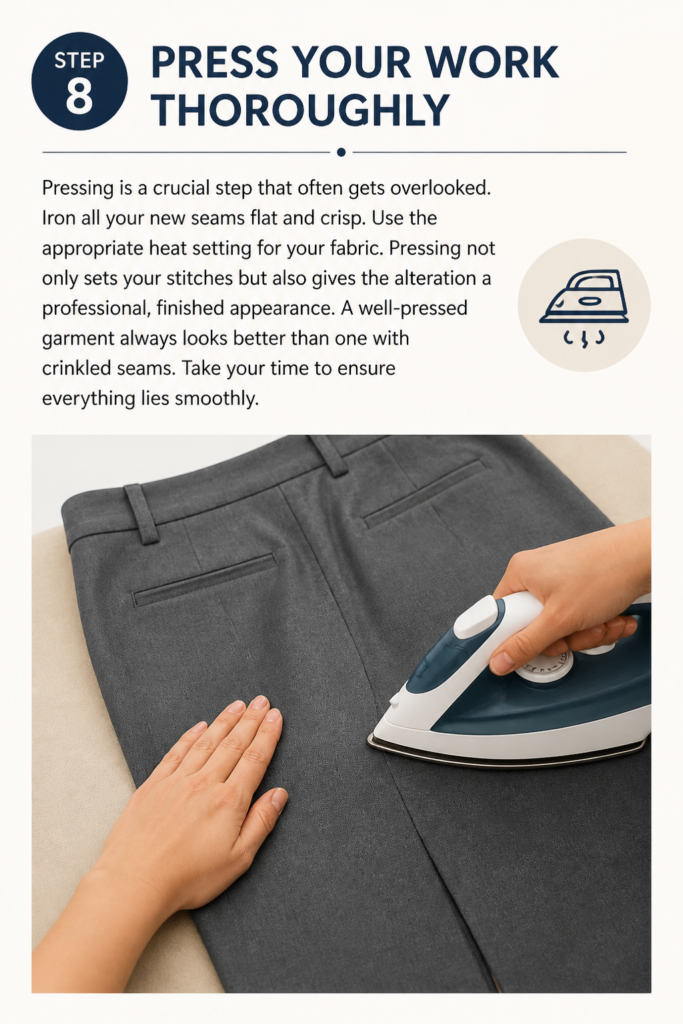
Pressing is a crucial step that often gets overlooked. Iron all your new seams flat and crisp. Use the appropriate heat setting for your fabric. Pressing not only sets your stitches but also gives the alteration a professional, finished appearance.
A well-pressed garment always looks better than one with crinkled seams. Take your time to ensure everything lies smoothly.
Step 9: Final Try-On and Adjustments

Put on your newly altered pants one last time. Check the fit in different positions – standing, sitting, walking. Make sure there are no uncomfortable pulls or puckers. If you find any minor issues, now is the time to make small adjustments.
If the pants are still a little loose, you can take in a tiny bit more. If they are too tight, carefully unpick a few stitches and release the seam slightly. Small tweaks can make a big difference in comfort and appearance.
Common Mistakes to Avoid
Taking Out Too Much Fabric
This is perhaps the most common and frustrating mistake. It is far easier to take in more fabric than to let out a seam that has been cut. Always err on the side of caution. Make your initial alteration conservative, then try the pants on before trimming any excess fabric.
Uneven Alteration Lines
Drawing wobbly or uneven lines can lead to a crooked fit. Use a tailor’s chalk or fabric pen and a ruler to ensure your lines are straight and smooth. This precision translates directly to a more professional-looking final product. Check for symmetry by folding the pants or using a measuring tape.
Skipping Seam Finishing
Leaving raw seam edges unfinshed is a recipe for disaster. The fabric will fray over time, weakening your stitches and potentially causing the alteration to come undone. Always use a zigzag stitch, serger, or other method to enclose or finish your raw seam allowances.
Neglecting to Press
Pressing is not just about removing wrinkles; it’s an integral part of the sewing process. Pressing each seam as you go helps to set stitches, shape the garment, and gives a crisp, professional finish. Skipping this step makes your alterations look homemade rather than custom-tailored.
Troubleshooting
Pants Still Feel Too Loose After Alteration
If your pants are still baggy after your first alteration, it means you didn’t take in enough fabric. Carefully re-pin the excess while wearing them, focusing on the areas that are still loose. Unpick your previous stitching, redraw your lines slightly further in, and re-sew. Remember to try on again before trimming.
Pants Are Too Tight After Alteration
If you’ve taken in too much, don’t panic. Gently use your seam ripper to unpick the new stitching a small amount at a time. Try the pants on after releasing a few stitches. If you trimmed the seam allowance, you might have limited fabric to work with. If you only took in a small amount, you might be able to release it enough to be comfortable.
Waistband Doesn’t Lie Flat or Looks Bulky
This often happens if the waistband wasn’t reattached smoothly or if too much fabric was left in the seam allowance of the waistband itself. Ensure you trim the waistband’s seam allowance to reduce bulk before re-topstitching. When reattaching, carefully pin all layers to prevent shifting and ensure the topstitching catches both sides of the waistband. Pressing the waistband thoroughly after reattachment helps flatten it.
Key Takeaways
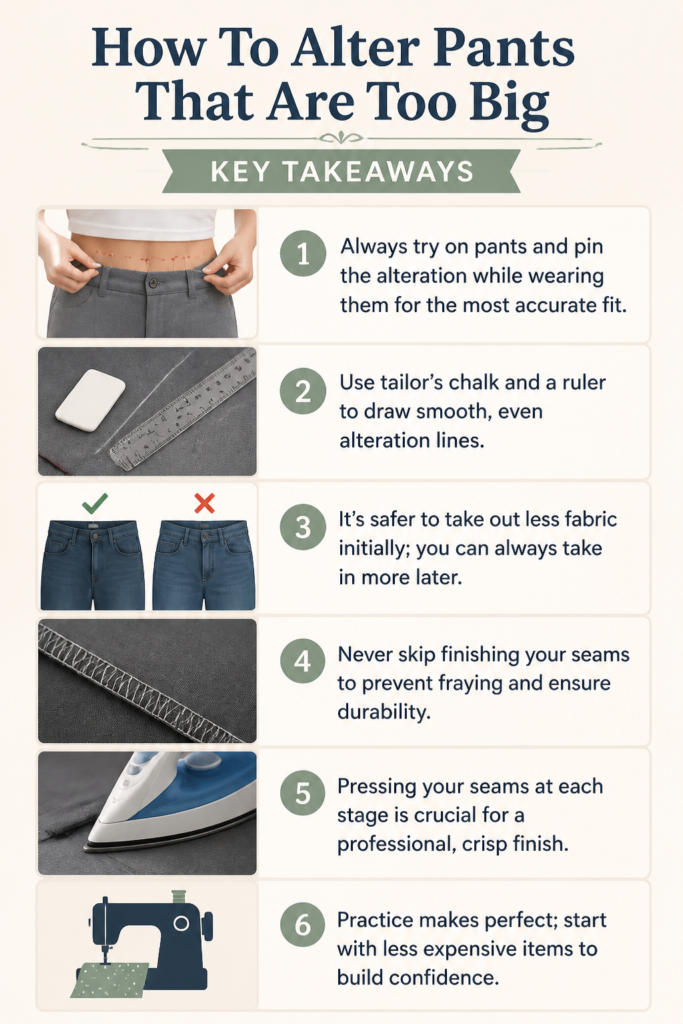
- Always try on pants and pin the alteration while wearing them for the most accurate fit.
- Use tailor’s chalk and a ruler to draw smooth, even alteration lines.
- It’s safer to take out less fabric initially; you can always take in more later.
- Never skip finishing your seams to prevent fraying and ensure durability.
- Pressing your seams at each stage is crucial for a professional, crisp finish.
- Practice makes perfect; start with less expensive items to build confidence.
Frequently Asked Questions

Can I alter pants that are several sizes too big?
Yes, you can, but it becomes more complex. Altering pants more than two sizes larger might require significant reshaping beyond just the waist and side seams, potentially involving the pockets, crotch curve, and leg width. For very large alterations, consider consulting a professional tailor or starting with a pair that’s only slightly too big.
Do I need a sewing machine for this alteration?
While possible to hand-sew, a sewing machine will provide stronger, more consistent stitches, which are essential for durable pants. Hand-sewing is suitable for very minor adjustments or temporary fixes, but for a lasting alteration, a machine is highly recommended.
How do I know what thread color to use?
Always choose a thread color that matches your pants as closely as possible. If you can’t find an exact match, opt for a shade slightly darker than the fabric, as it tends to blend in better than a lighter shade. Use good quality polyester all-purpose thread.
What if my pants have belt loops?
If you’re taking in the waist at the center back, you might need to temporarily remove the belt loop located at the center back. Once your alteration is complete and the waistband is reattached, simply re-sew the belt loop back into its original position, centered over the new seam.
Our Top Recommended Finds
- Quality Fabric Scissors: Sharp scissors make precise cuts, essential for neat alterations. Look for brands known for durability.
- Tailor’s Chalk Wheel: This tool provides a fine, accurate line that’s easy to see and brushes away cleanly.
- Seam Ripper with a Comfortable Handle: You’ll be doing some unpicking, so a sharp, ergonomic seam ripper is a must-have.
Transform Your Wardrobe Today
Don’t let ill-fitting pants gather dust in your closet any longer. Taking the time to alter them yourself is a rewarding skill that enhances your entire wardrobe. Imagine the confidence of wearing clothes that fit you perfectly, custom-tailored by your own hands.
Start with a pair of less-loved pants to build your confidence, then move on to your favorites. This skill opens up a world of possibilities for personalizing your style and making the most of your clothing investments. Pick up your tools and get started on your first alteration project this week!