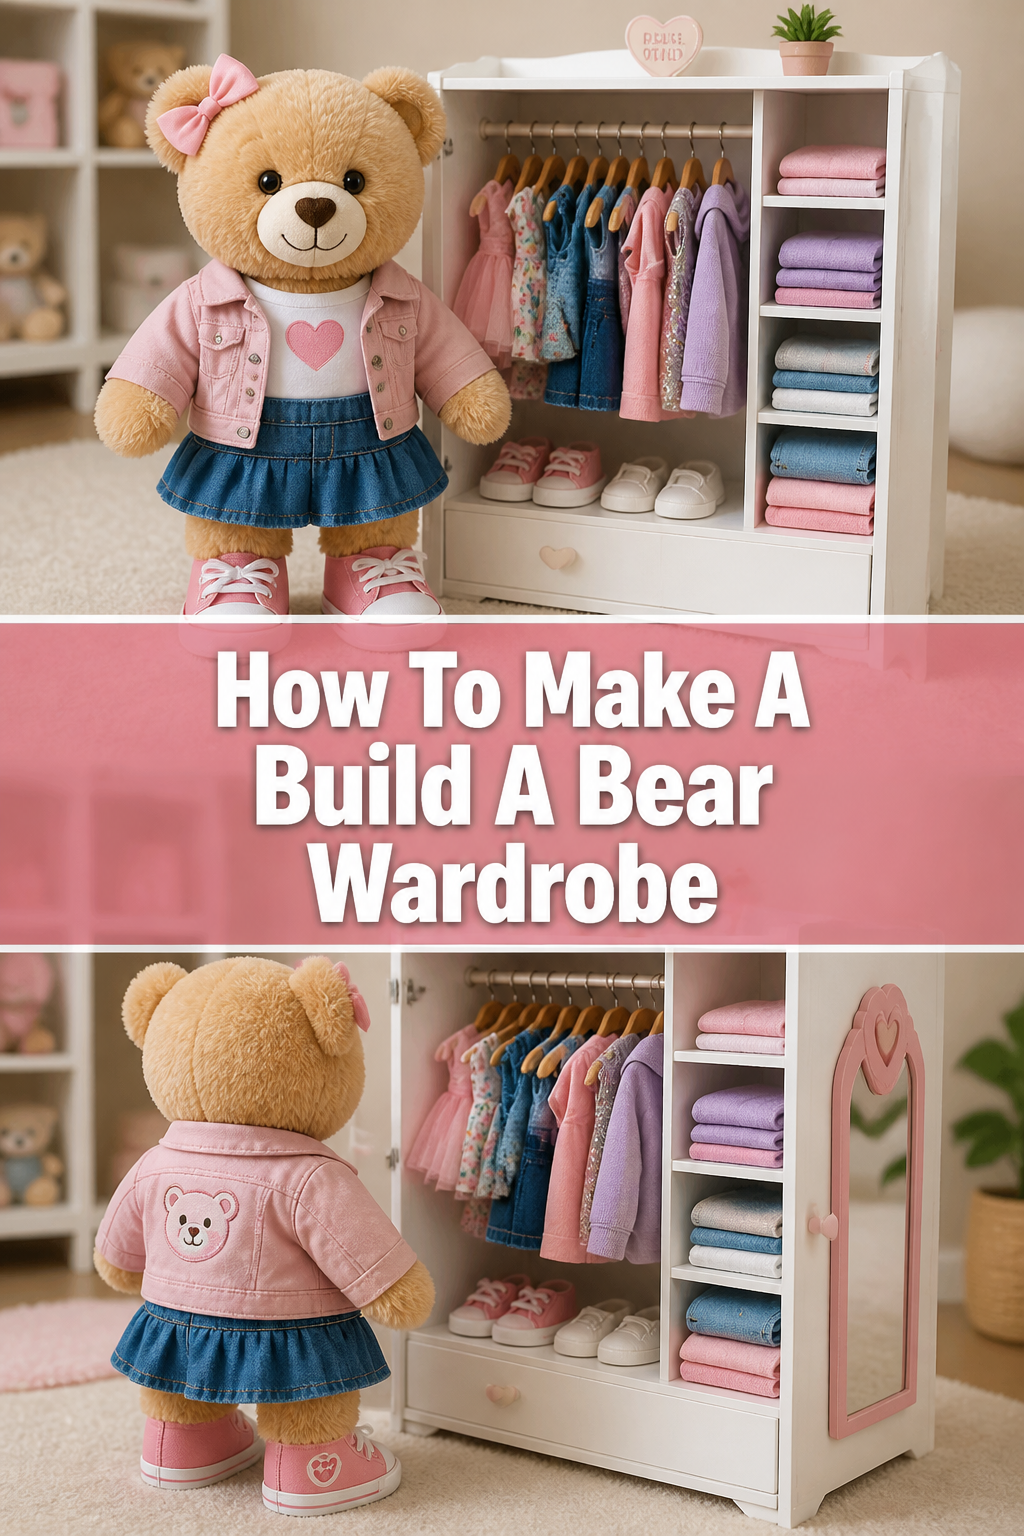
🐻 How To Make A Build A Bear Wardrobe
Creating a miniature wardrobe for your Build A Bear collection is a delightful project. It adds charm and organization to your beloved plush friends’ outfits. I’ve spent countless hours crafting tiny furniture, and there’s a real joy in seeing those tiny clothes neatly displayed.
This guide will walk you through every step, ensuring your plush pals have the stylish storage they deserve. You’ll be surprised how simple it is to bring this functional decor to life.
Quick Overview
Transforming simple craft materials into a charming Build A Bear wardrobe is a rewarding experience. This project allows for creativity and provides a practical storage solution. You’ll finish with a custom-built piece perfect for any miniature fashionista.
- Time needed: 3-5 hours (including drying time)
- Difficulty: Beginner to Intermediate
- What you’ll need: Craft sticks, strong craft glue, paint, small dowel or skewer, decorative paper
Step-by-Step Instructions
Step 1: Gather Your Materials
Before you begin building, collect everything you’ll need. Having all your supplies ready saves time and keeps your workflow smooth. This initial preparation makes the entire process much more enjoyable.
Collect your craft sticks (regular and jumbo sizes are useful).
Ensure you have a reliable craft glue that dries clear and strong.
Pick out your desired paint colors for the wardrobe’s exterior and interior.
Find a small dowel or bamboo skewer for the hanging rod.
Grab decorative paper, fabric scraps, or even miniature stickers for personalization.
Don’t forget scissors, a ruler, a pencil, and a craft knife for precise cuts.
Pro Tip: Opt for quick-drying, non-toxic craft glue. This speeds up assembly and ensures safety if little hands are helping. Wood glue also works wonderfully for a strong bond.
Step 2: Plan Your Design and Measurements
A clear plan prevents mistakes and helps you visualize the finished wardrobe. Take a moment to sketch out your ideas and measure carefully. This step is crucial for achieving a well-proportioned piece.
Decide on the overall dimensions of your wardrobe. A good starting point is about 10-12 inches tall, 6-8 inches wide, and 3-4 inches deep.
Sketch a simple design, noting where shelves or hanging rods will go.
Measure the length of your craft sticks and plan cuts accordingly. You’ll need pieces for the front, back, sides, top, and bottom.
Consider how many sections you want – perhaps a full hanging space or a combination of hanging and shelves.
Step 3: Build the Main Frame
The frame forms the backbone of your wardrobe. Careful assembly here ensures stability and a professional look. Work on a flat surface to keep everything level.
Cut craft sticks to create four equal pieces for the side panels’ height.
Cut more sticks for the top and bottom pieces, matching your chosen width.
Glue two craft sticks together side-by-side for each panel to create solid surfaces. Repeat this until you have enough pieces for the front, back, sides, top, and bottom.
Assemble the back panel first by gluing several sticks together to form a solid rectangle.
Attach the two side panels to the back panel, forming a ‘U’ shape. Hold them in place or use clamps while the glue dries.
Glue the bottom piece between the side panels, ensuring it’s flush with the bottom edges.
Add the top piece in the same manner.
Reinforce all corners with additional small pieces of craft stick if desired, gluing them on the inside for extra strength.
Step 4: Add Interior Shelves and Hanging Rod
Now it’s time to make the wardrobe functional. Shelves and a hanging rod provide distinct storage areas for different types of clothing. This step brings your design to life.
Measure and cut craft sticks to the desired length for your shelves. These should fit snugly across the width of your wardrobe.
Glue the shelves into place, ensuring they are level. You might want to use a ruler to mark identical heights on both side panels.
For the hanging rod, mark two spots on the inside of the side panels, slightly above where the clothes will hang.
Carefully pierce small holes with a sharp tool (like an awl or the tip of a craft knife) at these marks.
Cut your dowel or skewer to the correct length. It should fit between the holes with a little extra to secure it.
Insert the dowel into the holes and secure with a tiny drop of glue on each end for stability.
Step 5: Create the Wardrobe Doors
Doors give your wardrobe a finished look and keep clothes tidy. You can make single or double doors, depending on your preference. This step adds a polished touch.
Measure the opening of your wardrobe where the doors will go.
Cut craft sticks to create two door panels. Again, glue sticks side-by-side to form a solid surface for each door.
Attach small hinges to the side of the door and the side of the wardrobe frame. Miniature dollhouse hinges work perfectly.
Alternatively, for a simpler approach, you can create “swing” doors. Glue a thin strip of fabric or ribbon along the edge of the door and the frame. This creates a flexible hinge.
Add a small bead or button as a doorknob if desired.
Pro Tip: If using fabric hinges, make sure the fabric is thin but strong. Hot glue can be used here for a quick bond, but craft glue will offer a more durable hold over time.
Step 6: Paint and Decorate
This is where your wardrobe truly comes to life! Choose colors and patterns that match your Build A Bear’s personality or room decor. Painting and decorating allow for full creative expression.
Paint the entire wardrobe, inside and out, with acrylic craft paint. Apply multiple thin coats for a smooth, even finish.
Allow each coat to dry completely before applying the next.
Once dry, you can add decorative elements.
Glue on decorative paper to the back panel or inside the doors for a patterned lining.
Use small stencils, stickers, or even draw freehand designs on the exterior.
Consider adding tiny embellishments like rhinestones, glitter, or ribbon trim.
Step 7: Craft Miniature Hangers
What’s a wardrobe without hangers? These tiny accessories complete the look and make your wardrobe fully functional. They are surprisingly easy to make.
Bend paper clips into a hanger shape. Start by unbending the clip into a straight wire, then form the triangular bottom and hook top.
Alternatively, use floral wire. Cut small pieces, bend them into shape, and twist the ends to secure.
For a sturdier option, cut thin cardboard or plastic into hanger shapes. Punch a hole at the top and insert a small piece of bent wire for the hook.
Make enough hangers for your favorite Build A Bear outfits.
Step 8: Organize Your Collection
With your wardrobe complete, it’s time for the grand reveal! Arrange your Build A Bear clothes neatly inside. This final step is incredibly satisfying.
Hang miniature dresses, shirts, and jackets on the rod.
Fold pants, skirts, and accessories onto the shelves.
Store shoes or hats in smaller compartments or on the bottom shelf.
Step back and admire your organized and charming Build A Bear wardrobe.
Common Mistakes to Avoid
Ignoring Scale
One common error is making the wardrobe too large or too small for Build A Bear clothes. If it’s too big, it looks awkward; too small, and clothes won’t fit. Always measure your bear’s clothing before starting to ensure everything fits perfectly. A well-proportioned wardrobe enhances the overall aesthetic.
Using Weak Adhesives
Another pitfall is using glue that isn’t strong enough. School glue or temporary adhesives won’t hold craft sticks together long-term. This leads to a flimsy wardrobe that falls apart quickly. Invest in a good quality craft glue, wood glue, or even hot glue (for quick bonds, but ensure it’s secure). Strong glue provides durability.
Over-complicating the Design
It’s easy to get carried away with elaborate plans. Trying to add too many intricate details or complex moving parts can make the project frustrating and difficult to finish. Start with a simple, functional design. You can always add more decorative elements later once the basic structure is solid. Simplicity often yields the best results.
Skipping Prep Work
Rushing into assembly without cutting all pieces or gathering all materials is a common mistake. This leads to interruptions, mismatched parts, and frustration. Take the time to measure, cut, and organize everything at the beginning. Proper preparation makes the building process much smoother and more enjoyable.
Troubleshooting
Wardrobe Feels Flimsy
If your assembled wardrobe feels wobbly or weak, it’s likely due to insufficient glue or improper drying. Re-evaluate the joints. Add more glue to all seams, especially the corners, and hold them in place with clamps or heavy objects until completely dry. You can also glue small reinforcement pieces (tiny craft stick squares) into the inside corners for added stability. Patience with drying time is key.
Paint Looks Streaky
Streaky paint usually means you applied it too thickly or didn’t allow enough drying time between coats. To fix this, lightly sand down any uneven areas with fine-grit sandpaper. Apply another thin, even coat of paint, ensuring it’s not overloaded on the brush. Allow ample drying time, sometimes several hours, before applying subsequent coats. Multiple thin coats always look better than one thick one.
Hangers Don’t Hold Clothes
If your miniature hangers are too flimsy or clothes slip off, the material might be too thin or the shape incorrect. For wire hangers, use a slightly thicker gauge wire or double-up thin wires for strength. Ensure the hook is deep enough to stay on the rod and the bottom bar is wide enough to support the garment. Adding a tiny dab of glue to the hanger’s “shoulders” can also help clothes stay put. Experiment with different materials like thin cardboard for sturdier hangers.
Key Takeaways
- Planning is Essential: Always sketch your design and measure carefully before cutting and gluing.
- Strong Adhesive Matters: Use reliable craft glue or wood glue for durable construction.
- Patience with Drying: Allow ample time for glue and paint to dry between steps for a sturdy, neat finish.
- Personalize and Enjoy: Don’t be afraid to get creative with paint, paper, and embellishments to make it unique.
- Start Simple: Begin with a basic design and add complexity once you’re comfortable with the fundamentals.
Frequently Asked Questions
What if I don’t have craft sticks?
You can use other readily available materials. Sturdy cardboard (like from shipping boxes), foam board, or thin balsa wood sheets are excellent alternatives. Just ensure they are thick enough to hold their shape and can be easily cut and glued. The principles of assembly remain the same.
Can I make it bigger or smaller?
Absolutely! This guide provides general dimensions, but you can easily scale the wardrobe up or down. Simply adjust your initial measurements and the length of your craft sticks or other materials. For a smaller wardrobe, consider using popsicle sticks or even matchsticks (with care). For larger, consider wider craft sticks or balsa wood.
Is this project safe for kids?
With adult supervision, yes! Younger children can help with painting, decorating, and even gluing larger pieces. Adults should handle all cutting with craft knives or sharp scissors. Always use non-toxic paints and glues when working with children. This can be a wonderful parent-child crafting activity.
How do I store the wardrobe?
Once complete, your Build A Bear wardrobe is a charming display piece. You can place it on a shelf, in a dollhouse, or on a dresser. If you need to put it away, ensure it’s in a dry, safe spot where it won’t be crushed. Delicate embellishments might need extra care.
Our Top Recommended Finds
- Elmer’s Wood Glue Max: Provides an incredibly strong bond for craft stick projects, ensuring durability.
- Acrylic Craft Paint Set: Offers a wide range of colors, dries quickly, and is easy to clean up.
- Miniature Dollhouse Hinges: Perfect for creating functional doors that open and close smoothly.
Ready to Organize Your Bear’s Best Outfits?
Imagine the joy of seeing your Build A Bear’s tiny clothes neatly hung and folded, a miniature fashion statement all its own. This project is more than just crafting; it’s about creating a special space for cherished companions. It’s about adding a touch of personalized magic to their world.
Why wait? Gather your materials and begin crafting this charming wardrobe today. Your furry friends will thank you for their stylish new storage. You might even find yourself inspired to build more miniature furniture!