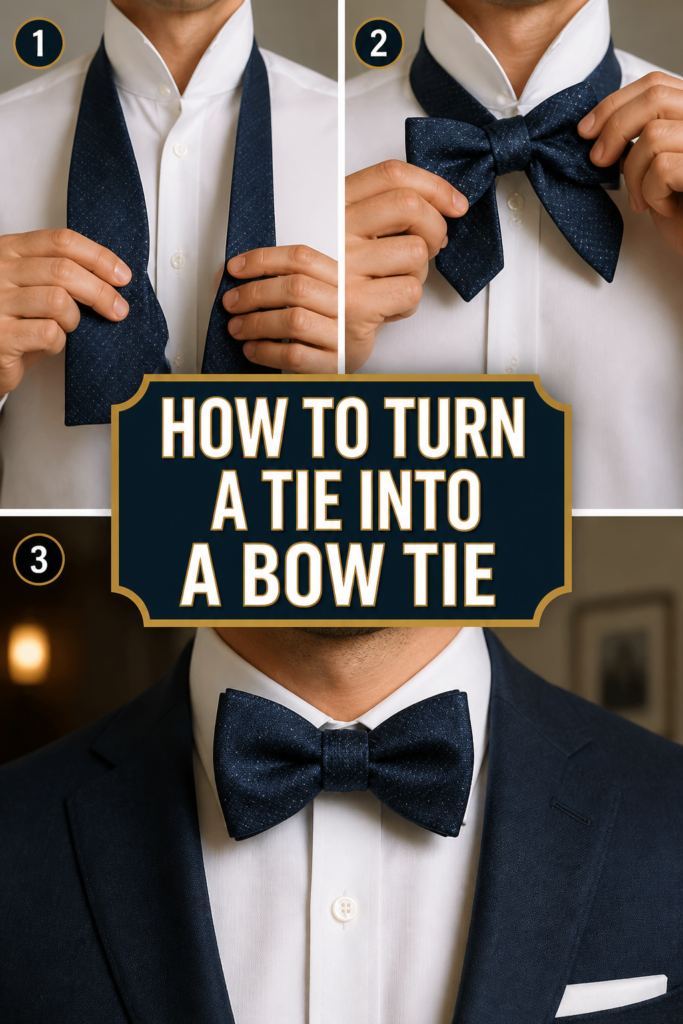
👔 How To Turn A Tie Into A Bow Tie
I remember finding a vintage silk necktie in a thrift store that had the most incredible paisley pattern I had ever seen.
The only problem was that the tie was stained at the very bottom and was far too wide for modern fashion trends.
Instead of tossing it aside, I decided to cut it up and transform it into a custom bow tie that I still wear to weddings today.
Quick Overview
This project allows you to breathe new life into old or damaged neckties while creating a unique accessory that fits your personal style perfectly.
- Time needed: 60 to 90 minutes
- Difficulty: Intermediate
- What you’ll need: An old necktie, fabric scissors, seam ripper, sewing machine or needle and thread, iron, and bow tie hardware.
Step-by-Step Instructions
Step 1: Deconstruct the Original Tie
Start by flipping the necktie over to the back side where you will see a thick, hand-sewn stitch holding the fabric together.
Use your seam ripper to carefully snag these stitches, being extremely gentle so you do not snag the delicate silk or polyester face fabric.
Remove the “guts” of the tie, which is the heavy white interlining material that gives the necktie its structure and weight.
Keep this interlining nearby because you might want to use pieces of it later to stiffen your new bow tie if the silk feels too thin.
Pro Tip: Most high-quality ties are sewn with a single “slip stitch” that can be pulled out in one long string once you find the right thread.
Step 2: Prepare and Flatten the Fabric
Lay the deconstructed fabric flat on your ironing board with the “wrong” side (the dull side) facing up toward you.
Set your iron to the appropriate heat setting for the material, usually the “Silk” or “Low” setting to avoid scorching the fibers.
Press out all the old creases and fold lines until the fabric is a completely flat, wide piece of material ready for cutting.
Check for any hidden stains or holes that were previously tucked away in the folds so you can avoid them when laying out your pattern.
Step 3: Measure Your Neck and Create a Template
Wrap a soft measuring tape around your neck exactly where your shirt collar sits to get your precise neck circumference.
Add two inches to this measurement to account for the overlap needed for the hardware and the adjustable slider mechanism.
Draft a paper template in the shape of a “butterfly” or “diamond” wing, which usually measures about 2.5 inches at its widest point.
Ensure the narrow “neck” portion of your template is about 1 inch wide so it can easily slide under a shirt collar without bunching up.
Pro Tip: If you have a bow tie you already love, simply trace it onto a piece of cardstock to create a perfect template.
Step 4: Cut the Fabric on the Bias
Position your template on the fabric at a 45-degree angle relative to the weave of the cloth, which is known as the “bias.”
Cutting on the bias is vital because it allows the fabric to stretch and recover, making the final knot look much more natural and full.
Trace four identical pieces of your template onto the fabric, ensuring you leave at least a half-inch of space between each piece for seam allowances.
Cut the pieces out slowly using very sharp fabric shears to prevent the silk from fraying or shifting as you move the blade.
Step 5: Pin and Sew the Main Pieces
Place two of the fabric pieces together with the “right” sides (the pretty, patterned sides) touching each other on the inside.
Pin the edges securely every inch to keep the slippery fabric from sliding around while you are working at the sewing machine.
Sew around the perimeter of the shape using a 1/4-inch seam allowance, but leave a small two-inch gap in the narrow neck section.
Repeat this process for the second set of fabric pieces so that you end up with two separate “wings” for your bow tie.
Step 6: Trim and Turn the Fabric
Clip the curves of the fabric by making tiny snips into the seam allowance, being careful not to cut through your actual stitches.
Reach through the small gap you left in the neck section and begin pulling the fabric right-side out very slowly.
Use a blunt tool like a chopstick or a specialized turning tool to push the corners out and create a crisp, clean edge.
Press the pieces flat with your iron again, making sure the seams are rolled right to the edge so the lining doesn’t show from the front.
Step 7: Attach the Adjustable Hardware
Slide the metal “T-hook” onto one end of the fabric and the adjustable slider onto the other end of the fabric strap.
Thread the end of the fabric through the slider, then through the hook, and back through the slider to create a loop that can change size.
Stitch the end of the fabric down securely to the slider using a needle and thread or a short line of stitches on your machine.
Tuck the raw edges of the opening you used for turning inside the tie and sew it shut with an invisible ladder stitch.
Pro Tip: Test the hardware by sliding it back and forth several times to ensure it doesn’t snag on any loose threads.
Common Mistakes to Avoid
Ignoring the Fabric Grain
Many people try to save fabric by cutting the pieces straight along the edge of the tie rather than on the bias.
This results in a stiff bow tie that twists awkwardly when you try to tie it and lacks the “spring” needed for a good knot.
Always take the time to find the 45-degree angle even if it means you have less fabric to work with from the original tie.
Skipping the Interlining
If you use a very thin silk tie without adding any internal support, the bow tie will look limp and saggy on your neck.
You should use a lightweight fusible interfacing or a piece of the original tie’s interlining to give the “wings” some body.
A bow tie needs a bit of “crunch” to hold its shape throughout a long evening or a formal event.
Forgetting the Seam Allowance
It is easy to trace a template and forget that the finished product will be smaller once the seams are sewn together.
If you do not account for that 1/4-inch or 1/2-inch border, your bow tie will end up looking tiny and disproportionate to your face.
Always draw your cutting lines slightly wider than you want the final accessory to be to ensure a proper fit.
Troubleshooting
The Fabric is Fraying Rapidly
Silk and satin are notorious for fraying as soon as they are cut, which can ruin your seam allowance before you even start sewing.
You can apply a very thin layer of “fray check” liquid to the edges of the cut pieces to seal the fibers in place.
Alternatively, use a zigzag stitch or an overlock stitch on the edges immediately after cutting to keep the fabric intact.
The Knot Looks Lumpy or Uneven
This usually happens when the internal seam allowances are too bulky or are not trimmed properly before the tie is turned right-side out.
Go back and trim the excess fabric inside the tie as close to the stitch line as possible without weakening the seam.
Make sure you have pressed the tie thoroughly with steam to flatten any internal bunching that might be occurring.
The Hardware is Too Loose
If the metal slider keeps moving while you are wearing the tie, the fabric you used might be too thin for the hardware size.
You can fix this by sewing a small “stop” stitch on the inside of the neckband to prevent the slider from moving past a certain point.
You can also try using a slightly wider piece of fabric for the neckband to create more friction against the metal slider.
Key Takeaways
- Always deconstruct the tie completely and press the fabric flat before you begin any cutting or measuring.
- Cutting your pattern pieces on the bias (45-degree angle) is the secret to a professional-looking knot.
- Use a template to ensure both sides of the bow tie are perfectly symmetrical and balanced.
- Don’t skip the interlining if your fabric is thin; structure is what makes a bow tie stand out.
- Invest in a quality bow tie hardware kit to make the final product adjustable and easy to put on.
- Practice your ladder stitch for a truly invisible finish when closing the turning gap.
Frequently Asked Questions
Can I turn a polyester tie into a bow tie?
Yes, polyester works very well because it is durable and holds a crease quite effectively when pressed with an iron.
Just be careful with the heat settings on your iron, as polyester can melt if the temperature is set too high.
How much fabric do I need from the original tie?
You generally need the widest part of the necktie to get enough surface area for the butterfly wings of the bow tie.
Most standard neckties have enough fabric to make one bow tie, provided the fabric is not heavily damaged or stained in the center.
Do I need a sewing machine for this project?
While a sewing machine makes the process much faster and the seams more durable, you can certainly sew a bow tie by hand.
If sewing by hand, use a backstitch for the main seams to ensure they can handle the tension of being tied and pulled.
What if my necktie has a very large pattern?
Large patterns can be tricky because they might look different on each side of the bow tie once the fabric is cut.
Try to “fussy cut” the fabric by centering the most interesting part of the pattern on the wings of your template.
Our Top Recommended Finds
- Ergonomic Seam Ripper: This tool makes deconstructing the old tie much faster and prevents hand fatigue during the tedious parts.
- Fabric Shears: A pair of professional-grade scissors will ensure your silk cuts are clean and free of jagged edges or pulls.
- Adjustable Bow Tie Hardware Kit: These kits usually include the hook, eye, and slider needed to make your tie fit any neck size.
Mastering the Art of Reclaimed Style
Turning a necktie into a bow tie is more than just a craft project; it is a way to preserve history and show off your creativity.
Once you master this technique, you can start looking at the tie rack in thrift stores as a gold mine for custom accessories.
Try experimenting with different shapes, such as the “pointed” diamond end or the “big butterfly” for a more vintage aesthetic.
Take one of your old, unused ties today and see how a few simple cuts can completely transform your wardrobe.