📰 How To Make A Newspaper Dress For Kids
Creating a newspaper dress for a child is a wonderfully imaginative project. It’s a fantastic way to spark creativity and teach about repurposing materials. I remember the joy on my niece’s face when we crafted her first “paper gown” for a school play.
This guide will walk you through every simple step, ensuring a fun and successful crafting adventure. You’ll soon have a unique, eco-friendly dress ready for play or a special event.
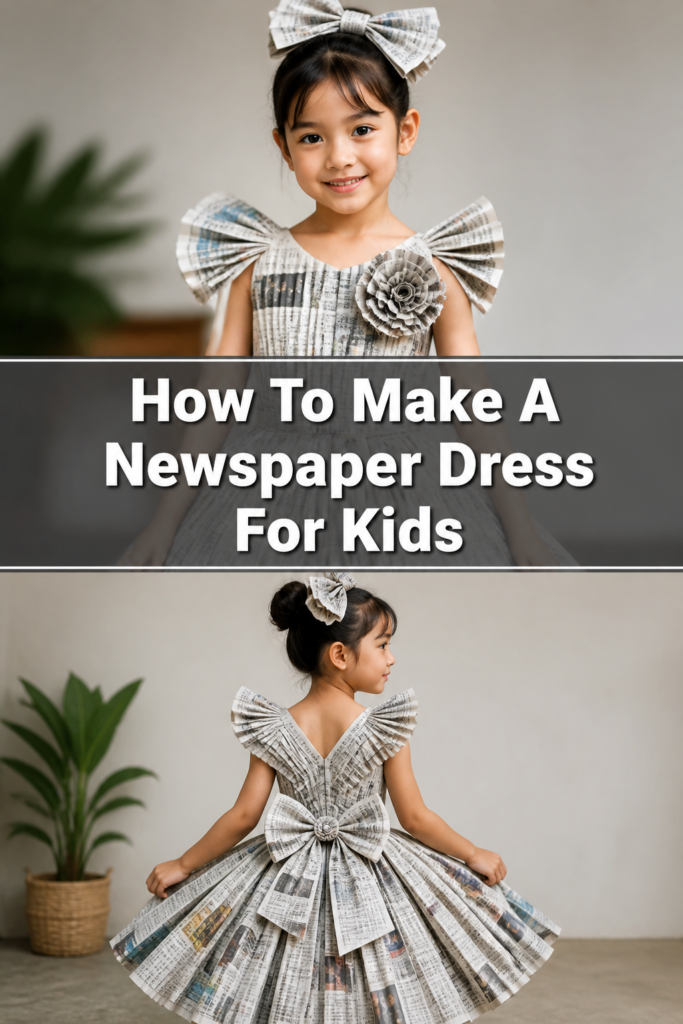
Quick Overview
Get ready to transform old newspapers into a stunning, wearable piece of art. This project is perfect for creative afternoons and yields impressive results.
- Time needed: 2-4 hours (plus drying time)
- Difficulty: Beginner
- What you’ll need: Newspapers, tape, glue, scissors, string, optional decorations
Step-by-Step Instructions
Step 1: Gather Your Materials
Before you begin, collect everything you’ll need in one organized spot. This saves time and keeps your crafting flow smooth. You’ll want plenty of newspapers, preferably the larger, broadsheet variety for bigger pieces.
Make sure your adhesive options include both clear tape and a good quality craft glue. Scissors that are comfortable to hold are also essential. A roll of string or elastic will be useful for measurements and structure.
Pro Tip: Collect newspapers a few days in advance. This ensures you have a consistent look if you prefer specific sections, like comics or plain text. Varying paper types can add interesting textures.
Step 2: Measure and Plan the Design
Take accurate measurements of the child’s body to ensure the dress fits well. You’ll need their chest circumference, waist circumference, and the desired length from shoulder to hem. Think about the style you want.
Will it be a simple A-line dress, or will it have a fuller skirt? Consider if you want sleeves or straps. Sketching a quick design helps visualize the final look and how you’ll assemble the pieces.
Step 3: Create the Bodice Base
Lay out several sheets of newspaper, overlapping them slightly, to form a large panel. Secure these overlaps with tape on both sides to create a sturdy, single sheet. This will be the foundation for the bodice.
Fold this large panel in half lengthwise. Draw half of the bodice shape on one side, including the neckline, armholes, and side seams. Cut along your drawn lines, then unfold the paper to reveal a symmetrical bodice front. Repeat this process for the back piece, making sure the back neckline is slightly higher.
Step 4: Form the Skirt Panels
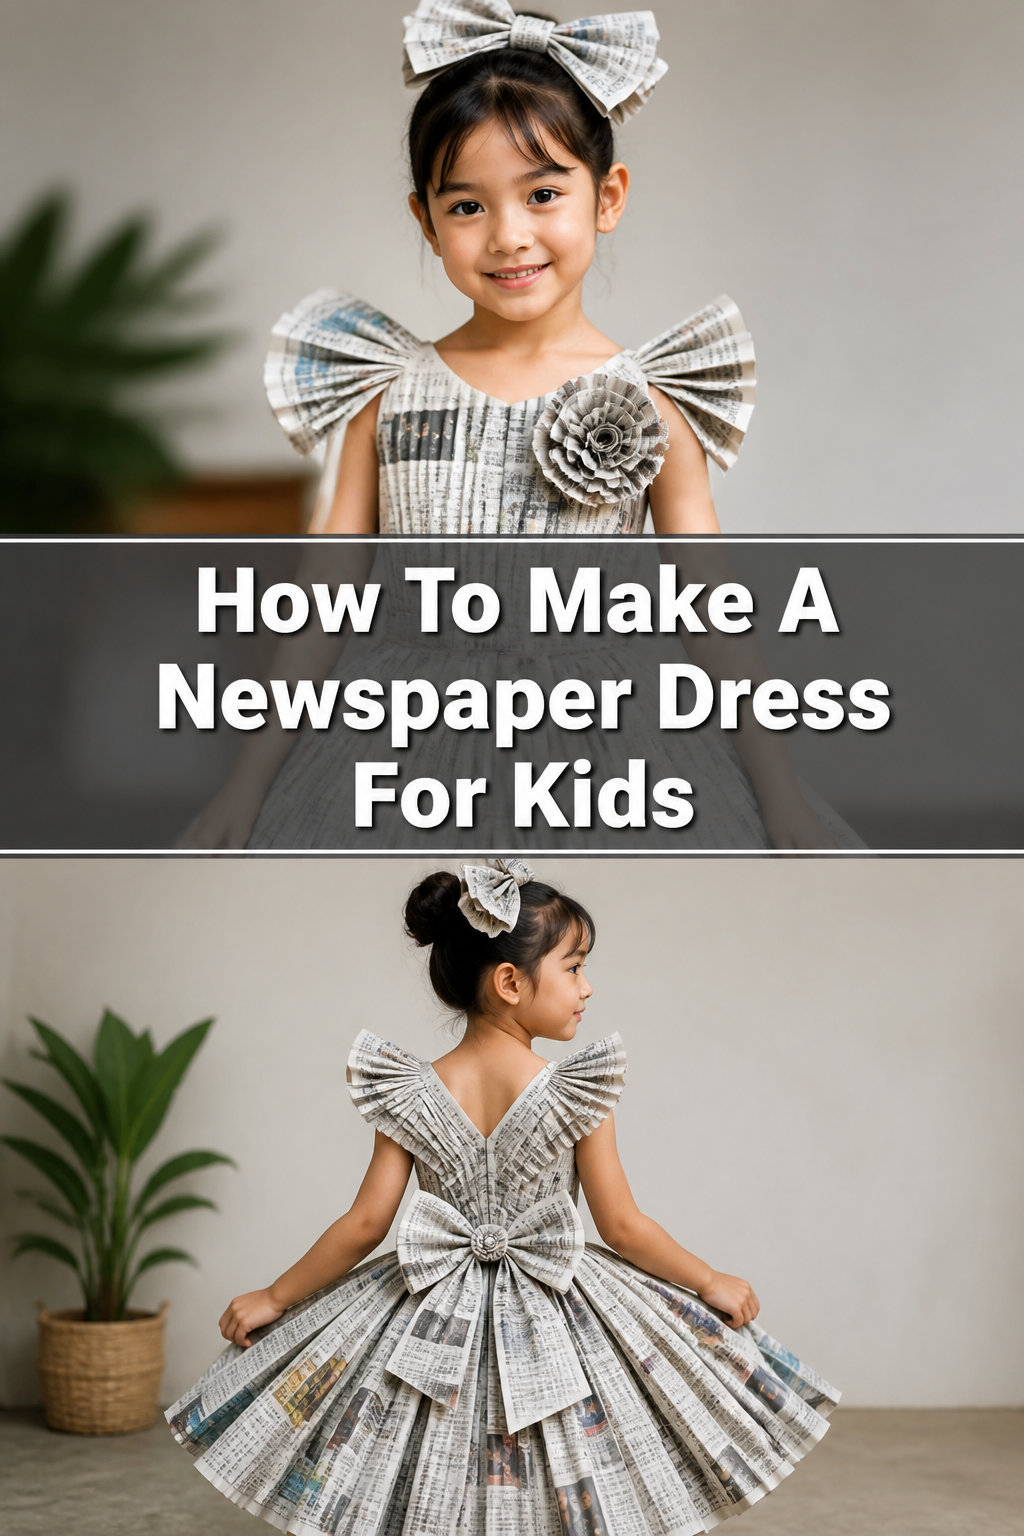
The skirt can be made from various newspaper sections. For a full skirt, you might create several pleated panels. Lay out individual newspaper sheets and fold them accordion-style, making consistent pleats about 1-2 inches wide.
Secure the top edge of each pleated panel with a strip of tape to hold the pleats in place. For a simpler skirt, you can just overlap and tape large sheets of newspaper to create a wide rectangle. The width of this rectangle should be at least 1.5 to 2 times the child’s waist measurement for gathering.
Step 5: Assemble the Skirt
If you’re using pleated panels, tape the side edges of these panels together. Overlap them slightly to create a continuous, circular skirt. Ensure the taped seams are strong and secure.
If you’re using a large rectangular panel, gently gather the top edge. You can do this by running a line of tape along the top and bunching it, or by making small, evenly spaced pleats as you go. The gathered top edge should match the child’s waist circumference.
Step 6: Attach Skirt to Bodice
Carefully align the top edge of the assembled skirt with the bottom edge of the bodice. Start by taping the front skirt to the front bodice, then the back skirt to the back bodice. Use strong, clear tape for this connection.
Work your way around, ensuring an even attachment. You can reinforce this seam with a thin line of craft glue applied over the tape for extra durability. Allow the glue to dry completely before moving on.
Step 7: Add Straps or Sleeves
For straps, cut two long strips of newspaper, about 2 inches wide and sufficient length to go over the shoulders. Fold each strip lengthwise multiple times to make it stronger and narrower. Secure the folds with tape.
Attach one end of each strap to the front bodice, near the neckline. Try the dress on the child (carefully!) to determine the correct length for the straps. Then, attach the other end to the back bodice. If you prefer sleeves, you can create simple cap sleeves by cutting and shaping smaller newspaper pieces, then taping them to the armholes.
Step 8: Embellish and Refine
Now comes the fun part – decorating your newspaper dress! Use additional newspaper cutouts, like flowers, bows, or geometric shapes, to add flair. You can also incorporate other craft materials like glitter, paint, or colored paper.
Glue these embellishments onto the dress in a way that enhances your design. Consider adding a newspaper belt or a decorative collar. Let your imagination guide you in making the dress truly unique.
Step 9: Final Fit and Adjustments
Have the child try on the dress one last time. Check for any areas that might be too tight or too loose. You can make small adjustments by carefully adding more tape to reinforce seams or by trimming excess paper.
Ensure the dress is comfortable and allows for movement. Reinforce any areas that seem weak, especially around the armholes and neckline, with extra tape or a layer of craft glue. A well-fitted dress will be more enjoyable to wear.
Common Mistakes to Avoid
Using Too Much Adhesive
Applying excessive tape or glue can make the newspaper stiff and prone to cracking. It also adds unnecessary weight to the dress. Instead, use tape strategically for structural integrity and glue for reinforcement or embellishments, applying thin, even layers.
Ignoring Measurements
Skipping precise measurements can lead to a dress that doesn’t fit the child well. A too-tight dress will tear easily, and a too-loose one will look sloppy. Always measure carefully at the beginning and try the dress on during key assembly stages.
Rushing the Drying Process
Craft glue needs time to set and dry properly. If you rush this step, the glued sections might separate, causing the dress to fall apart. Allow ample drying time, especially for major seams and embellishments, to ensure maximum durability.
Forgetting Reinforcement
Newspaper is fragile. Neglecting to reinforce key areas like the armholes, neckline, and waist can lead to tears during wear. Always add extra layers of tape or glue to these high-stress points to make the dress more robust and long-lasting.
Troubleshooting
Dress Tears Easily
If your newspaper dress is tearing, it likely needs more reinforcement. Go back over the seams, especially around the armholes, neckline, and waist, with additional strips of strong clear tape. You can also add a thin layer of craft glue over the tape for extra strength once dry. Consider adding a second layer of newspaper in high-stress areas before assembly.
Doesn’t Fit Properly
A poorly fitting dress indicates that initial measurements might have been off or adjustments were not made during construction. For a loose fit, you can carefully pinch excess paper at the side seams and tape it down. For a tight fit, you might need to gently cut small slits in less visible areas and cover them with a decorative patch of newspaper, or, in extreme cases, recreate the problematic section.
Looks Wrinkled/Messy
Wrinkles often occur from handling the newspaper too roughly or not smoothing it properly during assembly. To fix this, gently press out minor wrinkles with your hand. For stubborn creases, you might need to carefully re-tape or re-glue sections. Ensure you’re working on a flat, clean surface to minimize accidental wrinkles from the start.
Key Takeaways
- Accurate measurements are crucial for a well-fitting dress.
- Reinforce all major seams and stress points with tape and glue.
- Allow adequate drying time for all adhesives to ensure durability.
- Embrace creativity and personalize the dress with unique embellishments.
- Work on a flat surface to keep your newspaper smooth and neat.
- Patience and careful handling will lead to the best results.
Frequently Asked Questions
How long does a newspaper dress typically last?
A newspaper dress is designed for temporary wear, often for a few hours or a single event. With careful construction and gentle handling, it can hold up for a day of play or a short performance. It’s not meant for repeated, vigorous use.
Can the dress be worn more than once?
It’s possible, but unlikely without significant wear and tear. Newspaper is delicate. Each time it’s worn, it risks creases, rips, or weakening of the adhesive. It’s best thought of as a single-use or very limited-use costume.
Is the newspaper dress waterproof?
No, a newspaper dress is definitely not waterproof. Any contact with water will cause the paper to disintegrate and the glue to dissolve. It’s strictly an indoor or dry-weather outdoor garment.
Can I use other types of paper besides newspaper?
Absolutely! You can experiment with craft paper, old wrapping paper, or even construction paper for different textures and colors. Just ensure the paper is flexible enough to shape and sturdy enough to hold together. Thicker papers might require stronger adhesives.
Our Top Recommended Finds
- Craft Scissors: A sharp, comfortable pair makes cutting newspaper much easier and more precise.
- Clear Packing Tape: Strong adhesion and transparency make it ideal for securing seams without being too noticeable.
- All-Purpose Craft Glue: A reliable glue stick or liquid craft glue provides extra reinforcement and is perfect for attaching embellishments.
Your Next Creative Adventure Awaits!
You’ve just completed a fantastic project, turning everyday newspaper into a delightful dress for a child. This isn’t just about crafting; it’s about fostering imagination and resourcefulness. Celebrate your creation and the joy it brings!
Why stop here? Consider making matching accessories like a newspaper hat or a small purse. You could even try creating other paper costumes or decorations. Let this project be the start of many more creative journeys together.