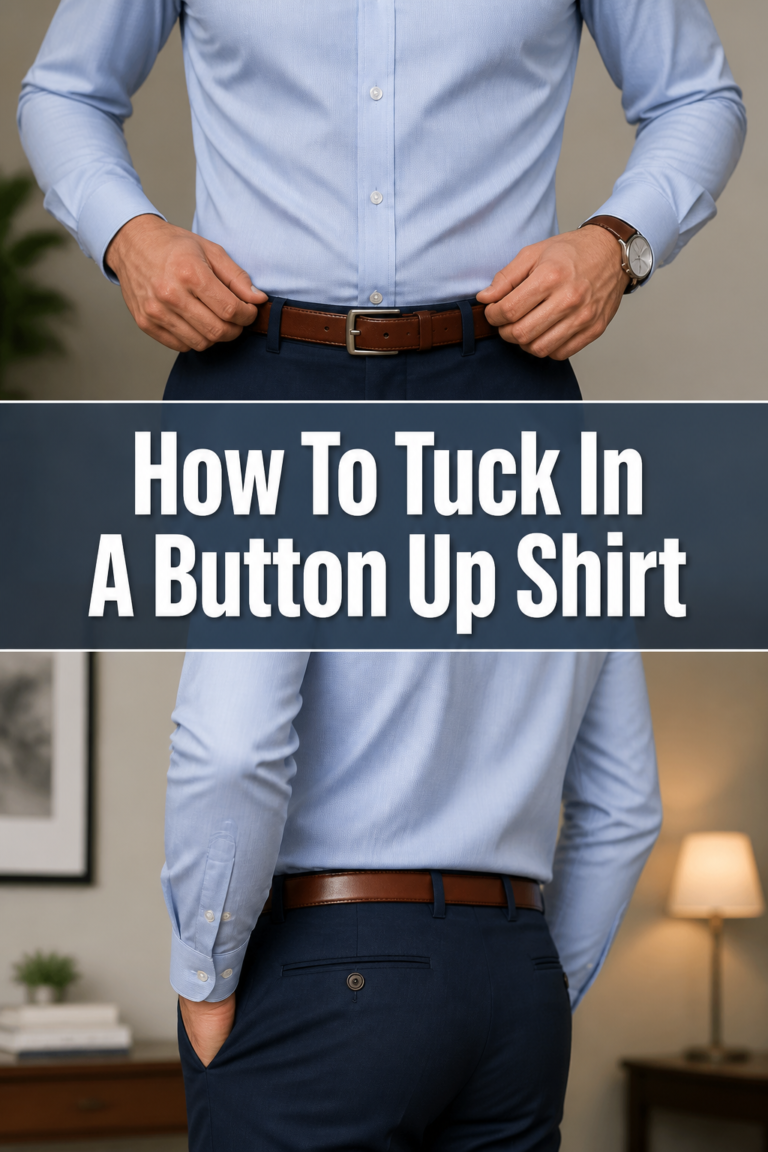
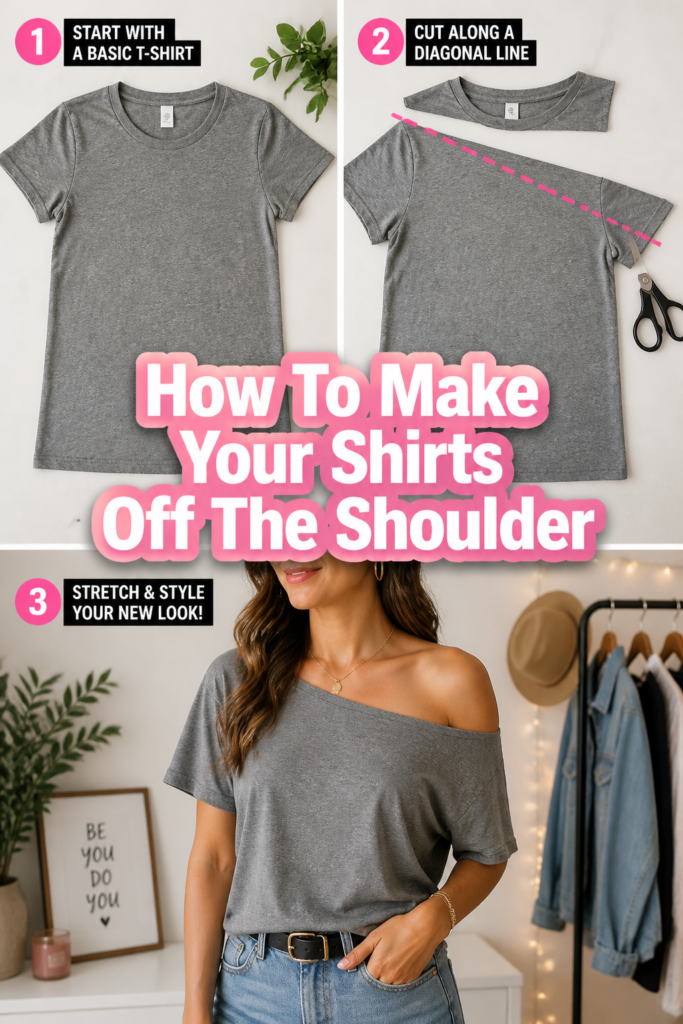
✂️ How To Make Your Shirts Off The Shoulder
I remember pulling out an old t-shirt, frustrated by its lack of flair.
That day, I decided to transform it into something chic and stylish, a perfect off-the-shoulder top.
This guide shares my own tried-and-true method, making it easy for you to achieve the same fabulous results at home.
Quick Overview
Transforming a regular shirt into a trendy off-the-shoulder piece is a rewarding DIY project.
You’ll create a new neckline and add elastic for that signature gathered look.
- Time needed: 45-90 minutes (depending on sewing experience)
- Difficulty: Beginner
- What you’ll need: A shirt, fabric scissors, measuring tape, fabric chalk or marker, elastic (1/4″ to 1/2″ wide), safety pin, sewing machine (or needle and thread), iron and ironing board.
Step-by-Step Instructions
Step 1: Choose Your Shirt Wisely
Start by selecting the right shirt for your transformation. Not all fabrics or styles are equally suited for this project.
A shirt made from a soft, drapey fabric like jersey, rayon, or a cotton blend works best.
Avoid stiff materials such as heavy denim or thick canvas, as they won’t gather well and might feel uncomfortable.
The shirt should be a size or two larger than your usual fit, especially if you want a relaxed, flowy off-the-shoulder look.
A slightly oversized fit allows for enough fabric to create the new neckline and elastic casing without feeling restrictive.
Pro Tip: Pre-wash and dry your shirt before you begin. This prevents any potential shrinking after you’ve completed your project, ensuring your new off-the-shoulder top maintains its intended size and shape.
Step 2: Prepare Your Work Area and Gather Tools
A well-organized workspace makes any DIY project smoother and more enjoyable.
Clear a large, flat surface where you can spread out your shirt completely without wrinkles or obstructions.
Gather all your necessary tools: sharp fabric scissors, a flexible measuring tape, fabric chalk or a washable marker, your chosen elastic, a safety pin, and your sewing machine (or needle and thread).
Having everything within reach saves time and prevents interruptions once you start cutting and sewing.
Step 3: Mark Your New Neckline
This step determines the depth and width of your off-the-shoulder look, so take your time.
Lay your shirt flat and smooth it out. Decide how far down from the original neckline you want your new off-the-shoulder line to sit.
Measure 2 to 4 inches down from the shoulder seam, depending on how dramatic you want the drop to be.
Use your fabric chalk or marker to draw a straight line across the shirt, connecting these points.
Then, consider how wide you want the opening to be. You’ll typically cut straight across, leaving the original sleeves intact.
Measure from the center of the original neckline out towards the sleeves, deciding how much of the shoulder you want to expose.
Make sure the line is even on both sides, using your measuring tape to double-check distances from the original seams.
Pro Tip: Try on the shirt and use pins to mark where you want the neckline to fall before drawing the final line. This gives you a visual reference and helps you customize the fit perfectly for your body.
Step 4: Carefully Cut the Neckline
Once your new neckline is clearly marked, it’s time to make the cut.
Using sharp fabric scissors, carefully cut along the chalk line you just drew.
Cut through both the front and back layers of the shirt simultaneously to ensure an even cut.
Take long, steady snips to create a smooth, clean edge, avoiding jagged lines.
Discard the top portion of the shirt, which includes the original neckline and shoulder seams.
You are now left with a shirt that has a wide, open neckline, ready for the next step of creating the elastic casing.
Step 5: Prepare the Fabric for the Elastic Casing
The elastic casing will hold the elastic in place, creating the gathered off-the-shoulder effect.
With your shirt still laid flat, turn the raw edge of the new neckline under by about 1/4 inch.
Press this fold firmly with a warm iron to create a crisp edge; this initial fold helps to prevent fraying and makes the subsequent fold easier.
Now, fold the edge under a second time, this time by about 1/2 inch to 3/4 inch, depending on the width of your elastic.
The goal is to create a channel wide enough for your elastic to pass through comfortably, plus a little extra for the seam allowance.
Press this second fold all the way around the neckline, making sure it’s consistent in width.
Use pins to secure the fold in place every few inches, preparing it for stitching.
Step 6: Stitch the Elastic Casing
With your casing folded and pinned, it’s time to sew it down.
Using your sewing machine (or needle and thread for hand-sewing), stitch along the inner edge of the folded casing.
Sew as close to the raw edge of the fabric as possible, leaving a clear channel for the elastic.
Remember to backstitch at the beginning and end of your seam to secure the stitches.
Leave an opening of about 1 to 2 inches unstitched somewhere along the casing.
This opening is crucial for inserting the elastic in the next step.
Step 7: Measure and Insert the Elastic
The elastic is what gives your shirt its off-the-shoulder shape and holds it in place.
To determine the correct length of elastic, measure around your shoulders where you want the shirt to sit.
Subtract 2 to 4 inches from this measurement, depending on how tight or loose you want the elastic to be.
Cut your elastic to this determined length.
Attach a safety pin to one end of the elastic, then thread the safety pin through the unstitched opening in your casing.
Gently push and gather the fabric around the safety pin, working the elastic all the way around the neckline until it emerges from the same opening.
Pro Tip: Pin the tail end of the elastic to the fabric near the opening before you start threading. This prevents the elastic from accidentally disappearing into the casing, saving you from having to retrieve it.
Step 8: Secure and Finish the Elastic
Once both ends of the elastic are out of the casing, it’s time to secure them.
Overlap the two ends of the elastic by about 1/2 inch to 1 inch.
Stitch them together securely using a zigzag stitch on your sewing machine, or several strong hand stitches.
Make sure the elastic is not twisted inside the casing before you sew the ends together.
Gently tug on the fabric to distribute the gathers evenly around the entire neckline.
Finally, close the 1 to 2-inch opening in the casing by stitching it shut with your sewing machine or needle and thread.
Step 9: Final Touches and Styling
You’ve done the hard work, now for the finishing touches.
Give your new off-the-shoulder top a good press with an iron, especially around the neckline, to set the gathers and make it look polished.
If the raw edges of the sleeves or bottom hem look unfinished, you can hem them using a simple double fold and stitch.
Try on your transformed shirt and admire your handiwork.
Style it with high-waisted jeans, a skirt, or shorts for a casual yet chic look, ready to wear.
Common Mistakes to Avoid
Cutting Too Much Too Soon
A common pitfall is being overly enthusiastic with the scissors right from the start. If you cut the neckline too deep or too wide immediately, there’s no way to add fabric back.
Always err on the side of caution. Start with a shallower cut, try the shirt on, and then trim more if needed. You can always take away more fabric, but you can never put it back.
Using the Wrong Fabric
Choosing a stiff or non-stretchy fabric like heavy cotton twill or denim will lead to disappointment. These materials don’t gather well and won’t drape softly off the shoulder.
Opt for fabrics with some stretch or a soft drape, such as jersey knit, rayon, or lightweight cotton blends. These fabrics will create the desired flowy, comfortable off-the-shoulder look.
Incorrect Elastic Length
If your elastic is too long, the shirt will constantly slide up your shoulders, defeating the purpose. If it’s too short, it will feel uncomfortably tight and restrict movement, creating an unflattering bulge.
Measure carefully around your shoulders where you want the shirt to sit, then subtract a small amount (2-4 inches) based on your desired snugness. Always test the elastic length by pinning it before sewing it permanently.
Skipping Pre-Washing
Many fabrics shrink slightly after their first wash and dry cycle. If you don’t pre-wash your shirt, your perfectly fitted off-the-shoulder top might shrink after its first laundry, becoming too tight or uncomfortable.
Always wash and dry your shirt according to its care instructions before you start any alterations. This ensures the fabric is pre-shrunk and your measurements will remain accurate.
Troubleshooting
Neckline is Too Wide/Loose
If, after inserting the elastic, your off-the-shoulder top still feels too loose or keeps riding up, the elastic might be too long.
Carefully unpick the seam where the elastic ends are joined. Trim a small amount (1/2 to 1 inch) off the elastic, then re-sew the ends together. Try the shirt on again and repeat if necessary until you achieve the desired fit. Remember to re-close the casing opening.
Elastic Feels Uncomfortable or Too Tight
If the elastic feels too restrictive or digs into your skin, it’s likely too short.
You’ll need to replace the elastic. Carefully unpick the seam where the elastic ends are joined and remove the elastic. Measure a new piece of elastic that is slightly longer than the previous one, then re-insert it following the steps for measuring and securing. If you only need a slight adjustment, you might be able to add a small extension piece of elastic.
Edges Are Fraying
If you notice the raw edges of your new neckline or sleeves beginning to fray, it means the fabric wasn’t properly secured or is prone to unraveling.
For the neckline, if the casing is already sewn, you might need to unpick the stitches, trim any frayed threads, and then serge or zigzag stitch the raw edge before re-folding and sewing the casing. For sleeves or hems, simply create a small double-fold hem and stitch it down to enclose the raw edge completely.
Key Takeaways
- Choosing a soft, drapey, and slightly oversized shirt is essential for a comfortable fit and good drape.
- Accurate measuring and marking of the new neckline ensure a symmetrical and flattering cut.
- Creating a consistent elastic casing is crucial for the elastic to move freely and gather evenly.
- Measuring the elastic against your shoulders guarantees the perfect tension and prevents slipping or tightness.
- Always pre-wash your shirt to avoid unexpected shrinkage after the transformation.
- Don’t be afraid to make small adjustments to the elastic length for a truly custom fit.
Frequently Asked Questions
Can I do this without a sewing machine?
Absolutely! While a sewing machine speeds up the process, you can definitely hand-sew your off-the-shoulder shirt. Use a strong running stitch or backstitch for the elastic casing. It will take more time, but the results can be just as professional with careful stitching. Just make sure your stitches are small and consistent.
What kind of elastic should I use?
For this project, a 1/4-inch to 1/2-inch wide braided or knit elastic works best. Braided elastic is strong and durable, while knit elastic is softer and more flexible, making it comfortable against the skin. Avoid using clear elastic or very thin elastic, as they might not provide enough support or can dig in uncomfortably.
Can I adjust the neckline after cutting?
You can adjust the depth of the neckline by cutting it a little deeper, but you cannot make it shallower once cut. To adjust the width, you’d primarily rely on the elastic length. If the cut neckline is too wide for your taste, you might need to gather the fabric more tightly with shorter elastic, or consider adding small pleats at the shoulders before creating the casing.
Does this work on all shirt types?
While the technique is versatile, it works best on knit fabrics like t-shirts, sweatshirts, or soft blouses. Woven fabrics (like crisp cotton button-downs) can be used, but they won’t drape as softly and might create a stiffer, more structured look. Avoid very thick or heavily embellished shirts, as they can be difficult to cut and sew.
Our Top Recommended Finds
- Sharp Fabric Scissors: A good pair of scissors makes clean cuts, preventing frayed edges and making your project look professional.
- High-Quality Knit Elastic: Durable and comfortable, this elastic will hold your shirt in place without digging in, ensuring long-lasting wear.
- Washable Fabric Chalk/Marker: Essential for precise marking, these tools disappear with a wash or steam, leaving no trace on your finished garment.
Your Style Transformation Awaits
Now you have all the tools and knowledge to turn any ordinary shirt into a chic off-the-shoulder statement piece.
It’s a fantastic way to refresh your wardrobe, express your personal style, and give new life to forgotten garments.
Don’t let your creativity stop here; consider exploring other simple garment alterations to customize your clothing even further.
Grab a shirt from your closet today and start your own style transformation!