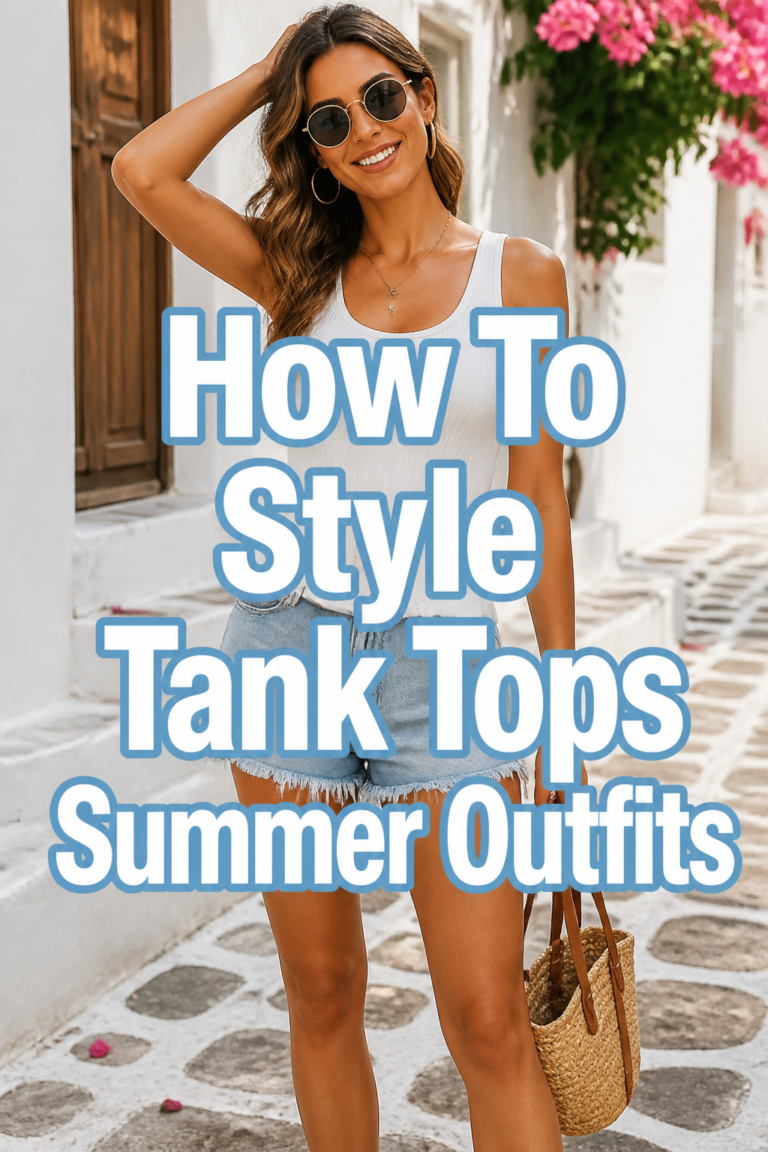
👙 How To Tie A Triangle Bathing Suit Top
Feeling confident and comfortable in your swimwear makes all the difference for a great day by the water. A perfectly tied triangle top can enhance your shape and provide the support you need. I’ve spent countless summers perfecting the art of tying these tops for various activities and body types. This guide will help you achieve that ideal fit every time.

Quick Overview
Getting your triangle top just right is simpler than you might think. This guide will walk you through creating a secure, comfortable, and flattering fit. You’ll learn the essential knots and adjustments to feel great all day.
- Time needed: 5-10 minutes
- Difficulty: Beginner
- What you’ll need: A triangle bikini top, a mirror (optional but recommended)
Step-by-Step Instructions
Step 1: Lay Out Your Top
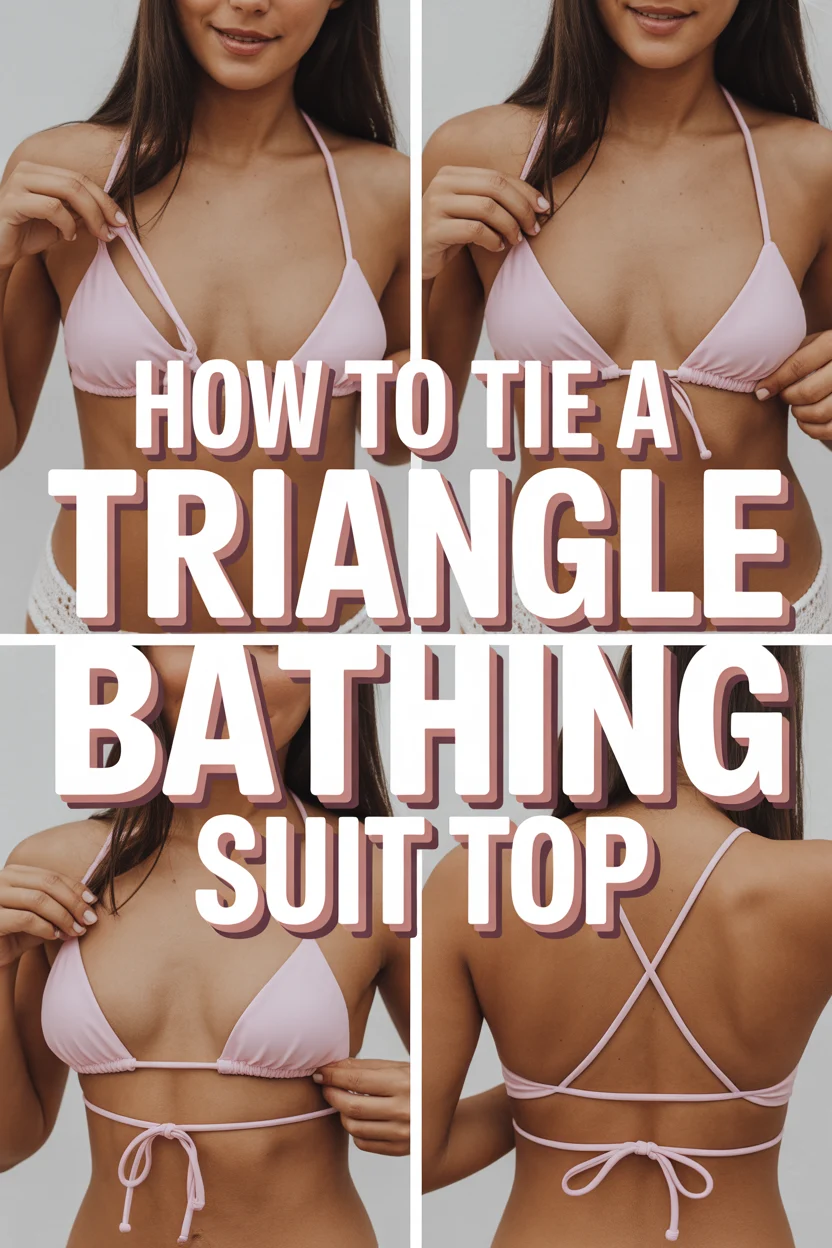
Begin by laying your triangle bikini top flat on a clean surface. This helps you visualize the straps and ensure they aren’t twisted. Untangle any knots or twists in both the neck and back ties.
Make sure the cups are facing upwards, just as they would when you wear them. This initial setup prevents confusion as you start tying. A clear workspace makes the process much smoother.
Step 2: Identify the Straps
Your triangle top has two sets of strings. The longer strings typically come from the top corners of the triangles and go around your neck. The shorter strings emerge from the bottom corners and tie around your back.
Understanding which set is which is crucial for correct tying. Some tops might have convertible straps, but for a standard triangle, this distinction is clear. Always double-check before you begin.
Step 3: Position the Cups
Hold the top up to your body, positioning the triangle cups over your breasts. Adjust them so they provide the desired coverage and cleavage. You can slide the triangles along the bottom string to customize the spacing.
For more coverage, bring the triangles closer together. For a more minimal look, spread them slightly apart. This initial placement is key to the final fit.
Pro Tip: Experiment with cup spacing before tying. A slight overlap can offer more coverage, while a wider gap might create a more daring look. Find what feels best for your body and comfort level.
Step 4: Tie the Neck Straps (Halter Style)
Take the two long strings that go over your shoulders. Bring them up and around the back of your neck. Cross them over each other.
Now, tie these two strings together in a secure knot. A simple square knot is usually sufficient. Avoid pulling too tightly, as this can cause discomfort and dig into your neck.
Step 5: Adjust Neck Strap Tension
After tying the neck, gently pull the knot to tighten or loosen the straps. The goal is to feel supported without any pinching or pressure. The cups should sit smoothly against your skin.
A good test is to slide one finger underneath the strap. It should feel snug but not restrictive. Too loose, and the top will sag; too tight, and it will be uncomfortable.
Step 6: Tie the Back Straps
Now, take the two shorter strings from the bottom of the cups. Bring them around your back. Make sure they are level across your back, not riding up or down.
Cross these two strings behind you. Then, tie them together in a secure knot. A double knot is highly recommended for the back straps to prevent them from coming undone.
Step 7: Adjust Back Strap Tension and Placement
Just like the neck straps, adjust the back tie for comfort and support. The band should feel firm but not constricting. It should run straight across your back, parallel to the ground.
Ensure the knot is centered or slightly to one side, wherever it feels most comfortable and least noticeable. A well-placed back knot contributes to both comfort and aesthetics.
Pro Tip: For extra security, especially if you plan on active swimming or diving, always double-knot your back straps. A single knot can loosen surprisingly quickly in the water.
Step 8: Final Adjustments for Fit and Comfort
Once both sets of straps are tied, take a moment to look in a mirror. Check the overall fit. Do the cups cover what you want them to cover? Are the straps digging in anywhere?
Gently pull on the cups and straps to ensure everything feels secure. Move around a bit – bend, stretch, lift your arms – to confirm the top stays in place. Make any minor adjustments to the knots or cup positioning as needed.
Step 9: Consider Alternative Tying Methods (Optional)
While the halter neck and back tie are standard, you can experiment. For instance, some prefer to criss-cross the neck straps in the back before tying. Others might tie the neck straps directly to the back straps for a bandeau style.
Exploring these variations can offer different looks and levels of support. Always prioritize comfort and security, especially if you’ll be active.
Common Mistakes to Avoid
Tying Too Tightly or Too Loosely
One of the most common errors is getting the tension wrong. Tying your straps too tight can cause discomfort, leave red marks, and create an unflattering “digging in” look. Conversely, tying them too loosely means your top won’t provide adequate support and might slip or sag, especially when wet. Always aim for a snug, secure fit that allows for easy movement without restriction.
Incorrect Knot Placement
Where you place your knots matters for both comfort and aesthetics. Tying a knot directly under your armpit or too high on your neck can cause irritation. For the back, an off-center knot might feel lopsided. Aim for knots that sit comfortably on your skin, ideally in the middle of your back for the back tie, and at the base of your neck for the halter. Ensure knots are flat and don’t create bulky bumps under clothing.
Forgetting to Double-Knot
Many people tie a single knot and think it’s sufficient, especially for the back straps. However, single knots can easily loosen or unravel, particularly when wet or during active movement. This leads to wardrobe malfunctions and unnecessary stress. Always use a secure double knot, especially for the back, to ensure your top stays firmly in place.
Ignoring the “Wet Test”
A bikini top that feels perfect when dry can behave very differently when wet. Fabric expands slightly, and the weight of water can put extra strain on your knots and straps. Before heading out for a swim, try wetting your top and seeing how it feels. Make any necessary adjustments to tension or knot security beforehand to prevent issues later.
Troubleshooting
Straps Digging In
If your neck or back straps are digging into your skin, they are likely tied too tightly. Loosen the knots slightly and re-tie, aiming for a snug but not restrictive fit. Ensure the fabric isn’t twisted, which can also cause discomfort. You might also try adjusting the position of the cups to distribute the weight more evenly.
Top Riding Up or Slipping
A top that rides up or slips usually indicates that the back band is too loose. Tighten the back knot to create a firmer band around your torso. If the neck straps are too loose, the cups might sag. Adjust the neck tie for more lift and support. Sometimes, the issue is uneven tension; ensure both neck and back straps are balanced.
Gaps or Lack of Support
If you notice gaps or feel a lack of support, especially around the sides or bottom of the cups, first adjust the individual triangles. Slide them along the bottom string to bring them closer together for more coverage, or further apart for less. You can also try adjusting the neck tie for more lift. Ensure the back band is firm and sitting straight across your back, as this provides foundational support.
Key Takeaways
- Start by laying your top flat: This ensures straps are untangled and ready for proper tying.
- Identify neck and back straps: Knowing which strings go where simplifies the process.
- Adjust cup placement first: Customize coverage by sliding the triangles before tying.
- Tie the neck straps securely but comfortably: Avoid excessive tightness to prevent discomfort.
- Double-knot the back straps: This provides essential security, especially for active wear.
- Perform a “comfort check”: Move around to ensure the top stays put and feels good.
Frequently Asked Questions
How can I prevent tan lines from the neck strap?
To minimize tan lines from the neck strap, you can try tying the straps in a different style. Instead of a traditional halter, some people tie the neck straps directly to the back straps, creating a strapless or bandeau look. Alternatively, you can untie the neck strap while sunbathing, provided the back tie is secure enough to keep the top in place.
Can I tie my triangle top differently for more support?
Yes, you can! For more support, especially for larger busts, try crossing the neck straps across your back before bringing them up to tie at your neck. This creates an “X” shape on your back, which can offer more lift and stability. You can also ensure the back band is tied very firmly and sits low on your back for maximum support.
What if the strings are too long?
If your bikini strings are excessively long, you have a few options. You can simply wrap them an extra time around your body before tying, creating a more decorative look. Another option is to tie a bow instead of a simple knot, which uses up more string. For a permanent solution, you can carefully trim the ends and knot them to prevent fraying, but only if you are certain about the desired length.
How do I make my triangle top look most flattering?
The key to a flattering look is finding the right balance of coverage and lift for your body. Adjust the individual triangle cups by sliding them along the bottom string to customize your cleavage and coverage. Tying the neck straps for a comfortable lift and the back straps for a firm, level band will enhance your natural shape. Experiment in front of a mirror to find your perfect fit.
Our Top Recommended Finds
- High-Quality Triangle Bikini Top: Look for swimwear made with durable, quick-drying fabric that offers good stretch and support. A good quality top will maintain its shape and color longer.
- Delicate Swimsuit Wash: To keep your bikini looking new, use a gentle, specialized detergent designed for swimwear. This helps preserve the fabric and elasticity, extending the life of your favorite top.
- Stylish Beach Cover-Up: A versatile cover-up is perfect for transitioning from the beach to a cafe. Choose a lightweight, breathable fabric that complements your swimwear for a complete look.
Embrace Your Perfect Fit
Mastering the art of tying your triangle bathing suit top is about more than just fashion; it’s about comfort and confidence. With these steps, you’re now equipped to achieve a secure and flattering fit every time. No more worrying about slips or discomfort – just pure enjoyment.
Take these tips to the beach, the pool, or your next vacation. Experiment with different tensions and placements until you find what feels perfectly right for you. Your ideal beach day starts with feeling great in your swimwear.