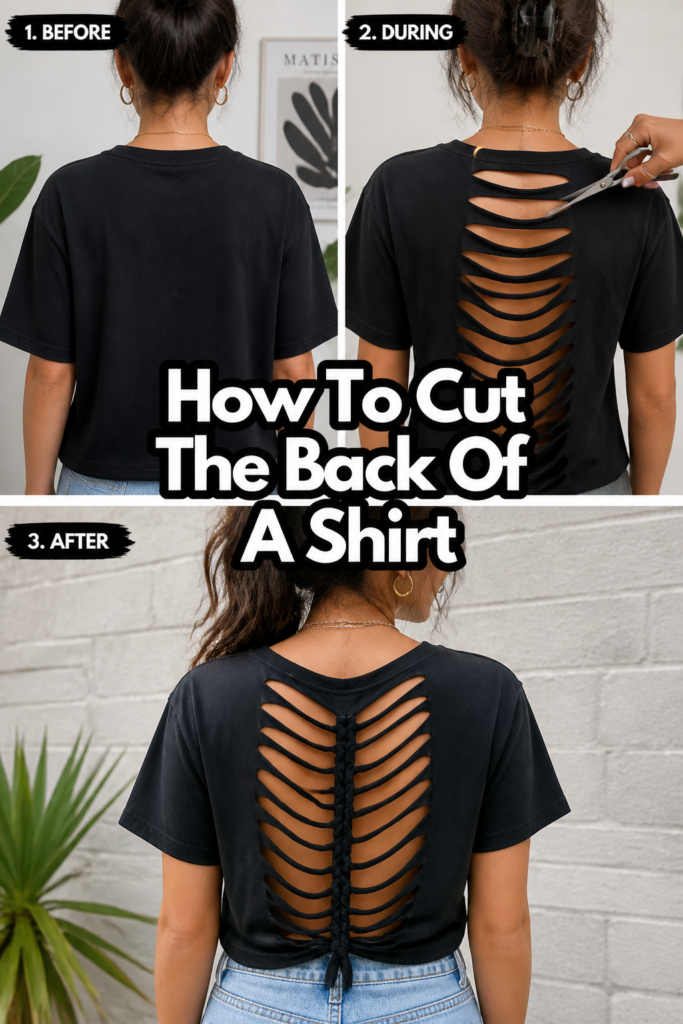
✂️ How To Cut The Back Of A Shirt
Transforming an old t-shirt into a custom piece is a rewarding project.
I’ve personally revamped countless shirts, giving them new life and a fresh style.
This guide shares my tried-and-true methods for achieving a professional-looking cut every time.
Quick Overview
This guide will help you confidently alter the back of a shirt, creating a unique and stylish design.
You’ll learn how to plan your cut, prepare the fabric, and execute precision snips for a fantastic custom look.
- Time needed: 30-60 minutes (depending on design complexity)
- Difficulty: Beginner to Intermediate
- What you’ll need: Shirt, sharp fabric scissors, tailor’s chalk or fabric marker, ruler, pins, cardboard or cutting mat
Step-by-Step Instructions
Step 1: Gather Your Materials
Before you begin, ensure you have all necessary tools laid out and ready.
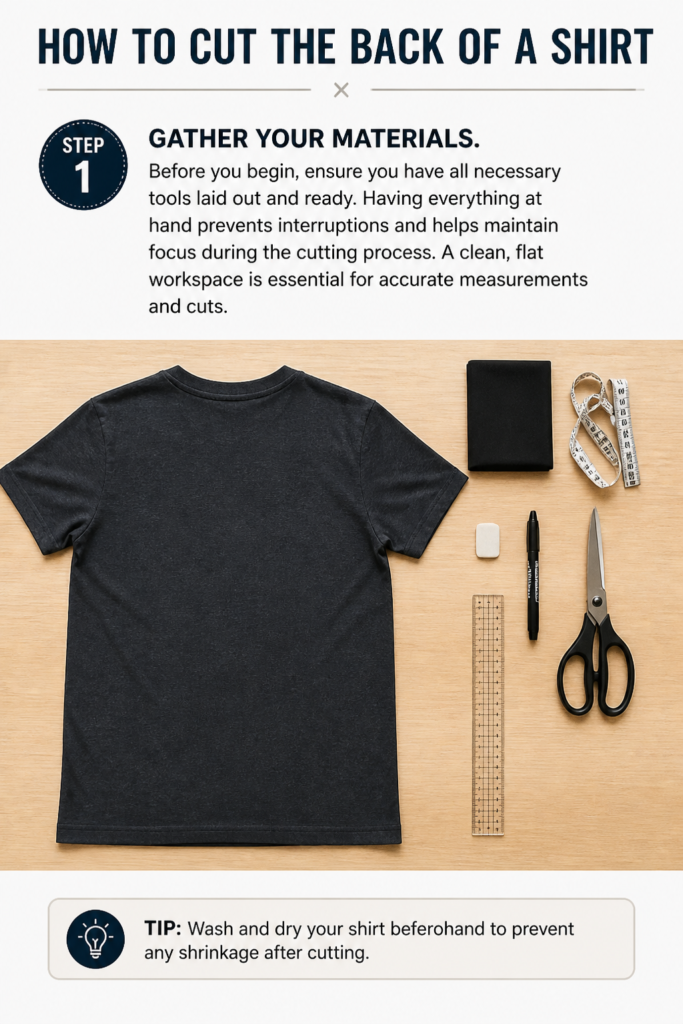
Having everything at hand prevents interruptions and helps maintain focus during the cutting process.
A clean, flat workspace is essential for accurate measurements and cuts.
Step 2: Wash and Press Your Shirt
Always start with a clean, dry shirt that has been pre-washed.
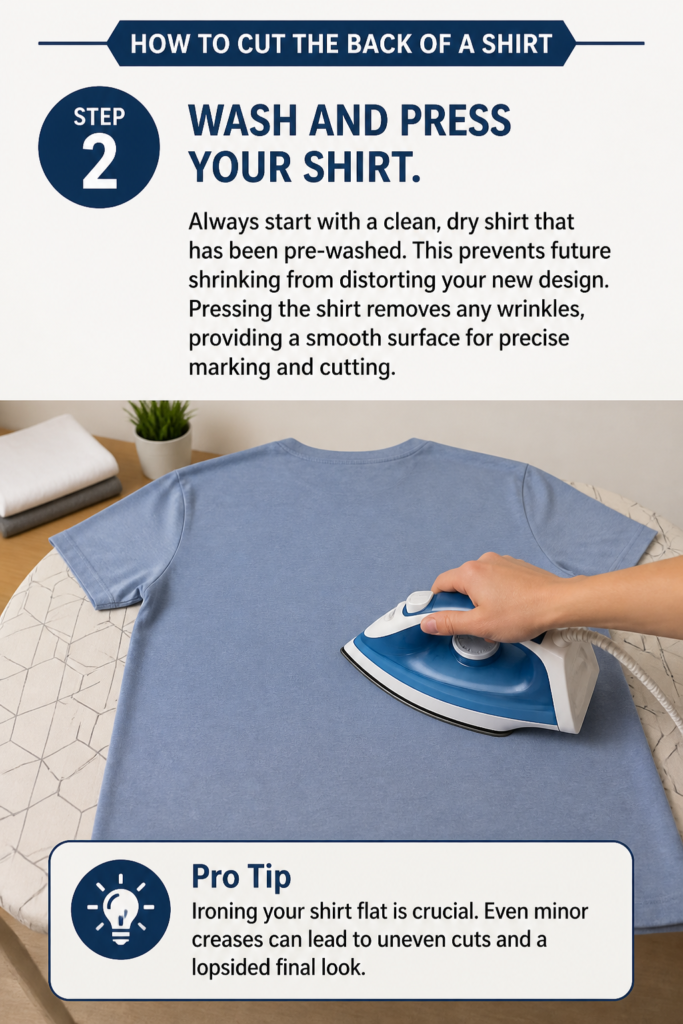
This prevents future shrinking from distorting your new design.
Pressing the shirt removes any wrinkles, providing a smooth surface for precise marking and cutting.
Pro Tip: Ironing your shirt flat is crucial. Even minor creases can lead to uneven cuts and a lopsided final look.
Step 3: Plan Your Design
Decide on the specific style you want to achieve for the back of your shirt.
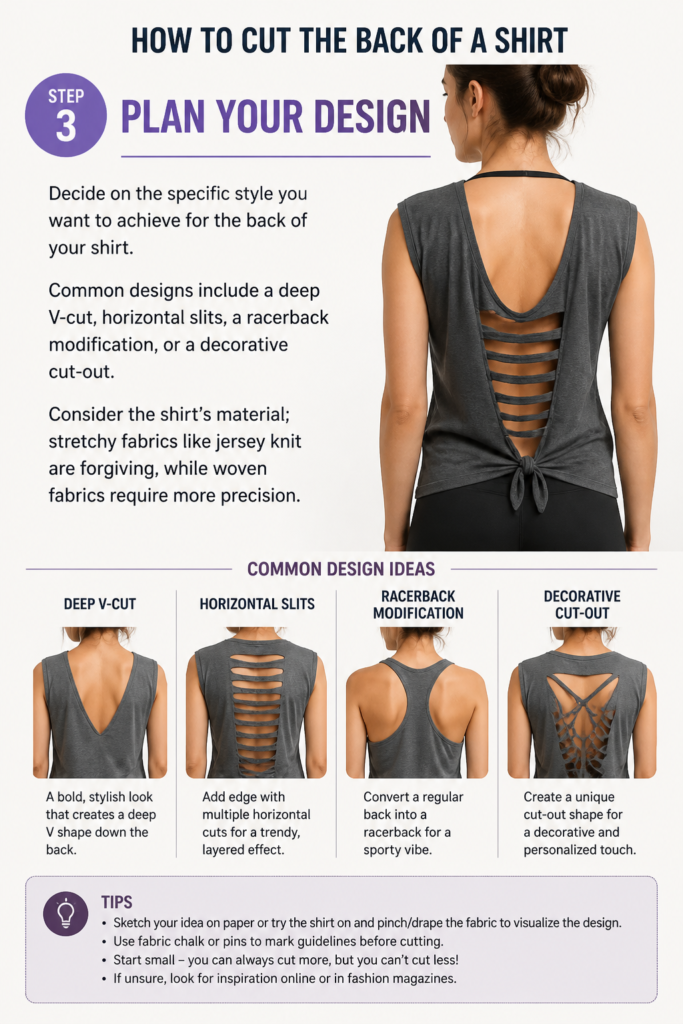
Common designs include a deep V-cut, horizontal slits, a racerback modification, or a decorative cut-out.
Consider the shirt’s material; stretchy fabrics like jersey knit are forgiving, while woven fabrics require more precision.
Step 4: Mark Your Cut Lines
Lay your shirt flat on your cutting surface, smoothing out any bumps.
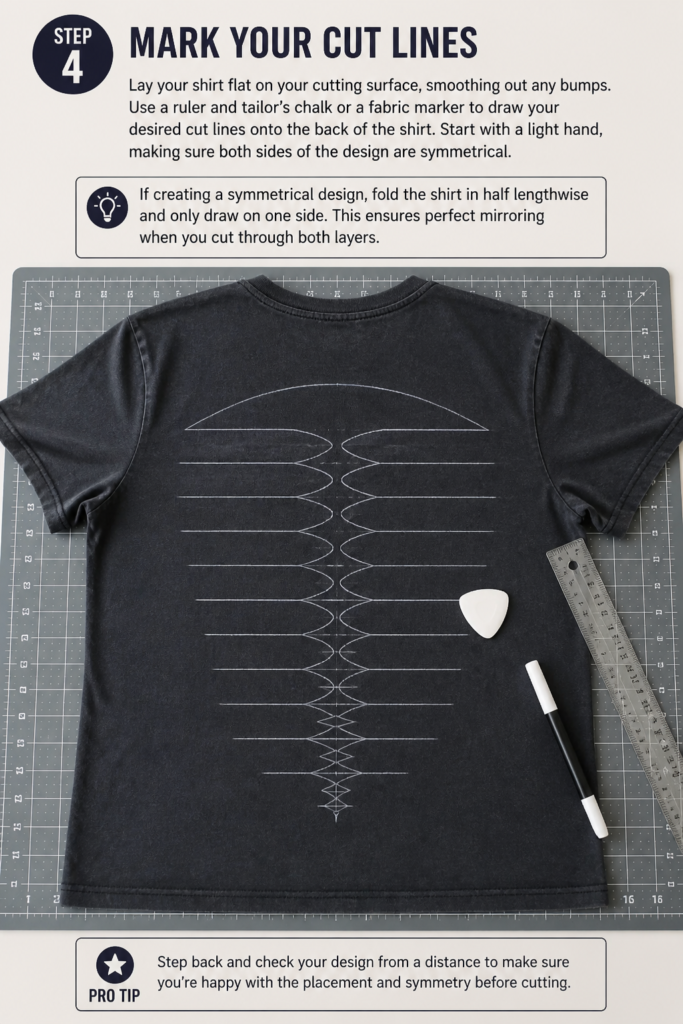
Use a ruler and tailor’s chalk or a fabric marker to draw your desired cut lines onto the back of the shirt.
Start with a light hand, making sure both sides of the design are symmetrical.
If creating a symmetrical design, fold the shirt in half lengthwise and only draw on one side.
This ensures perfect mirroring when you cut through both layers.
Step 5: Insert a Protective Layer
Place a piece of cardboard or a cutting mat inside the shirt, directly beneath the area you plan to cut.
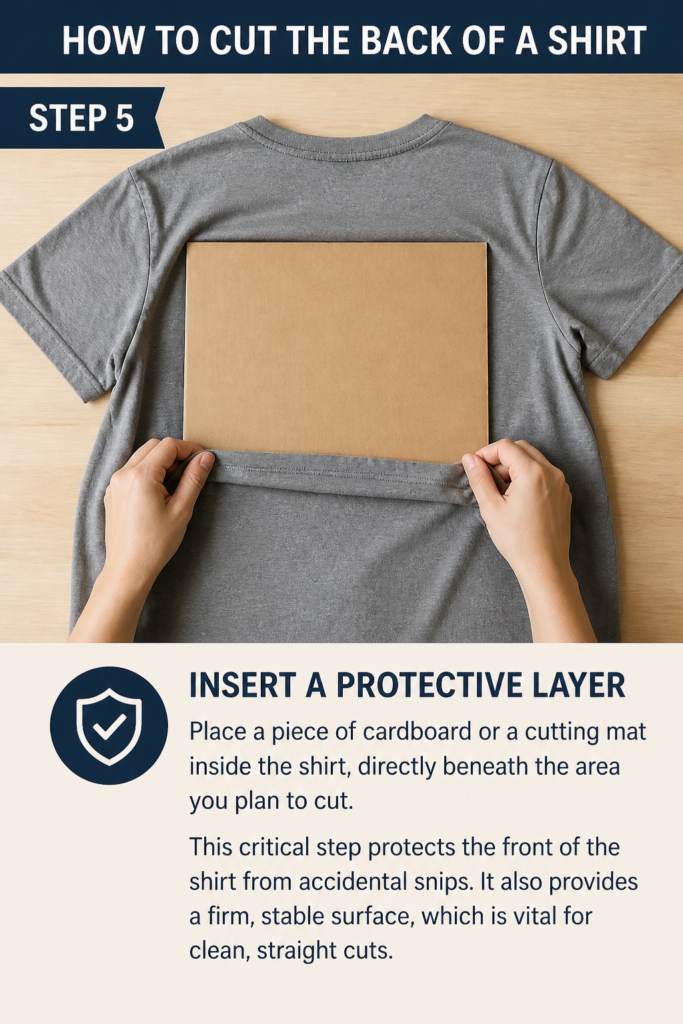
This critical step protects the front of the shirt from accidental snips.
It also provides a firm, stable surface, which is vital for clean, straight cuts.
Step 6: Pin the Fabric (Optional but Recommended)
For more intricate designs or slippery fabrics, use pins to secure the two layers of the shirt together along your cut lines.
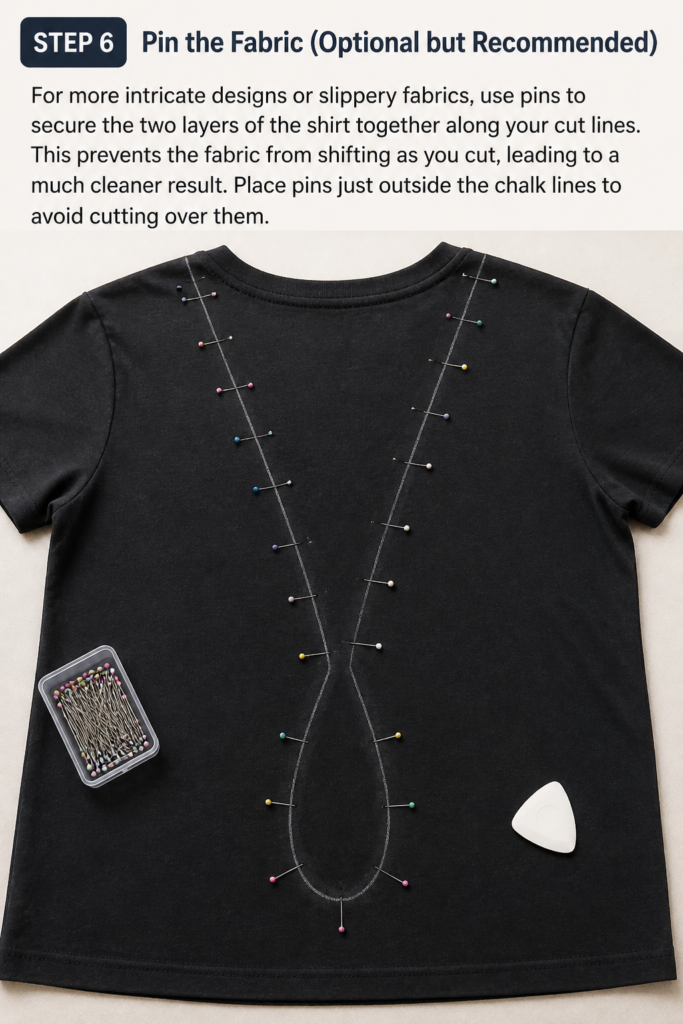
This prevents the fabric from shifting as you cut, leading to a much cleaner result.
Place pins just outside the chalk lines to avoid cutting over them.
Step 7: Make Your Cuts
Using sharp fabric scissors, carefully cut along your marked lines.
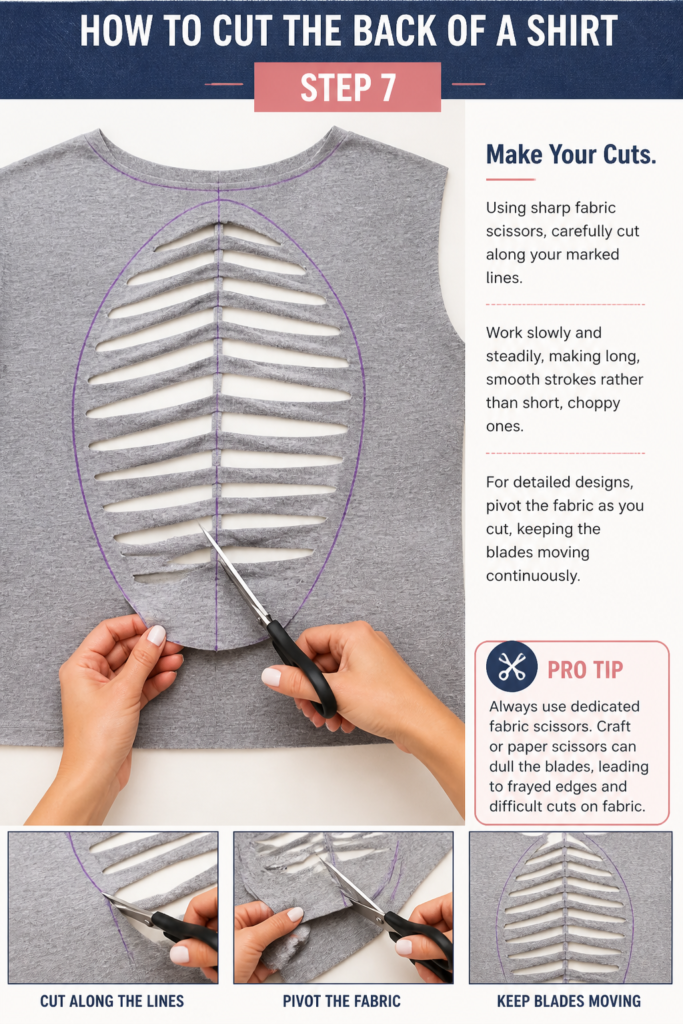
Work slowly and steadily, making long, smooth strokes rather than short, choppy ones.
For detailed designs, pivot the fabric as you cut, keeping the blades moving continuously.
Pro Tip: Always use dedicated fabric scissors. Craft or paper scissors can dull the blades, leading to frayed edges and difficult cuts on fabric.
Step 8: Remove Markings and Finish Edges
Once all cuts are made, remove any remaining tailor’s chalk or fabric marker residue.
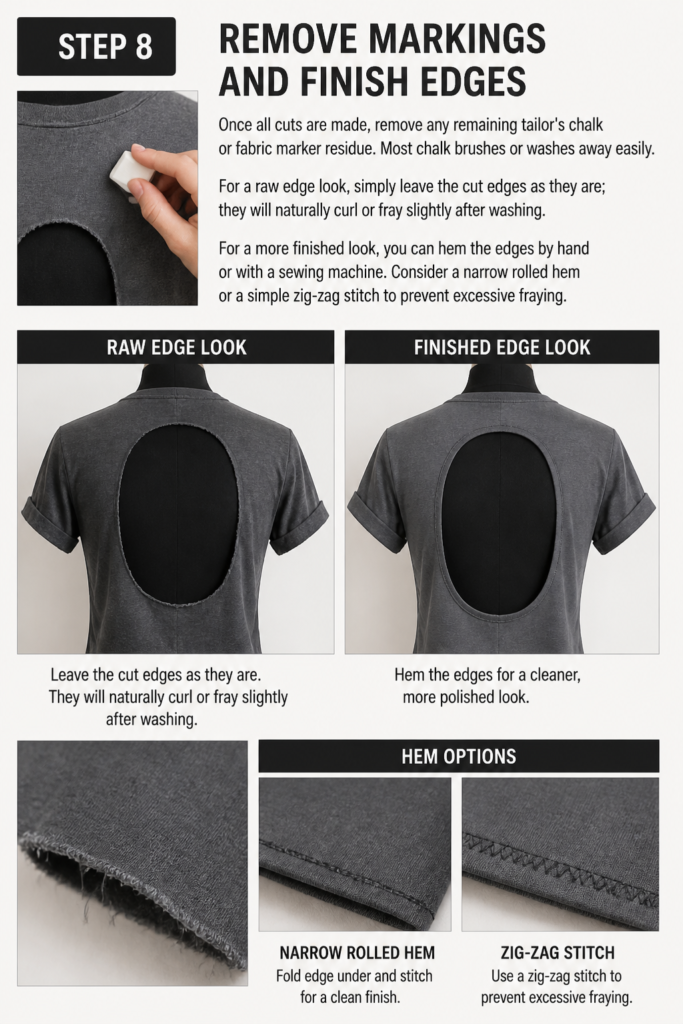
Most chalk brushes or washes away easily.
For a raw edge look, simply leave the cut edges as they are; they will naturally curl or fray slightly after washing.
For a more finished look, you can hem the edges by hand or with a sewing machine.
Consider a narrow rolled hem or a simple zig-zag stitch to prevent excessive fraying.
Step 9: Try On and Adjust
Put on your newly altered shirt to see how it fits and drapes.
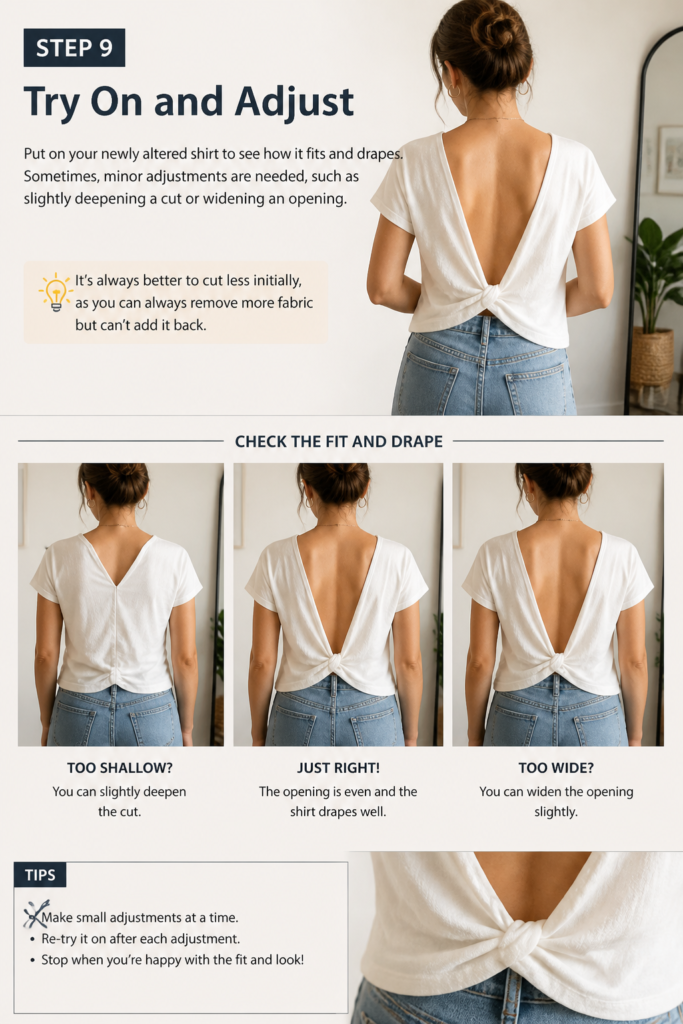
Sometimes, minor adjustments are needed, such as slightly deepening a cut or widening an opening.
It’s always better to cut less initially, as you can always remove more fabric but can’t add it back.
Common Mistakes to Avoid
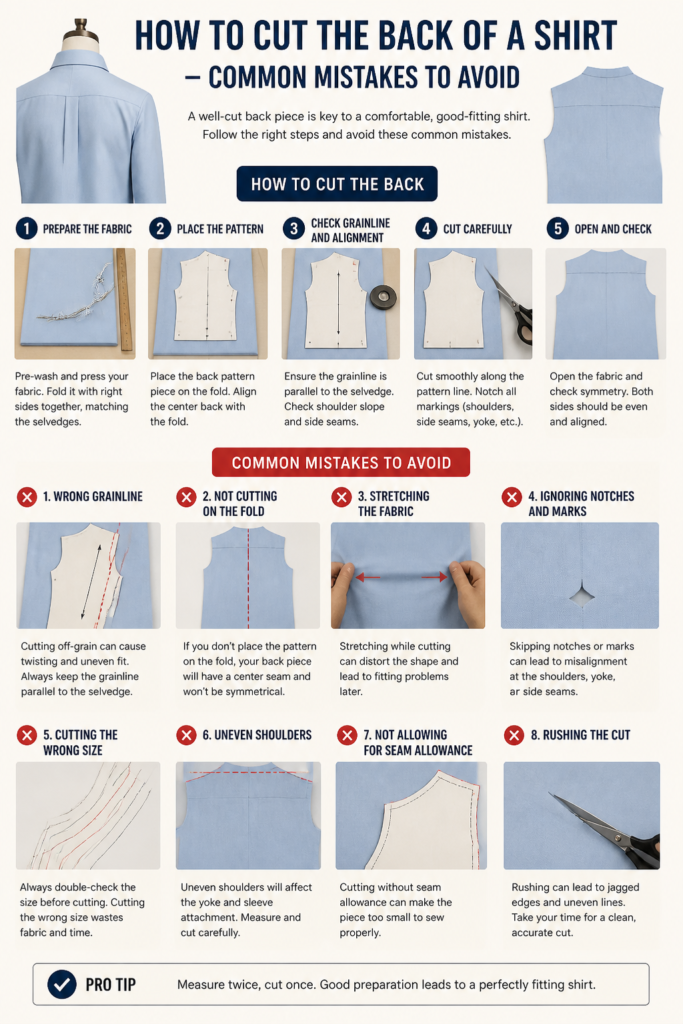
Using Dull Scissors
Attempting to cut fabric with dull scissors is a recipe for frustration and poor results.
Dull blades will chew through the fabric, leaving behind jagged, frayed edges instead of clean lines.
Invest in a good pair of fabric scissors and reserve them solely for fabric use to maintain their sharpness.
Not Pre-Washing the Shirt
Skipping the pre-wash step can lead to significant disappointment after the first laundry cycle.
Many fabrics, especially cotton, can shrink, distorting your carefully planned design.
Always wash and dry the shirt as you normally would before making any cuts.
Cutting Both Layers Without a Protective Barrier
Forgetting to place cardboard or a cutting mat inside the shirt is a common and costly error.
It can result in accidentally cutting through to the front of the shirt, ruining it completely.
Always ensure a protective layer is firmly in place beneath your cutting area.
Rushing the Process
Impatience often leads to mistakes like uneven lines, overcutting, or slipping scissors.
Take your time with each step, from marking to cutting.
Precision and patience are your best allies for a successful shirt alteration.
Troubleshooting
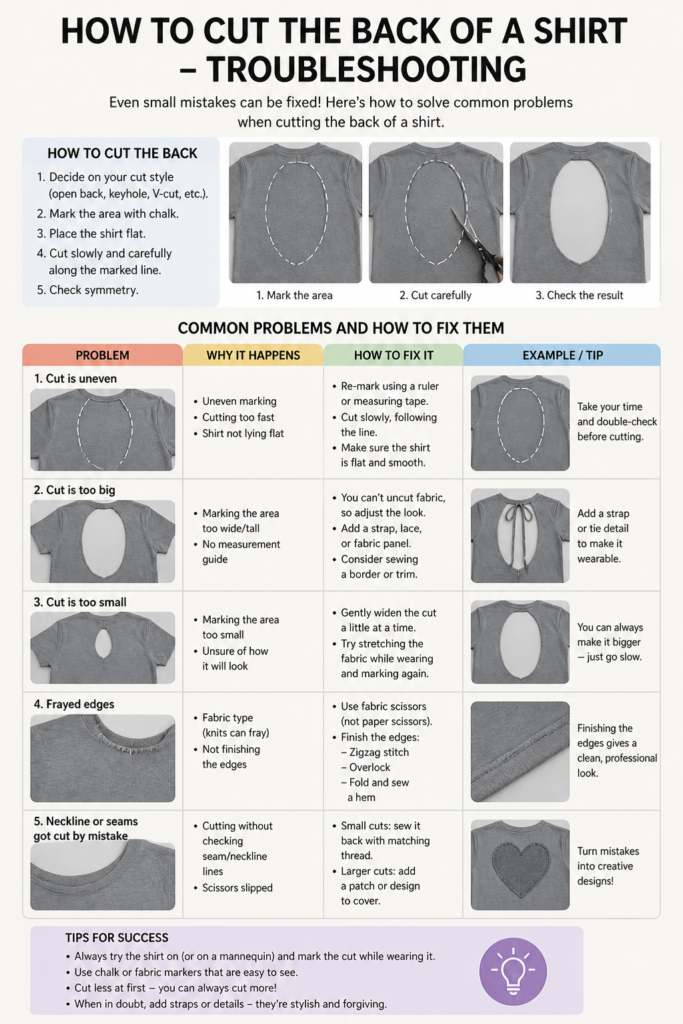
Edges Are Fraying Excessively
If your cut edges are fraying more than desired, it might be due to the fabric type or a less-than-sharp cut.
To fix this, you can apply a small amount of fabric glue or fray check along the raw edge after the initial cut.
Alternatively, consider adding a narrow hem by folding the edge twice and stitching it down, either by hand or machine.
Design Looks Uneven
An uneven design often stems from inaccurate marking or fabric shifting during the cut.
To correct minor unevenness, lay the shirt flat again, re-mark the problematic section, and carefully trim away excess fabric.
For significant asymmetry, you might need to embrace a new, more abstract design or consider it a learning experience for your next project.
Cut Is Too Small/Doesn’t Have Enough Impact
Sometimes, after cutting, the design doesn’t have the dramatic effect you envisioned.
The beauty of cutting fabric is that you can always remove more.
Carefully re-evaluate your design, mark new lines to expand the cut, and trim a little more at a time until you achieve the desired look.
Key Takeaways
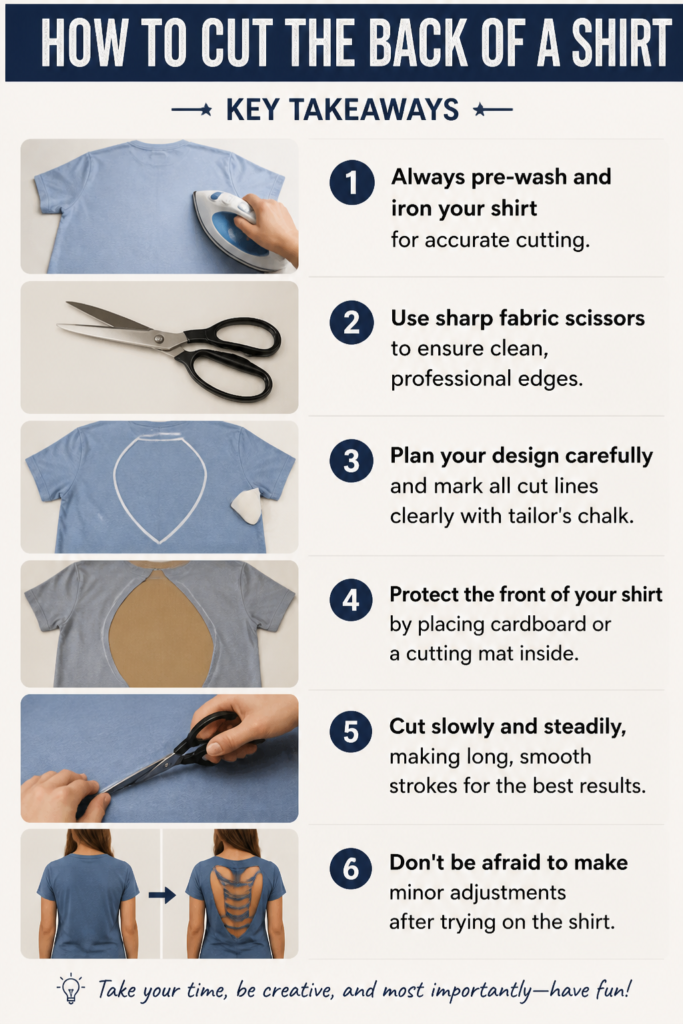
- Always pre-wash and iron your shirt for accurate cutting.
- Use sharp fabric scissors to ensure clean, professional edges.
- Plan your design carefully and mark all cut lines clearly with tailor’s chalk.
- Protect the front of your shirt by placing cardboard or a cutting mat inside.
- Cut slowly and steadily, making long, smooth strokes for the best results.
- Don’t be afraid to make minor adjustments after trying on the shirt.
Frequently Asked Questions
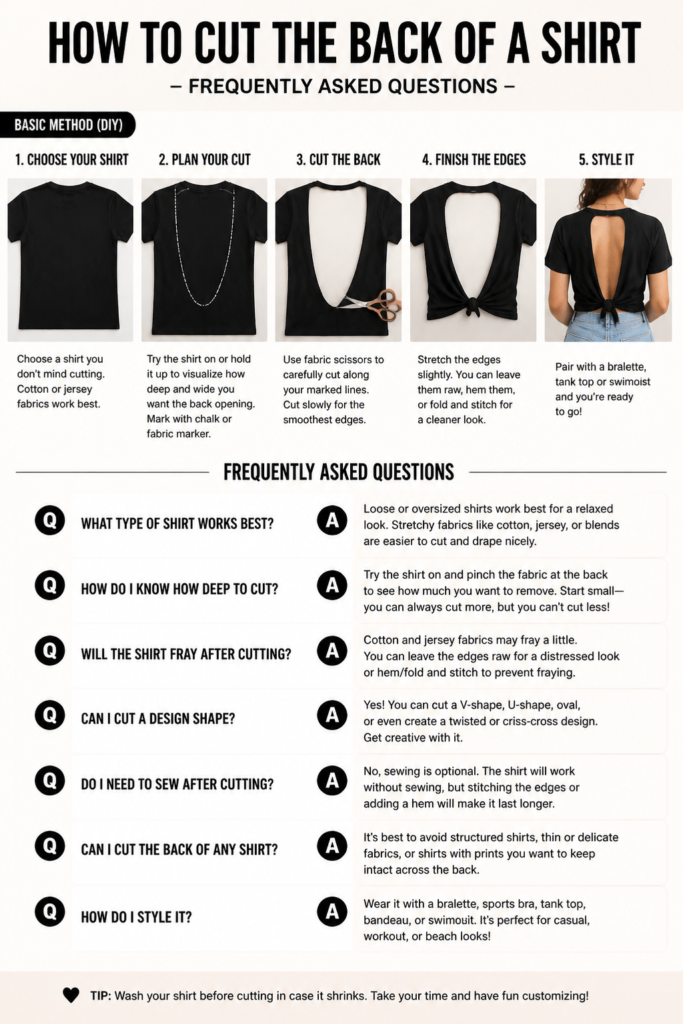
Can I cut any type of shirt?
While you can technically cut any shirt, knit fabrics like t-shirt jersey are generally the easiest to work with.
They are forgiving and tend not to fray excessively.
Woven fabrics like denim or flannel require very sharp scissors and often need hemming to prevent fraying.
How do I prevent the cut edges from rolling?
Many knit fabrics naturally roll at the edges, which can be part of the desired aesthetic.
If you prefer a flat edge, you can stitch a narrow hem or use a zig-zag stitch along the raw edge.
Applying a fabric stabilizer or interface before cutting can also help, though it adds a bit more stiffness.
What if I make a mistake while cutting?
Minor mistakes can often be incorporated into the design, perhaps by widening a cut or creating a new, unintentional pattern.
For larger errors, consider adding fabric patches, embellishments, or a decorative stitch to cover the area.
Sometimes, a “mistake” can lead to a truly unique and original design.
Can I cut a shirt without a fabric marker?
While a fabric marker or tailor’s chalk is ideal for clear, temporary lines, you can use alternatives.
A thin bar of soap or even a regular pencil (on lighter fabrics, applied lightly) can work in a pinch.
Just ensure the marking won’t permanently stain the fabric and is easily visible for cutting.
Our Top Recommended Finds
- Sharp Fabric Scissors: Essential for clean, precise cuts without fraying.
- Tailor’s Chalk or Fabric Marker: Allows you to draw clear, temporary lines that vanish after use.
- Self-Healing Cutting Mat: Protects your work surface and provides a stable base for accurate cutting.
Unleash Your Inner Fashion Designer
Cutting the back of a shirt is more than just an alteration; it’s an opportunity to express your personal style.
Each snip brings you closer to a garment that truly reflects you.
Don’t let hesitation hold you back from transforming your wardrobe.
Grab an old t-shirt today and start experimenting with these techniques.